
How To Install The Cylinder On Your 97-01 Honda CR250
 The Tools You Will Need
- Piston Holder
- Motion Pro Torque Wrench Adapter → https://amzn.to/4g2Moy8
- Foot-Pound Torque Wrench → https://amzn.to/3DOqm4B
- Inch-Pound Torque Wrench → https://amzn.to/4j9LDpC
- 4mm Hex Socket
- 17mm Socket
- 14mm Socket
- 12mm Socket
- 8mm Socket
- Lithium Grease → https://amzn.to/3ChhKTB
- Shop Towels
- Safety Glasses → https://bulltru.com
The Parts You Will Need
- New ’97-’01 Honda CR250 Bottom End Gasket Set → https://amzn.to/42jJKkd
- New Right Cylinder Cover Gasket → See Above
- New Cylinder Alignment Dowels → https://amzn.to/3DVxPPm
Pre-Service Notes
- I recommend opening the Service & Torque Specs in a new tab for easy reference.
- If you need parts and tools, make sure to buy them here! → https://amzn.to/4h4lDKq
- Pictures with captions are below after step b.
- If you need any help don’t hesitate to ask!
Cylinder Installation
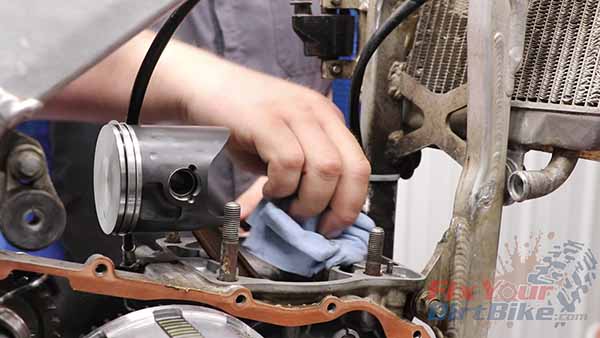
- Double-check the cylinder bore and mating surfaces for cleanliness.
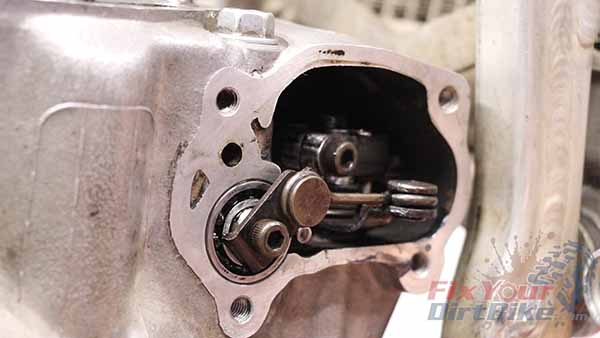
- Apply lithium grease to the exhaust valve pinion joint.
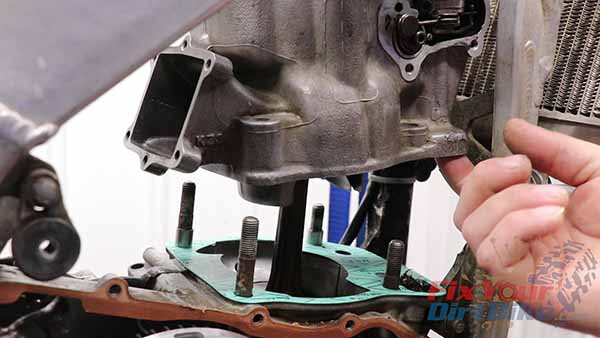
- Install NEW alignment dowels on the left side of the crankcase.
- Install your new gasket.
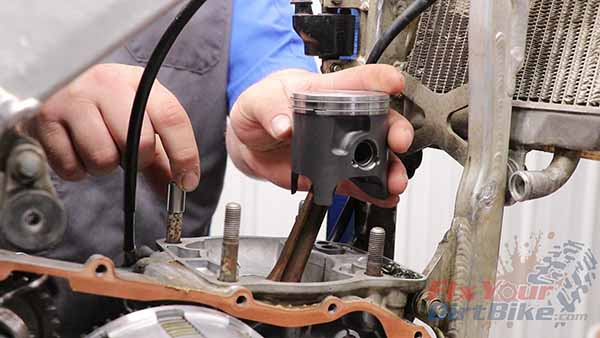
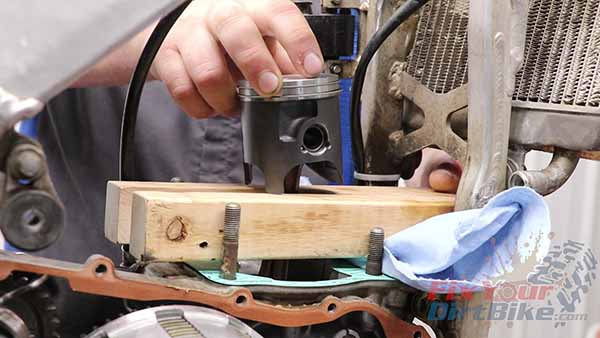
- Place your piston holder, and rotate the crankshaft so the piston skirt rests against the holder.
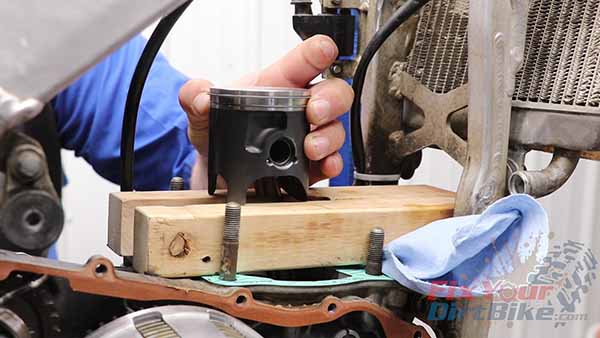
- Double-check the piston rings are seated against the locating pins and position your cylinder.
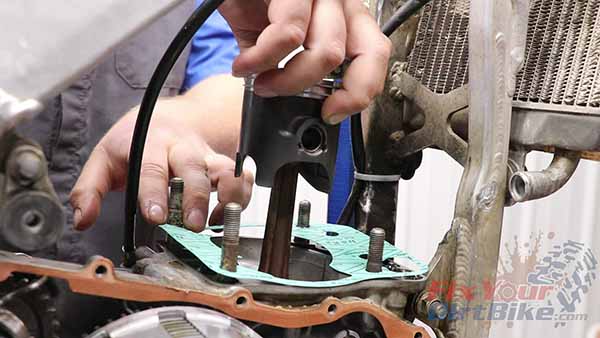
- Hold the cylinder as level as possible with the piston and compress the top ring against the alignment pin.
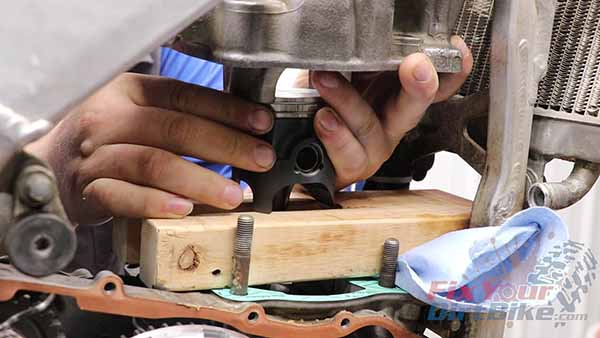
- The cylinder should slide right over the ring.
- Repeat with the second ring.
- It Is Extremely Important That You Do NOT Rotate The Cylinder!
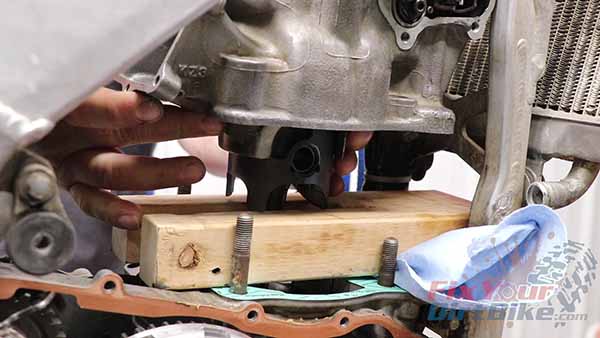
- Remove the holder and align the exhaust valve drive shaft.
- The drive shaft opening should face the rear of your bike.
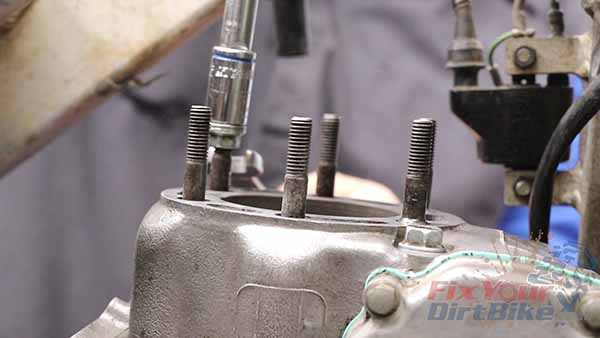
- Lower the cylinder onto the studs.
- Thread the cylinder mounting nuts finger tight.
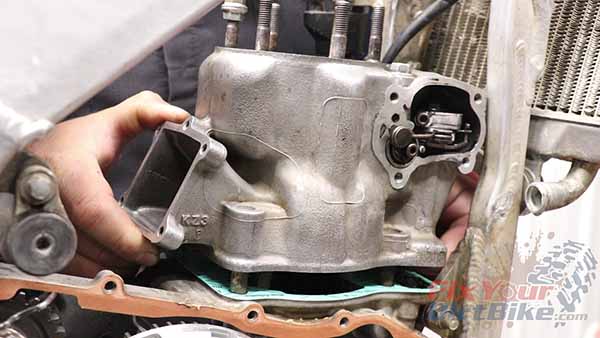
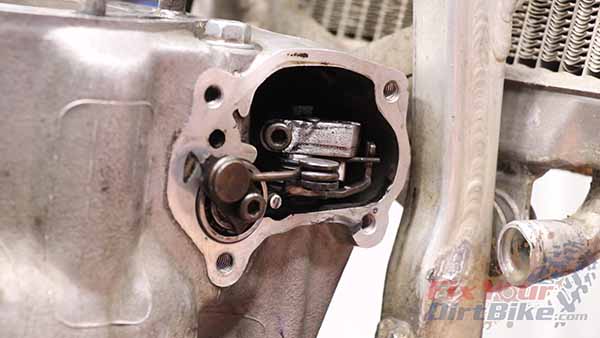
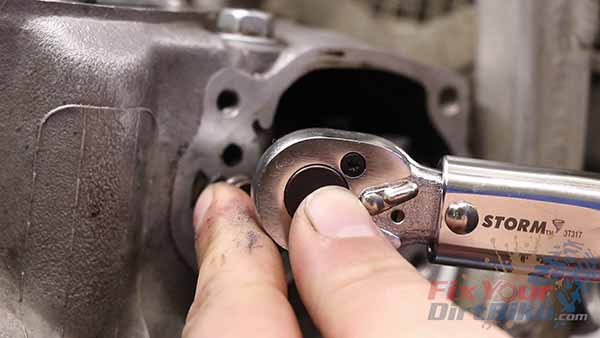
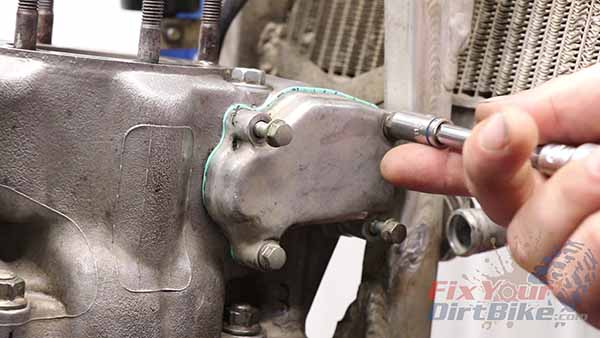
- Tighten the exhaust linkage pinion bolt hand tight and check the exhaust valve’s operation by pulling and pushing on the governor.
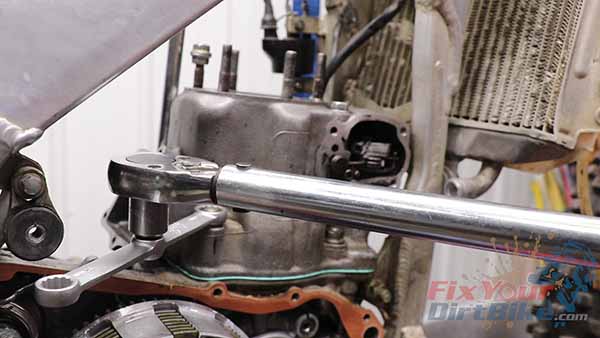
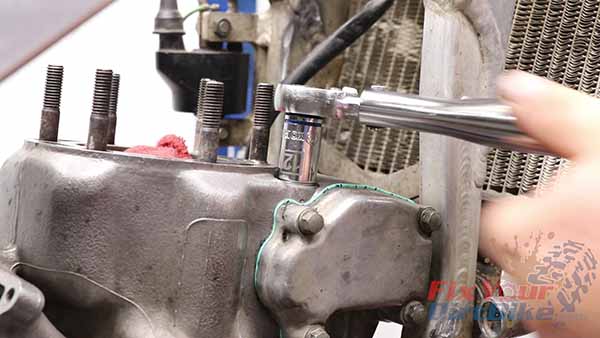
- Begin torquing the nuts in the same pattern as removal.
- Turn the nuts ¼ turns at a time, making as many passes as necessary to reach torque.
- Torque the cylinder mounting nuts to 29 ft-lbs.
- Remember, when using the torque adapter, you will NOT need to compensate for length if the adapter remains at a right angle to your torque wrench.
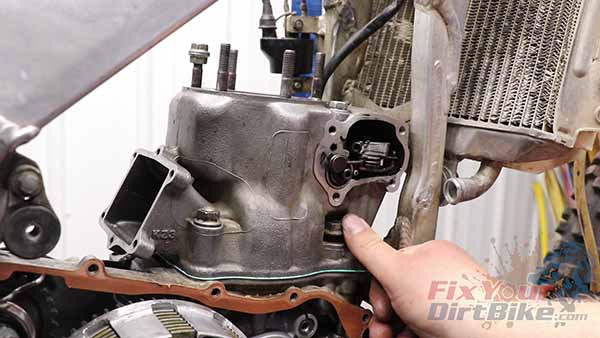
- Loosen the exhaust linkage pinion bolt, turn the valve all the way counter-clockwise, and check that the flap valve is open.
- Torque the pinion bolt to 48 in-lbs.
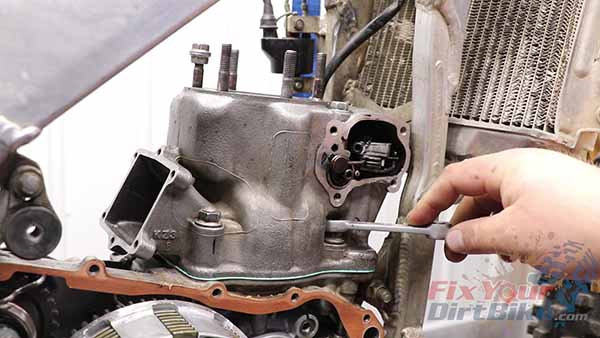
- Install the right cylinder cover with a new gasket.
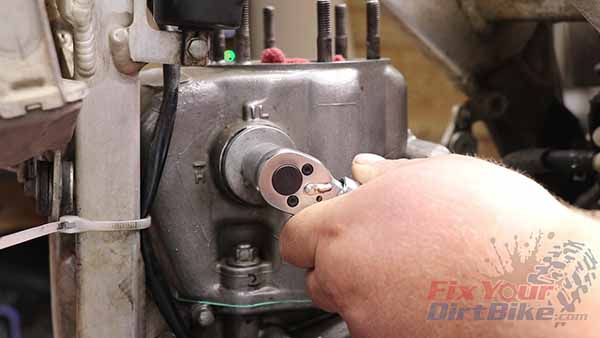
- Torque the valve stopper bolt to 141 in-lbs.
- Torque the left exhaust valve cap to 115 in-lbs.
- Torque-check the head studs and install the right crankcase cover.
Torque Specifications
- Cylinder Mounting Nuts 29 ft-lbs.
- Pinion Bolt 48 in-lbs.
- Valve Stopper Bolt 141 in-lbs.
- Left Exhaust Valve Cap 115 in-lbs.
← Part 11: Piston Installation
Part 13: Cylinder Head Installation →
Keep Your ’97-’01 CR250 Running Right!
- Service Specification
- Clutch Replacement
- Carburetor Service
- Engine Top End
- Engine Bottom End
- Brakes
- Exhaust
- Front Suspension
- Rear Suspension
- Wheels & Tires
- Kickstarter Inspection
- External Shift Linkage


