
Rear Wheel Bearing Replacement
Replacing the rear wheel bearings on your ’97-’01 Honda CR250 is a very simple job. However, the bearings are a driven fit, so you will need a drill and a hammer to remove them.
 The Tools You Will Need
- A garage floor
- Two long 2x4s
- 27mm Socket and breaker bar for the axle nut
- 13mm wrench for chain adjuster jam nut
- 10mm wrench for chain adjuster
- A block of wood
- Tire Spoons → https://amzn.to/4jjauaH
- 44mm Bearing retainer tool → https://amzn.to/4aFfvXj
- A drift
- 19mm socket for the inner bearing race
- 27mm socket for outer bearing race
- A Socket wrench extension
- A Propane Torch
- A Hammer
- A finishing file
- Parts cleaner
- A Clean towel
- Safety Glasses → https://bulltru.com
- Gloves
Specialty Tools
The only specialty tool you will need besides the block of wood is the bearing retainer tool. I would typically make a DIY tool for this sort of thing, but there are two very good reasons not to.
As you will find out, the bearing retainer is very brittle, so using a homemade tool can easily break it. Secondly, the retainer tool only costs $13, whereas the retainer costs $16.
Not only will breaking the retainer cost more, but you will also have to order a new one and wait while your friends ride without you.
1997 – 1999 Use a 44mm Bearing retainer tool → https://amzn.to/4aFfvXj
2000 – 2001 Use a 47mm Bearing retainer tool → https://amzn.to/40kAMRg
Rear Wheel Bearing Replacement Parts
You will only need a set of new ’97-’01 Honda CR250 rear wheel bearings and seals → https://amzn.to/42fz7ir.
I am installing a set of factory links, bearings, and seals.
I run factory links because their bearings are double-shielded. This means I don’t need to pre-grease them, and because they are sealed, they will resist water contamination longer than single-shielded bearings.
If you haven’t ordered your new bearings yet, I put a link below for the exact ones I use.
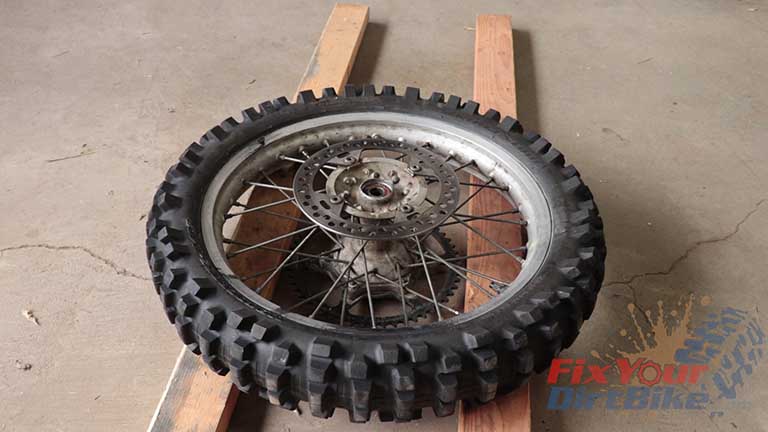
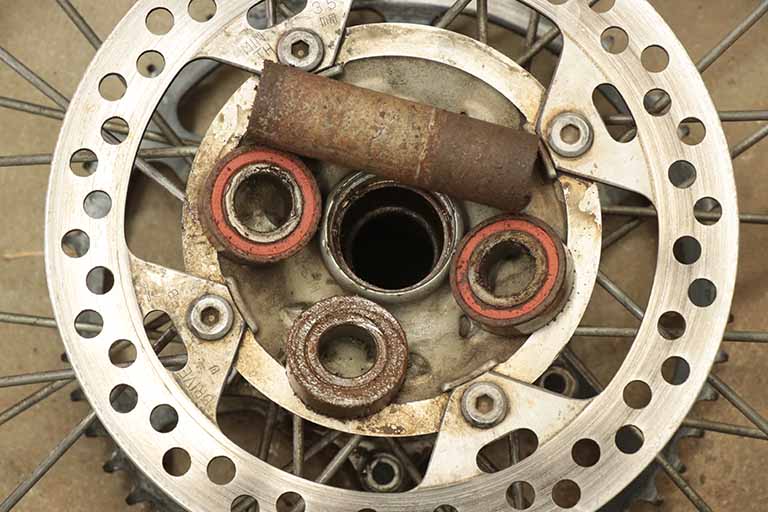
First, learn how the rear wheel hub works on your CR250 to get a better idea of what you’re working with.
Pre-Service Notes
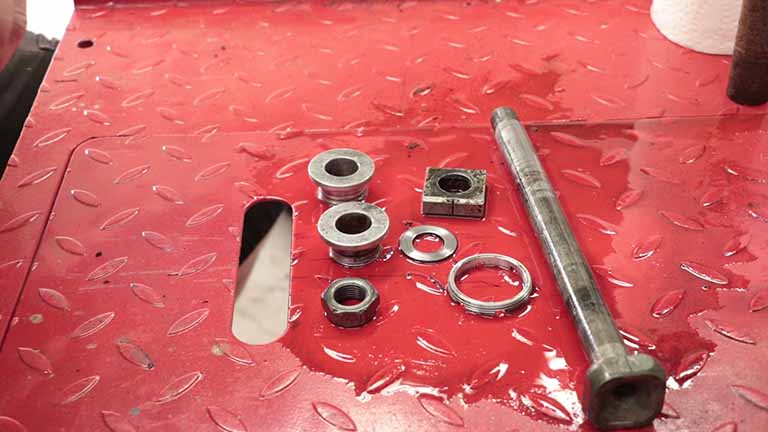
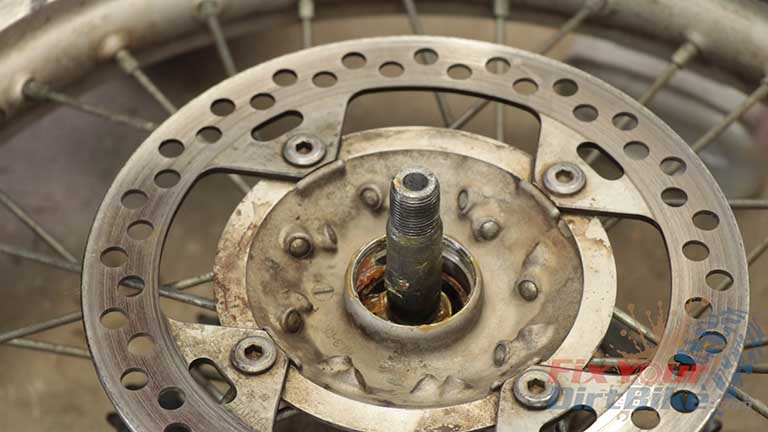
- Your rear wheel has three bearings, two on the sprocket side and one on the brake side.
- Always start and end with the brake side bearing.
- I recommend opening the Service & Torque Specs in a new tab for easy reference.
- If you need parts and tools, make sure to buy them here! → https://amzn.to/4h4lDKq
- Pictures with captions are after the steps below.
- If you need any help, don’t hesitate to ask!
Related: Knock out the front bearings, then move on to the rear wheel!
Rear Wheel Bearing Removal
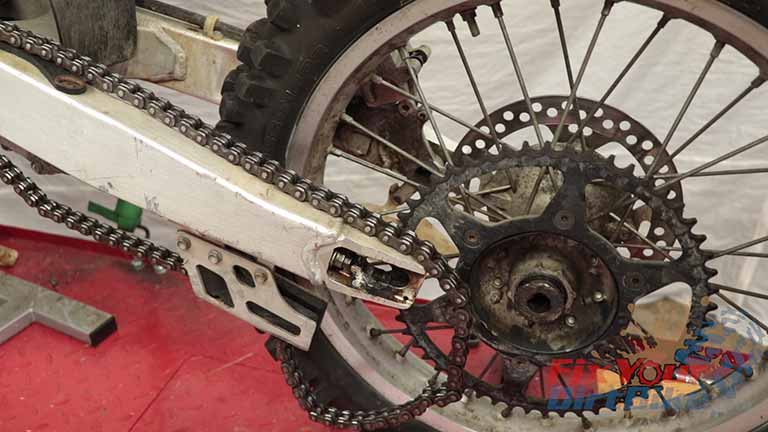
- Step 1: Remove the rear wheel.
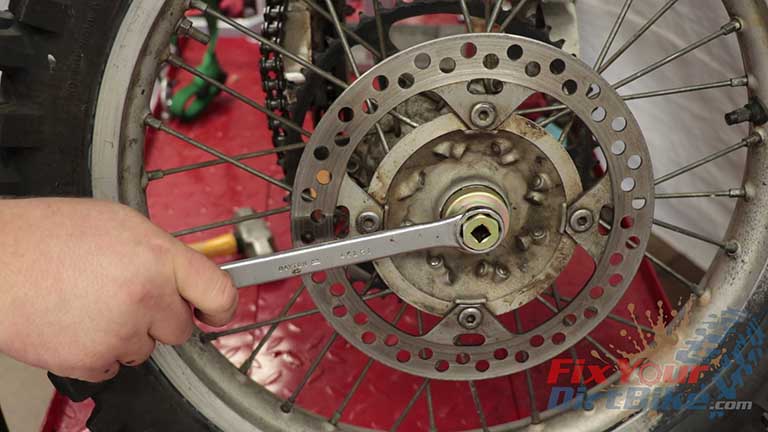
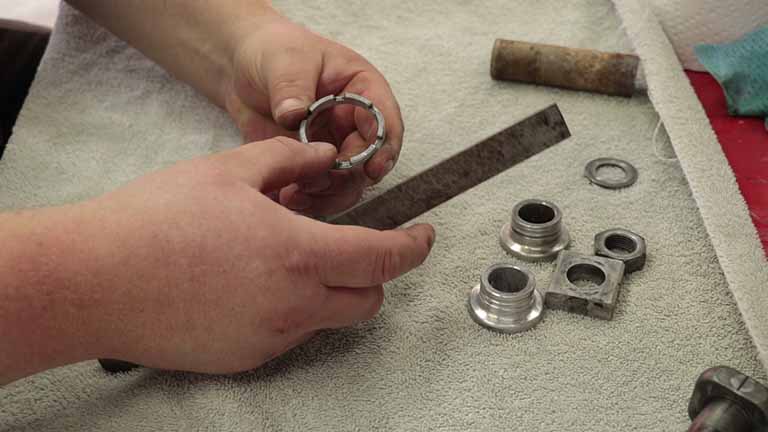
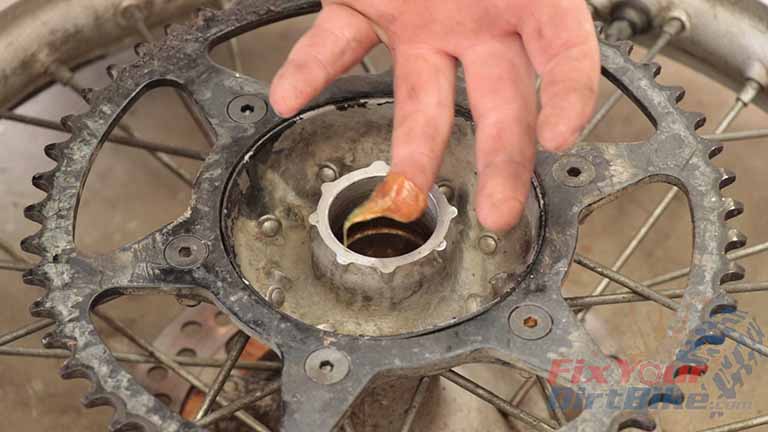
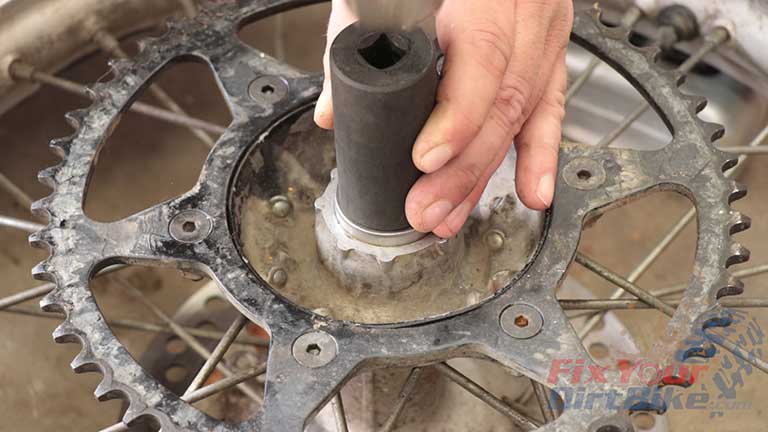
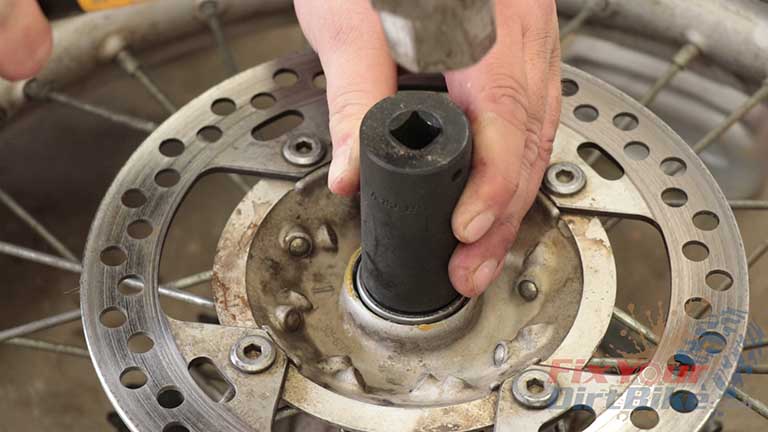
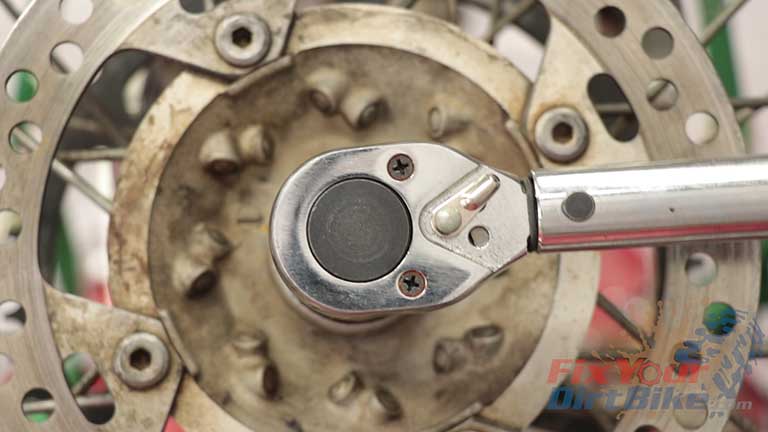
- Step 2: Remove the bearing retainer.
- Align your bearing retainer tool with the teeth on the bearing retainer and firmly turn it. Do not force it if it does not turn; you could break it.
- Instead, tap the end of your wrench with a hammer until you see the retainer turn.
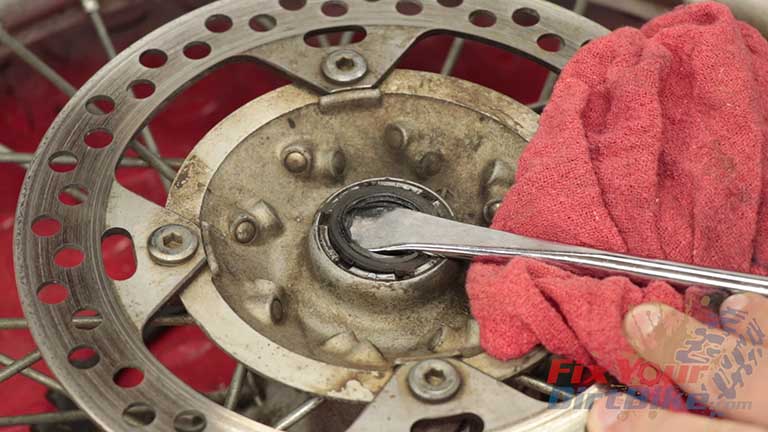
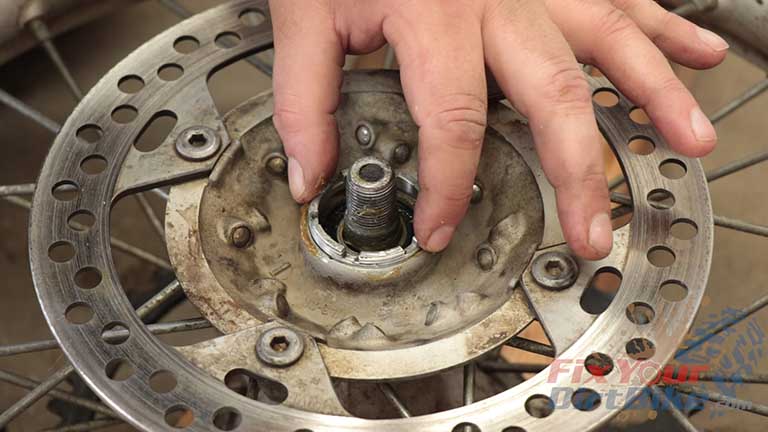
- Step 3: Pry out the old seals.
- Inside the old seal, there should be a shallow grease lip. Hook this with your tire spoon and pry it out.
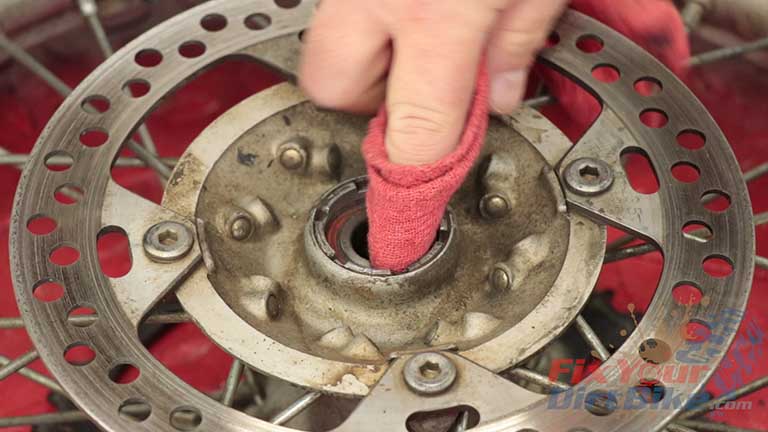
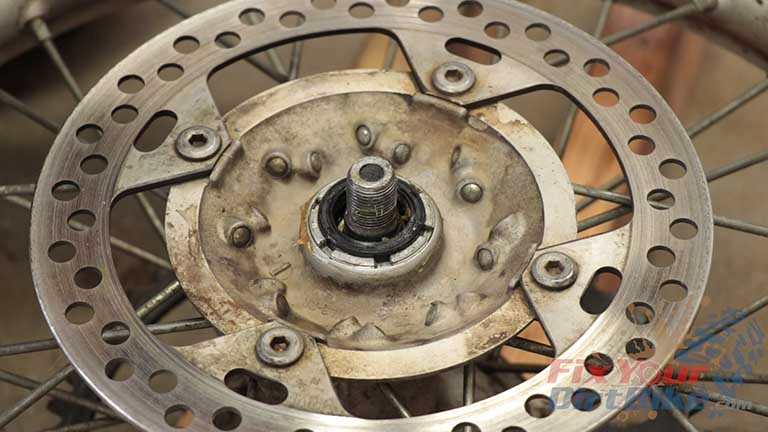
- Step 4: Clean the seal bore once the old seals are out.
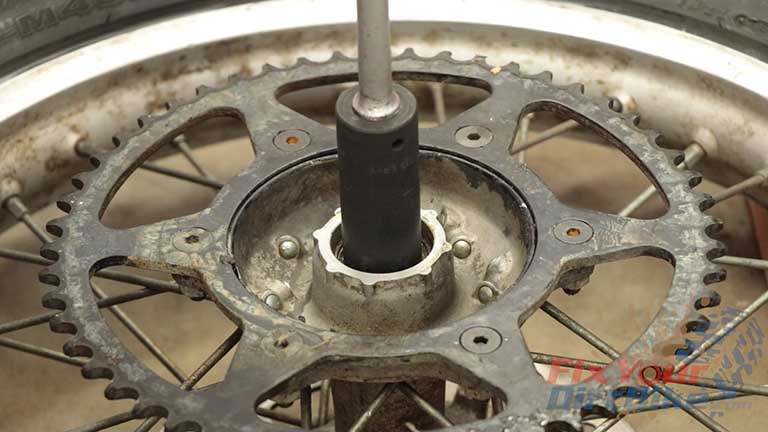
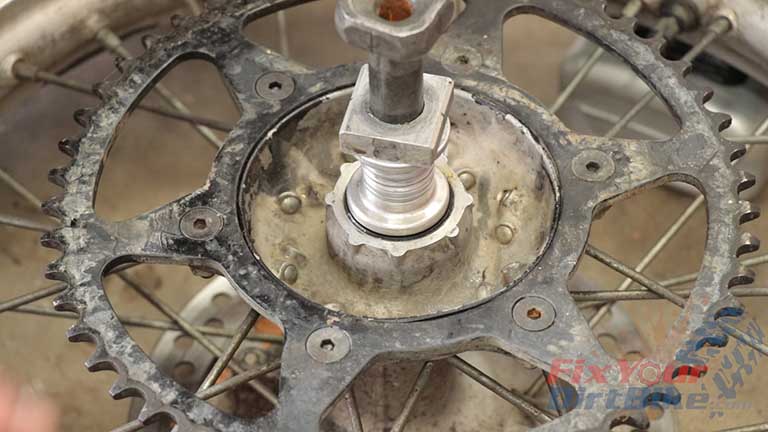
- Step 5: Dislodge the distance collar.
- Step 6: Insert your drift from the sprocket side up to, but not touching, the brake side bearing. Work your drift up and down to dislodge the distance collar.
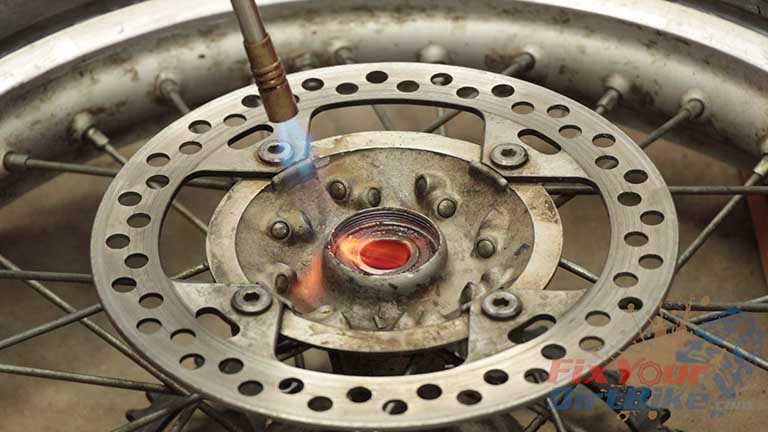
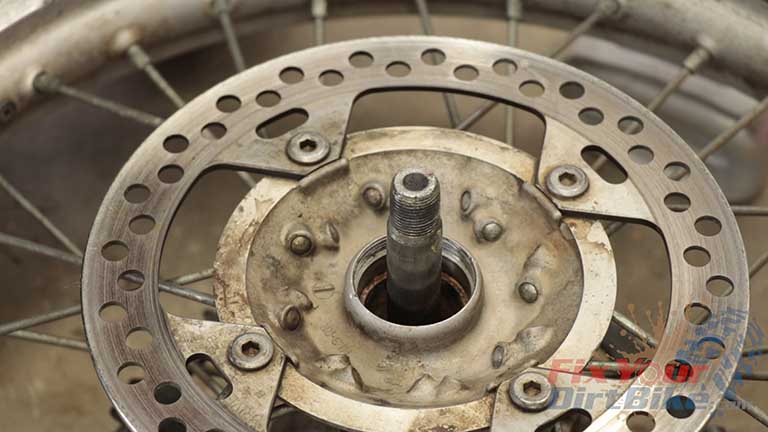
- Step 7: Place your wheel brake side up on your 2x4s so only the rim and tire support the wheel.
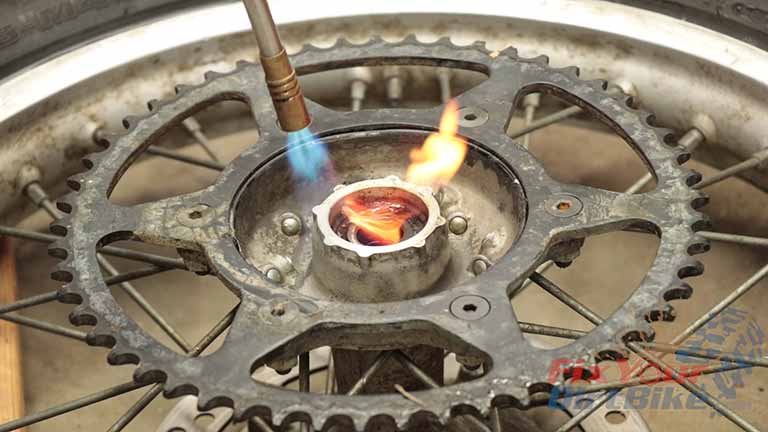
- Step 8: Heat the hub, not the bearing, for 60 seconds. This causes the hub to expand slightly, relieving the pressure on the bearing.
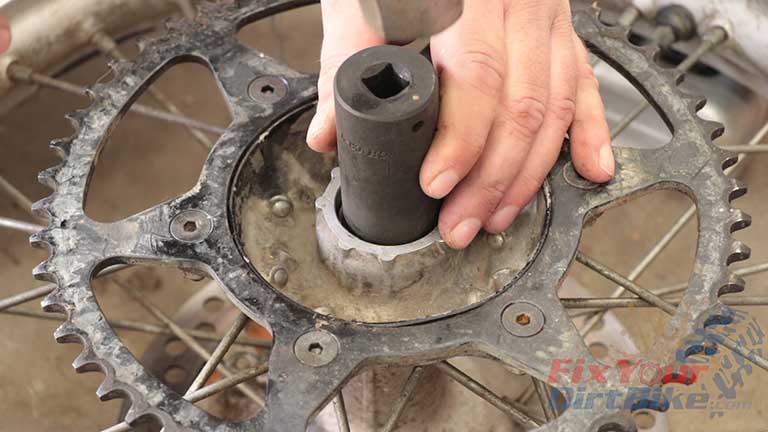
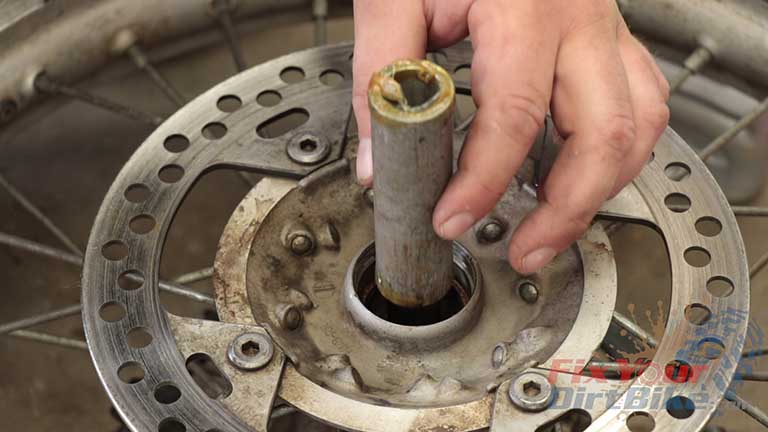
- Steps 9 and 10: Flip your wheel over, align your socket to the inner bearing race, and tap until the brake side bearing falls out.
- Do not strike the bearing too hard! The sprocket side bearings are seated against a lip inside the hub. Striking the inner bearing race too hard will break the sprocket side bearings, and then you must chip the outer bearing race out of the hub. This is annoying, and you could damage the hub.
- Step 11: Repeat this process for the sprocket side bearings
Rear Hub Maintenance
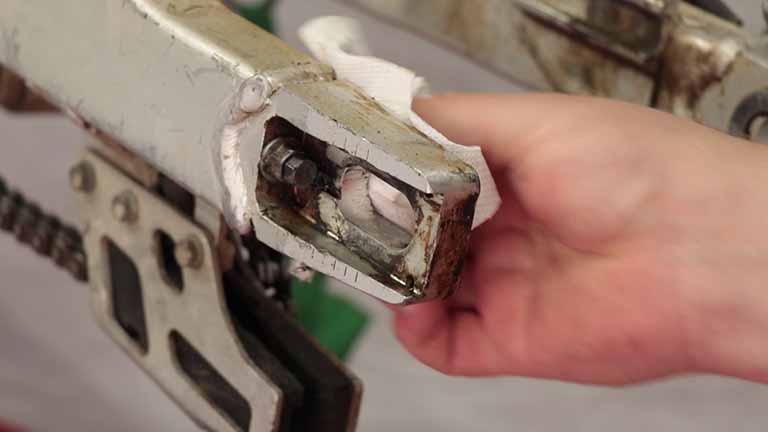
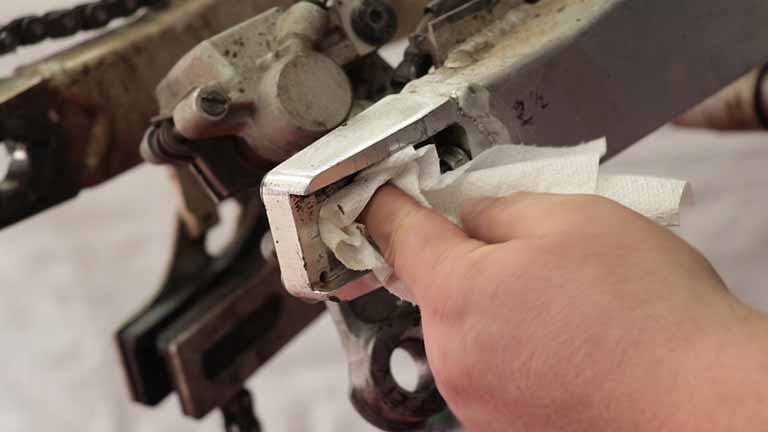
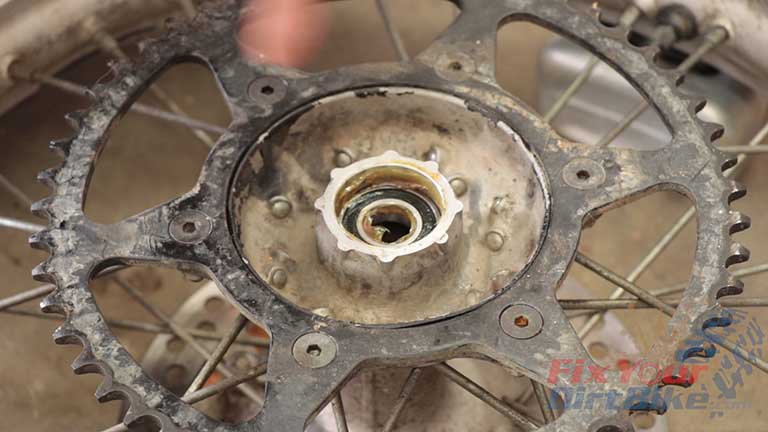
- Step 12: Clean and inspect the hub, hub components, and swing arm mounts for any signs of wear or damage.
- File off any burrs or chips.
- Do not remove any material when smoothing the ends of the hub components. The spacers and distance collar must be an exact length to work properly. If the ends are damaged, they need to be replaced.
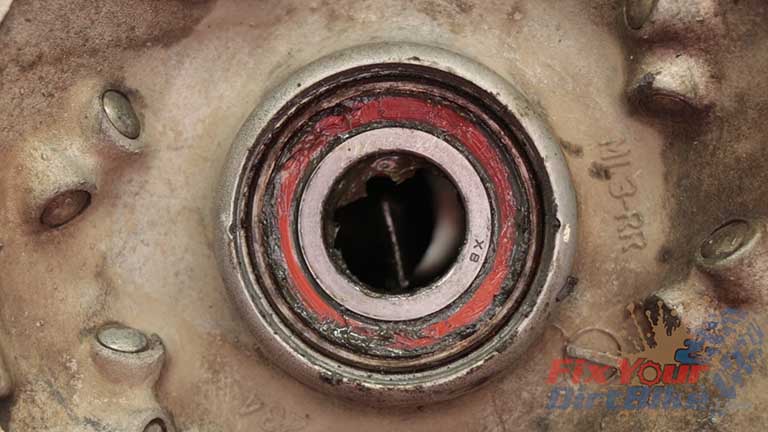
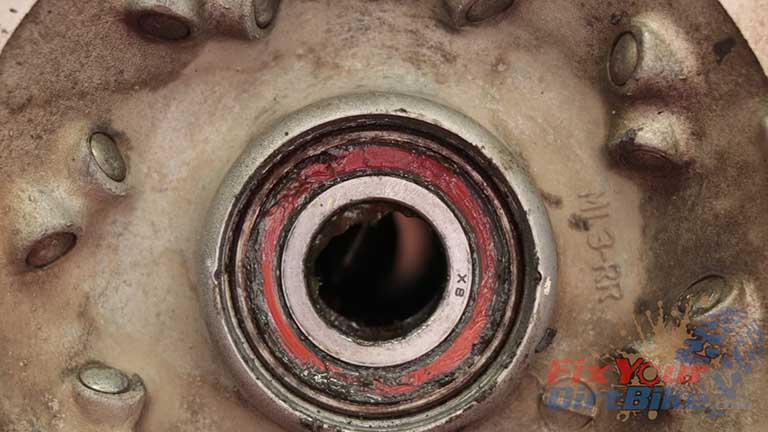
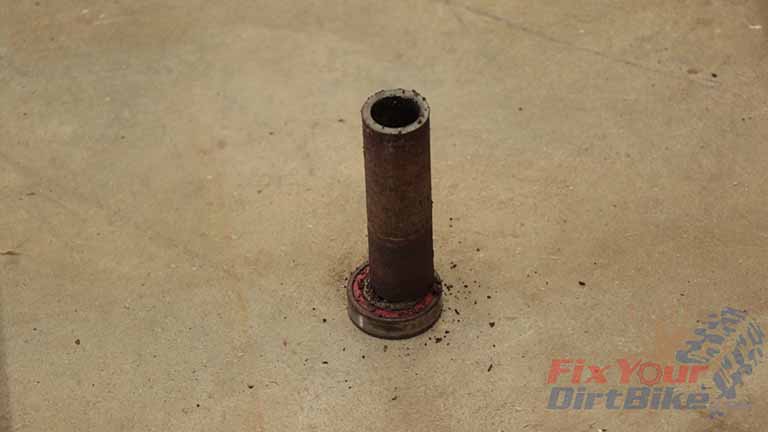
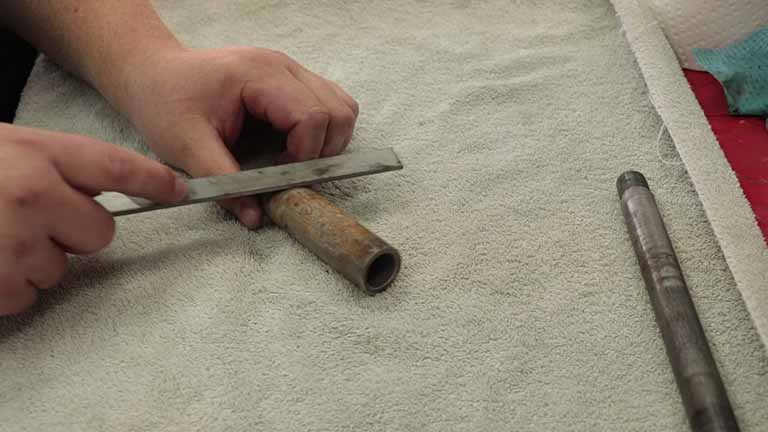
- Water has contaminated this hub assembly, and the distance collar and hub have some corrosion.
- Step 13: If you find this on your bike, file off the corrosion as much as you can without removing too much metal. Then, consider the importance of grease and good seals.
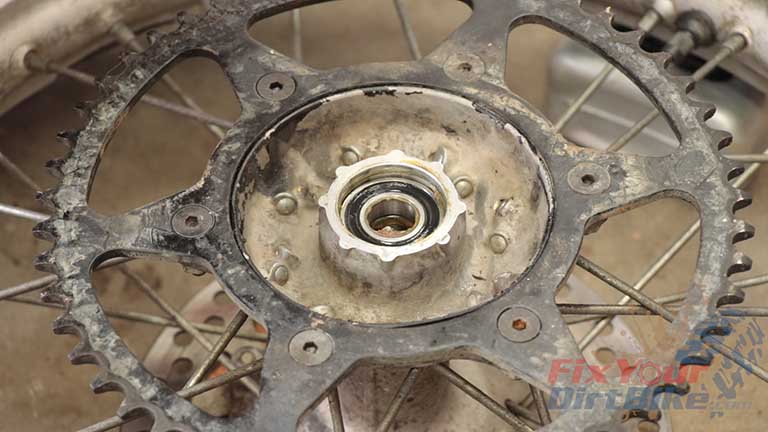
- Step 14: Test fit your new bearings once everything is cleaned and smoothed. They are a driven fit, so they should NOT slip into the bore.
- If your bearings slip into the bore, you must replace your hub.
Rear Wheel Bearing Installation
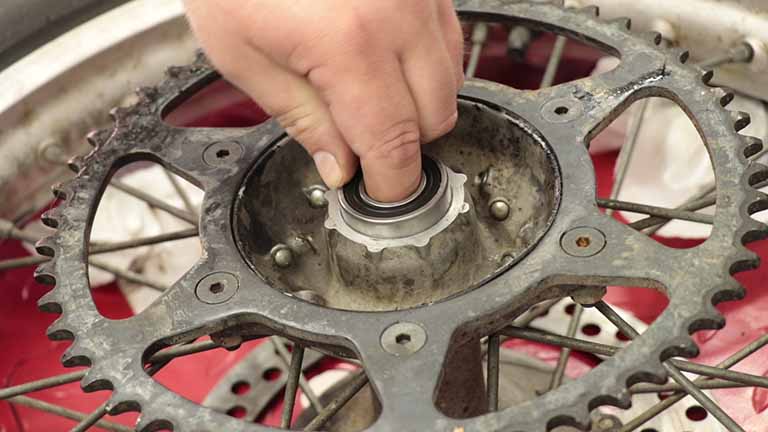
- Step 15: Set your wheel on your block of wood sprocket side up so only the hub is supported.
- Step 16: Grease the bore, then line up your new bearing flush to the hub.
- Step 17: Align your large socket with the outer bearing race and drive the bearing into the bore.
- Step 18: Apply another coat of grease and repeat the driving process with the second bearing.
- Step 19: Apply another coat of grease and drive your seal into the bore, ensuring the seal retention spring is facing in.
- Step 20: Stack your spacers and axle block on the axle, drop them into the hub, and flip your wheel over.
- Step 21: The axle will now be the guide to align the distance collar with the brake side bearing.
- Flip Your Wheel Over
- Step 22: Apply grease to both ends of the distance collar and drop it into the hub.
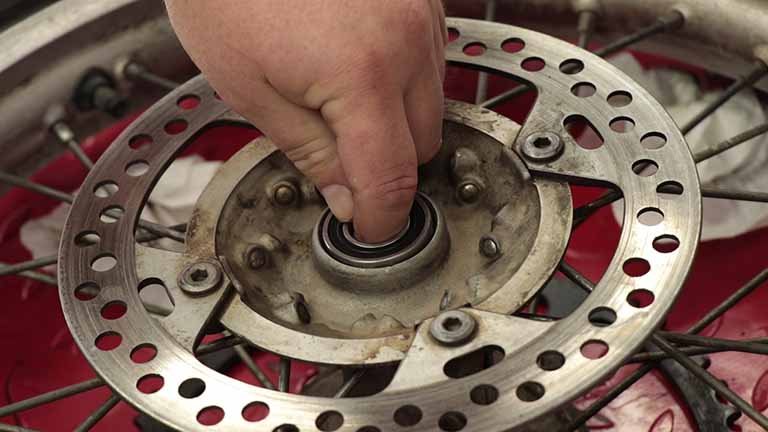
- Step 23: Grease the bore and install your last bearing.
- Step 24: Install the bearing retainer hand-tight.
- Step 25: Apply your last layer of grease and install the bearing seal and spring side.
- Step 26: Torque the bearing retainer to 33 ft-lb.
- Remember to take your time, and your bearing replacement will go smoothly.


If you want to help fix your dirt bike to the next level, check out my Patreon page!
If you have any questions or anything to add, please leave them in the comments or on our Facebook page!
Keep Your ’97-’01 CR250 Running Right!
- Service Specification
- Clutch Replacement
- Carburetor Service
- Engine Top End
- Engine Bottom End
- Brakes
- Exhaust
- Front Suspension
- Rear Suspension
- Wheels & Tires
- Kickstarter Inspection
- External Shift Linkage


