
How To Inspect The Cylinder On Your 97-01 Honda CR250
 The Tools You Will Need
- Plastic Scraper → https://amzn.to/40dl2Q1
- Soft Brush
- Shop Towels
- Mechanics Straight Edge
- Feeler Gauge → https://amzn.to/4hd7qen
- Telescoping Bore Gauges → https://amzn.to/4g5reiE
- Calipers → https://amzn.to/3BRoCXX
- Emery Paper
- WD40
- Plastic Wrap
- Safety Glasses → https://bulltru.com
Pre-Service Notes
- I recommend opening the Service & Torque Specs in a new tab for easy reference.
- If you need parts and tools, make sure to buy them here! → https://amzn.to/4h4lDKq
- Pictures with captions are after the steps below.
- If you need any help, don’t hesitate to ask!
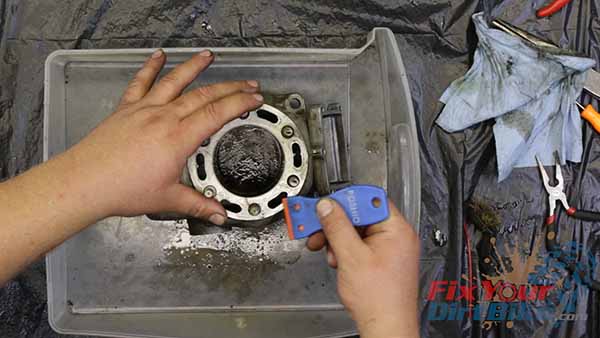
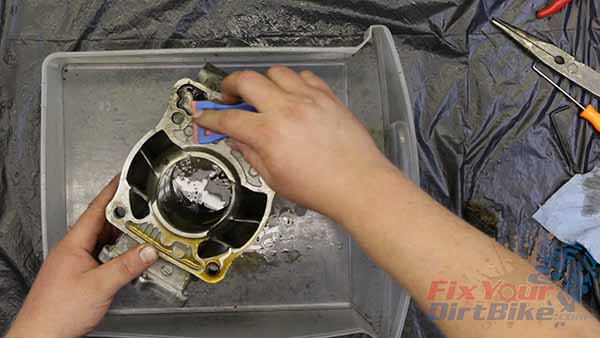
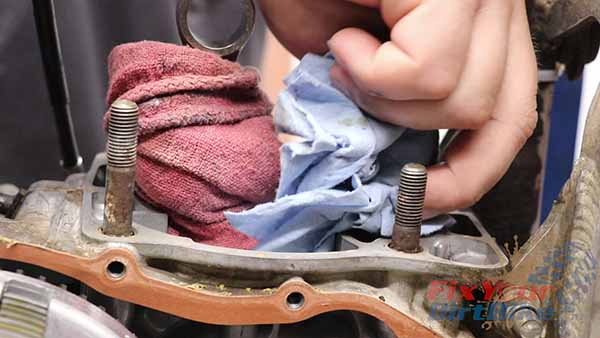
Clean Your Cylinder
- Clean your cylinder thoroughly without damaging the mating surfaces or bore.
- Remove all gasket material with a plastic scraper and smooth any pits or burs with 600-grit emery paper.
- If you have a seized alignment dowel, the only thing you can do is use PB blaster and be patient, otherwise, you will need to go to a machine shop to have it removed.
- If carbon build-up is present in the bore, it must be deglazed.
- There are two methods of deglazing, depending on your cylinder wall material.
- Stock: This aluminum cylinder with nikasil plating can be carefully deglazed with a scouring pad.
- However, your cylinder may have been bored out and fitted with an iron sleeve, which can be deglazed with a ball hone.
- The definite way to tell is by using a magnet. If it sticks, it’s sleeved.
- You can also tell visually. This is a cylinder from an air-cooled ATV, and you can see a distinct difference in color between the cylinder wall and the cylinder body.
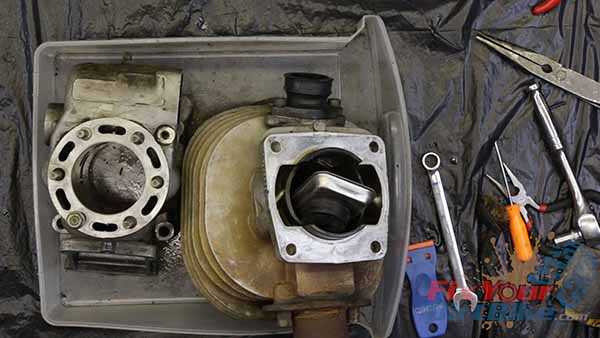
- With your cylinder cleaned and deglazed, inspect the water jackets, transfer ports, and exhaust valve sub-chamber for obstruction, wear, or damage.
- Clean the mating surface on the crankcase with a plastic scraper.
- Check the surface for smoothness, and correct any pits or burs.
- Check the mounting studs for tightness and thread condition.
- If you find a loose stud, re-torque it along with the others when the cylinder is back on the bike.


Related: How to service the reed valve on your 1997-2001 Honda CR250.
Inspect Mating Surfaces For Warp
- Lay your straight edge against two adjacent studs, and try to fit a feeler gauge underneath.
- Record any gaps found.
- If you find any gaps, double-check the surface for smoothness and try again.
- The warp limit for the cylinder is two thousandths (0.002) of an inch.
- If your cylinder is out of spec, It must be reconditioned at a machine shop.
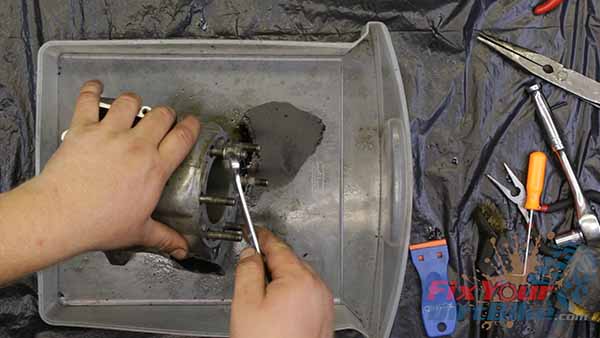
Bore Inspection
- Before you measure the cylinder bore, visually inspect it.
- If you feel a defined lip at the top of the cylinder bore where the piston rings stop, or if the plating is chipped or damaged around the intake, exhaust, and transfer ports, it must be replated.
- Considering the unusual wear on the piston, this cylinder is in excellent condition. The intake side is slightly marked but still smooth, so I’m comfortable reusing it as long as it’s within spec.
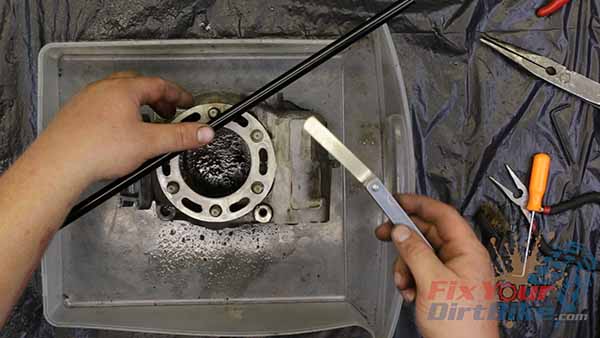
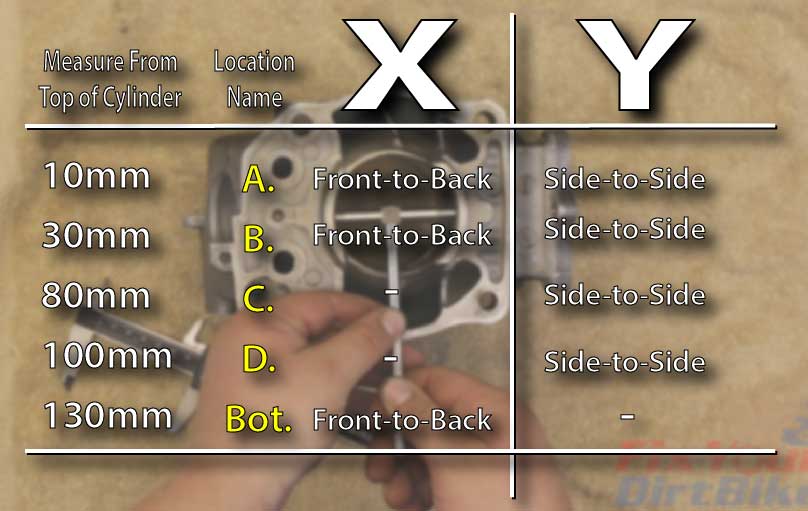
- Draw out a chart to keep track of your measurements.
- Measure your cylinder in five locations at 10, 30, 80, 100, and 130mm from the top of the cylinder.
- Label the locations A, B, C, D, and Bottom.
- Locations A and B can be measured from front to back and side to side.
- Locations C and D can only be measured side to side, and the bottom can only be measured front to back.
- Measure, then re-measure, and record all measurements for later.
 Prep Your Cylinder For Assembly
- Wash your hot, soapy water cylinder with a cylinder brush, then dry it with compressed air.
- Apply a thin coat of WD-40 to the cylinder walls to inhibit oxidation, and wrap the cylinder in plastic wrap until it is ready for assembly.
← Previous Step – Part 6: Cylinder Head Inspection
Next Step – Part 8: Exhaust Valve Inspection →
Keep Your ’97-’01 CR250 Running Right!
- Service Specification
- Clutch Replacement
- Carburetor Service
- Engine Top End
- Engine Bottom End
- Brakes
- Exhaust
- Front Suspension
- Rear Suspension
- Wheels & Tires
- Kickstarter Inspection
- External Shift Linkage


