
Step-by-Step Showa Rear Shock Rebuild
This is PART 1 of the Step-by-Step rear shock rebuild for a Showa KZ3P SA-1 found on your 1997 – 1999 Honda CR250. The steps in this rebuild will also work for a 2000 -2001 Honda CR250 but remember that for the 2000 – 2001 model years, Honda switched to a larger diameter shock, so parts are not interchangeable.
You can find Part 2: Shaft Assembly and Part 3: Body Assembly.
Shock Rebuild Parts List
- Shock Oil → https://amzn.to/42fLESS
- 1997-1999 Individual Parts → https://amzn.to/4h4lDKq
- 2000-2001 Shock Rebuild Kit → https://amzn.to/40a8MzA
I have found several rebuild kits for the ’00 – ’01 rear shock, but I have not been able to find a complete rebuild for the ’97-’99 shock. However, you can still get all the OEM parts individually here → https://amzn.to/4h4lDKq. I prefer buying the individual parts anyway so that I can save money. It all works out! (For me).
I don’t recommend buying any parts until you know exactly what you need.
That being said, the seals, O-rings, and valve bushing were in surprisingly good shape, considering the condition of the shock oil. I took a chance and reused everything (except the oil), so I may get 10 minutes of ride time or 100 hours from this rebuild.
*This was the best option for me then, so if you reuse your parts, know there is a risk of premature failure.
Specialty Tool List
- Racetech Rear Shock Seal Head Setting Tool → https://amzn.to/4ag6jby
- Tusk Seal Bullet → https://amzn.to/42j95Lj
- Tusk Reservoir Cap Removal Tool → https://amzn.to/4j8Z1KN
*You may be able to get this rebuild done without these tools, but you risk damaging many parts. I usually try to find ways to do things without special tools, but damaging anything on this shock would cost more than the tools.
Basic Tools
- Mallet
- Small flat-head screwdriver
- Medium Philips head screwdriver
- Valve stem removal tool → https://amzn.to/40wmEpd
- Hammer
- Punch
- File
- Grinder (if the shaft nut has mushroomed)
- Bench vise or assistant
- Towels
- Stiff bristle brush
- Parts cleaner
- Safety Glasses → https://bulltru.com
- Low-pressure air pump
Torque Specifications
- Shaft Nut – 35-60 ft-lbs
After you complete the rebuild on your shock, you must take it to a shop to get the reservoir filled with 150 – 200 PSI of NITROGEN. Why nitrogen and not regular compressor air? The simple answer is that air expands when heated, but nitrogen does not.
Pre-Service Notes
- Remember to inspect everything as you clean it, and replace any damaged or worn parts.
- I recommend opening the Service & Torque Specs in a new tab for easy reference.
- If you need parts and tools, make sure to buy them here! → https://amzn.to/4h4lDKq
- Pictures with captions are after the steps below.
- If you need any help, don’t hesitate to ask!
Related: While you’re at it, here’s how to rebuild the rear shock linkage on your CR250.
97-01 Honda CR250 Rear Shock Disassembly & Inspection
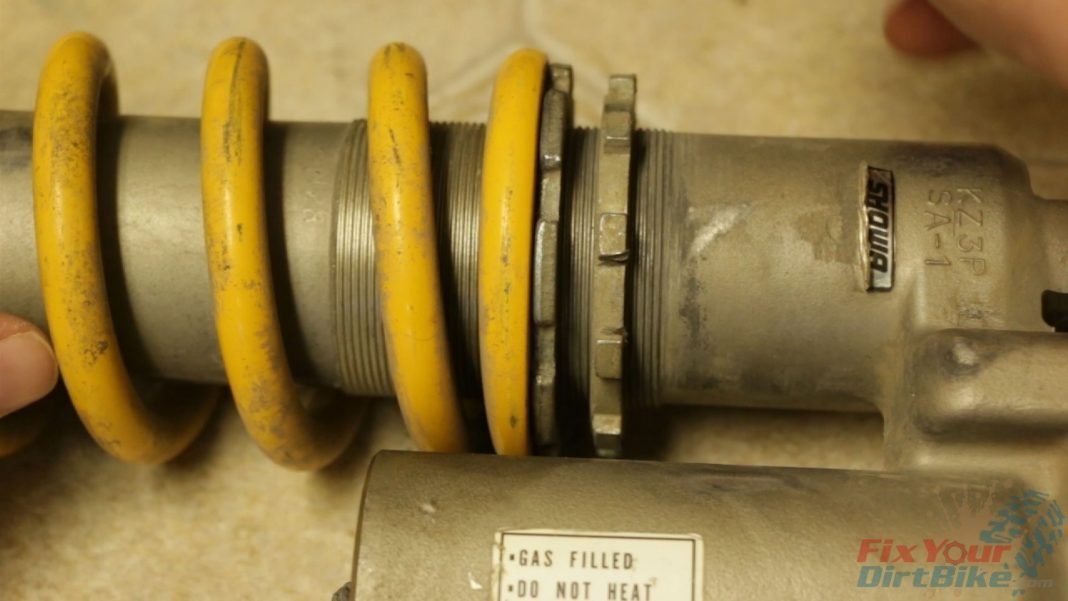
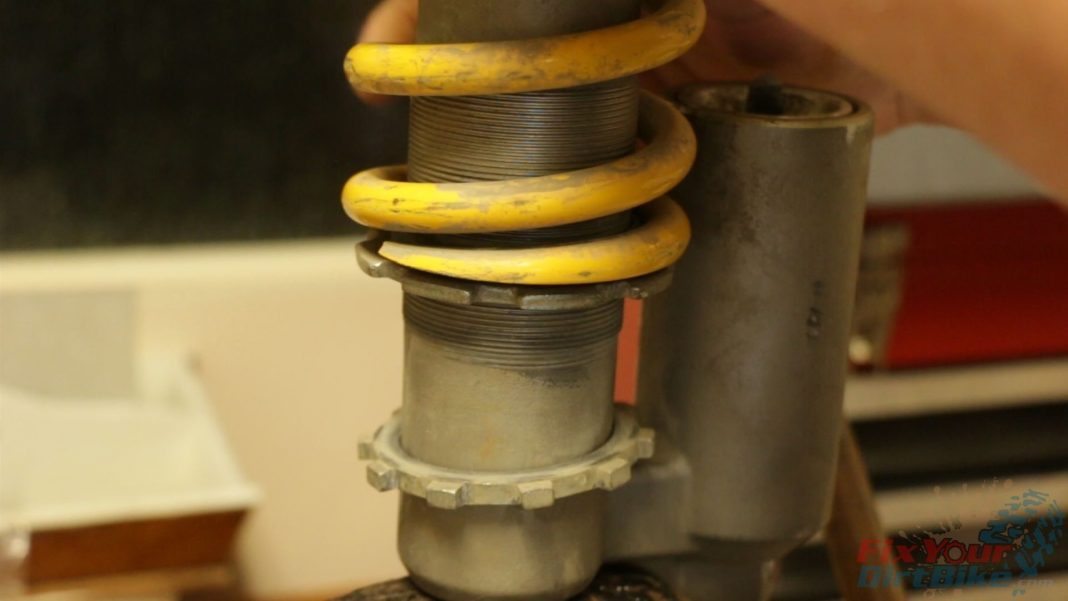
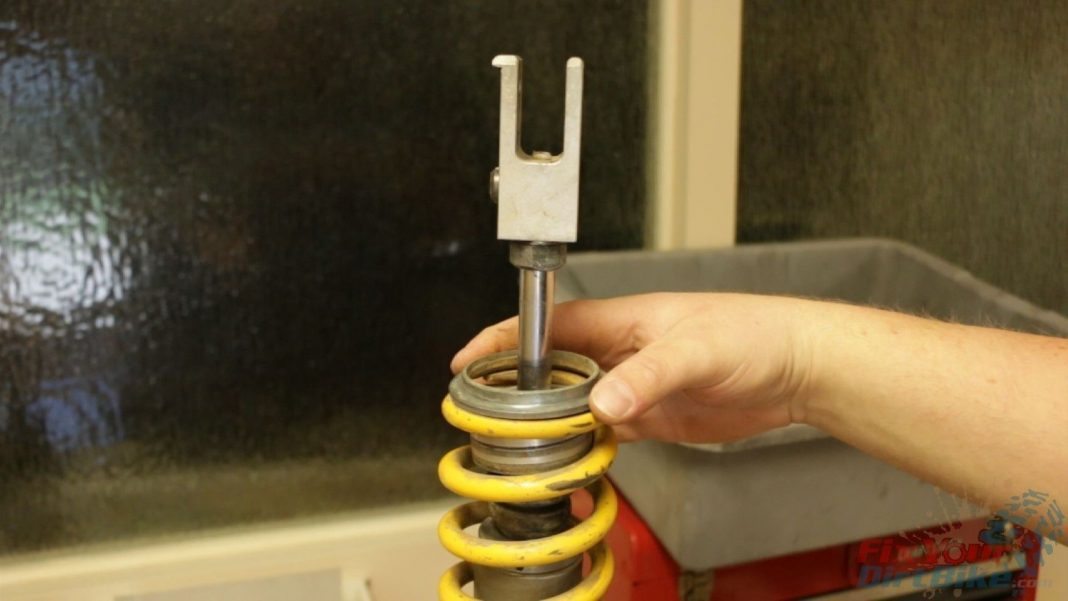
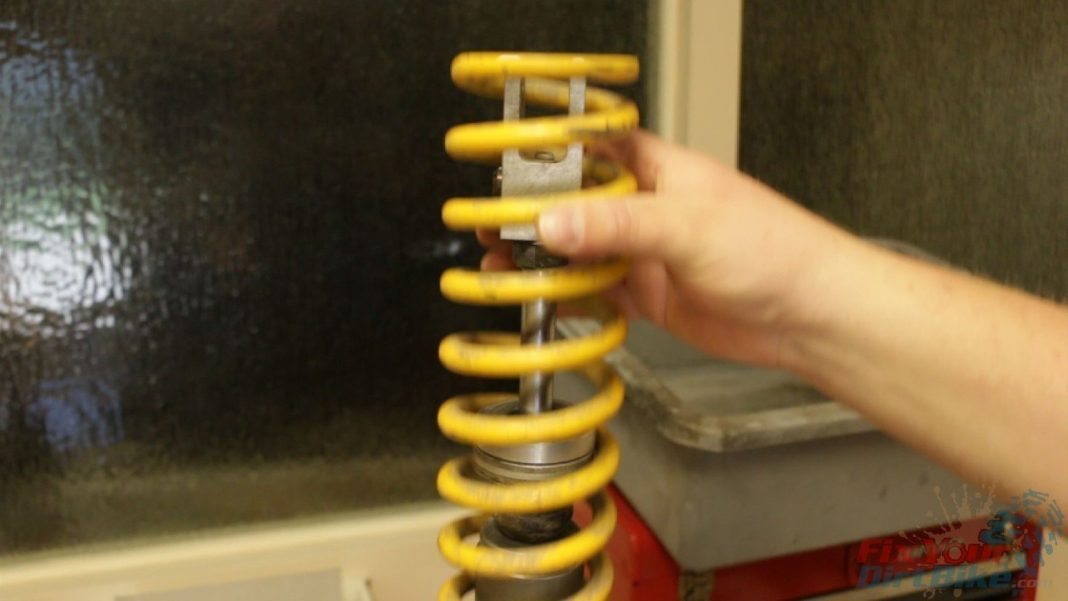
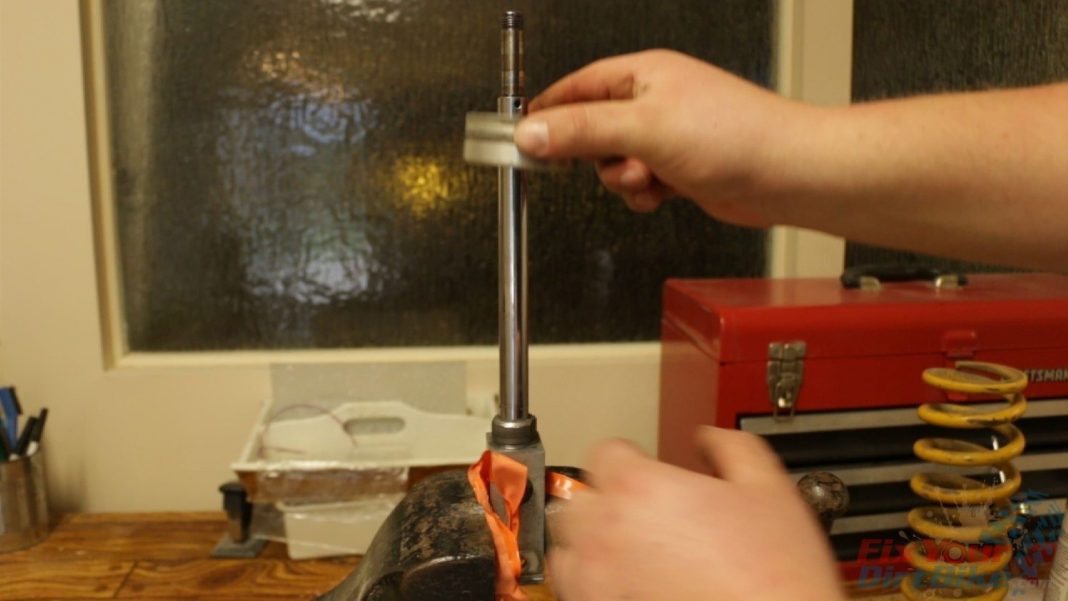
- Remove the spring:
- Back out the preload adjustment nut to release the spring pressure
- The spring plate is held on by a circlip attached to the collar.
- To separate the collar and spring plate, place a screwdriver between the collar and the spring,
- Then, hit the plate with a hammer to expose the circlip.
- Remove the circlip, the backing plate, and the spring.
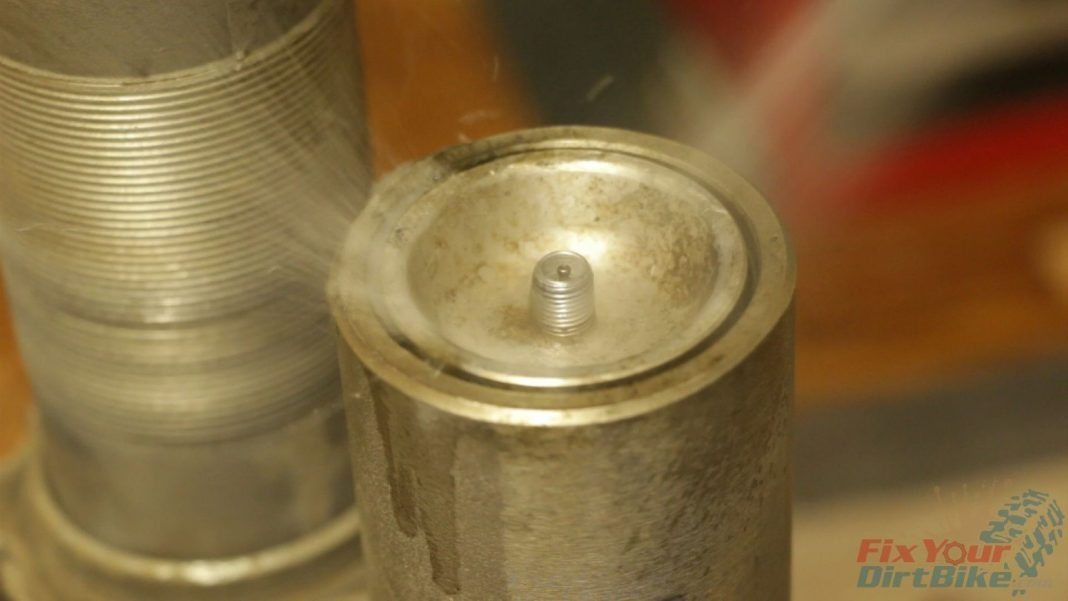
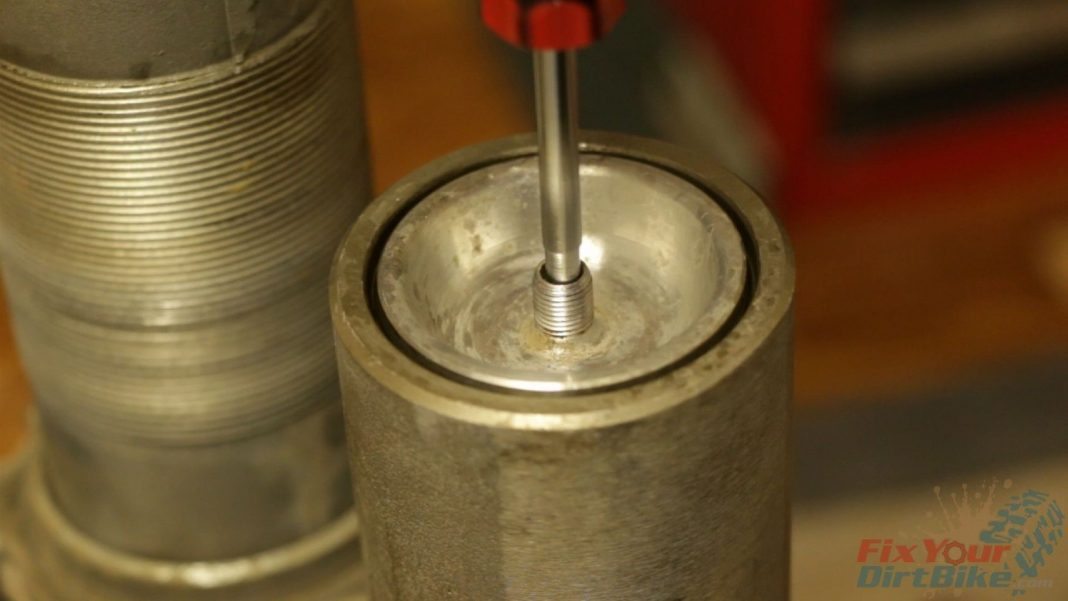
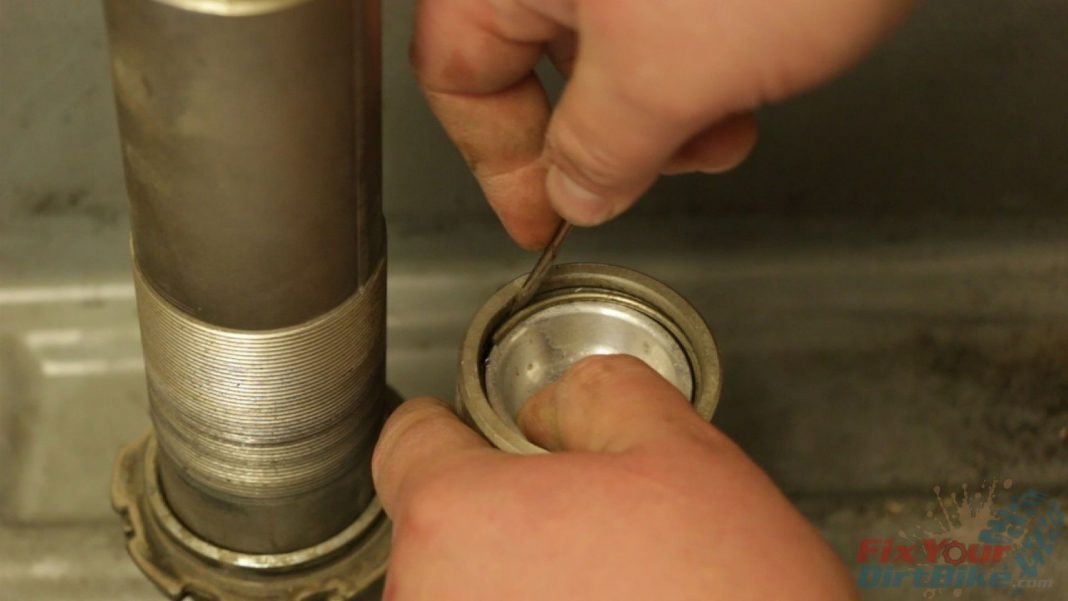
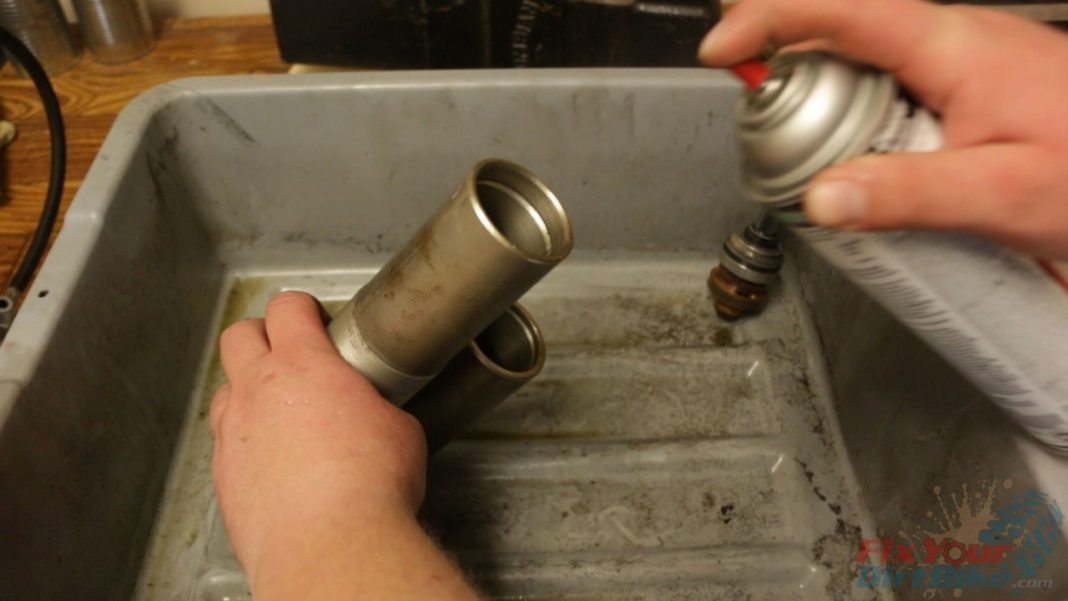
- Step 1: Clean the reservoir cap and release the air from the bladder.
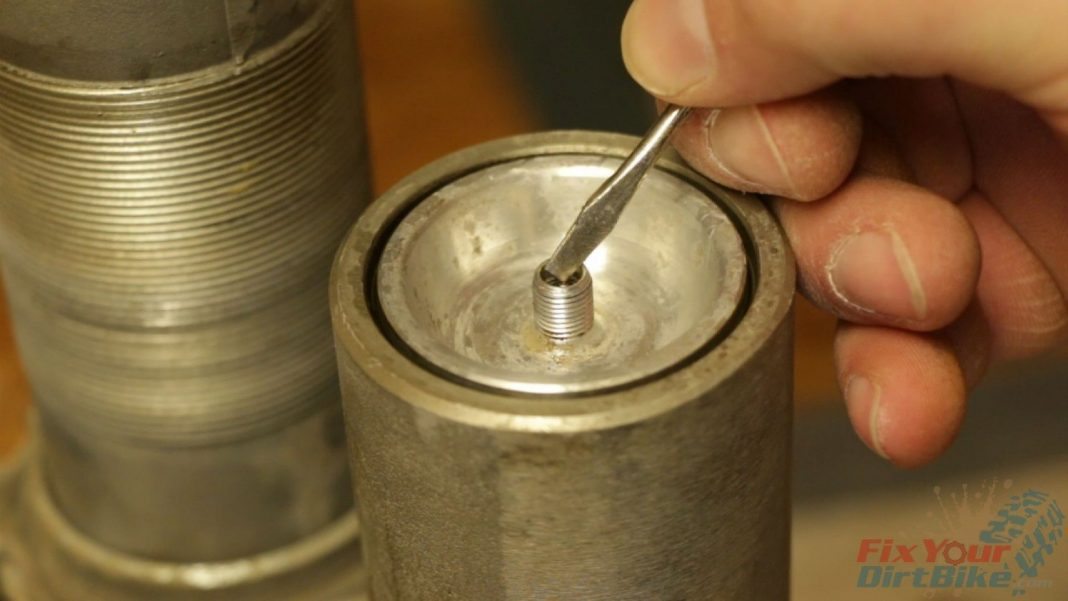
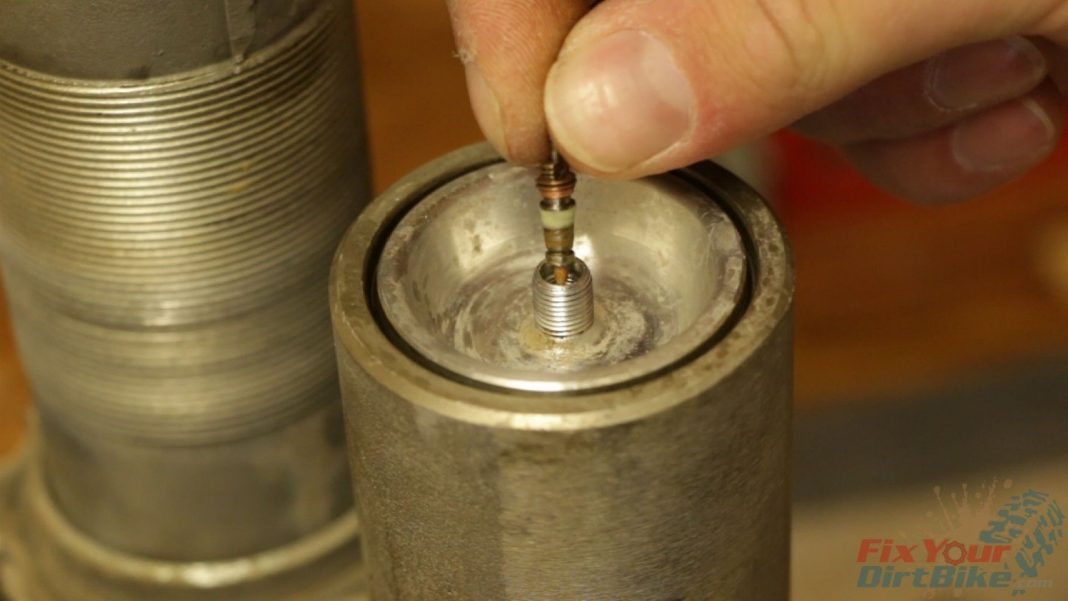
- Step 2: Remove the valve stem from the reservoir cap.
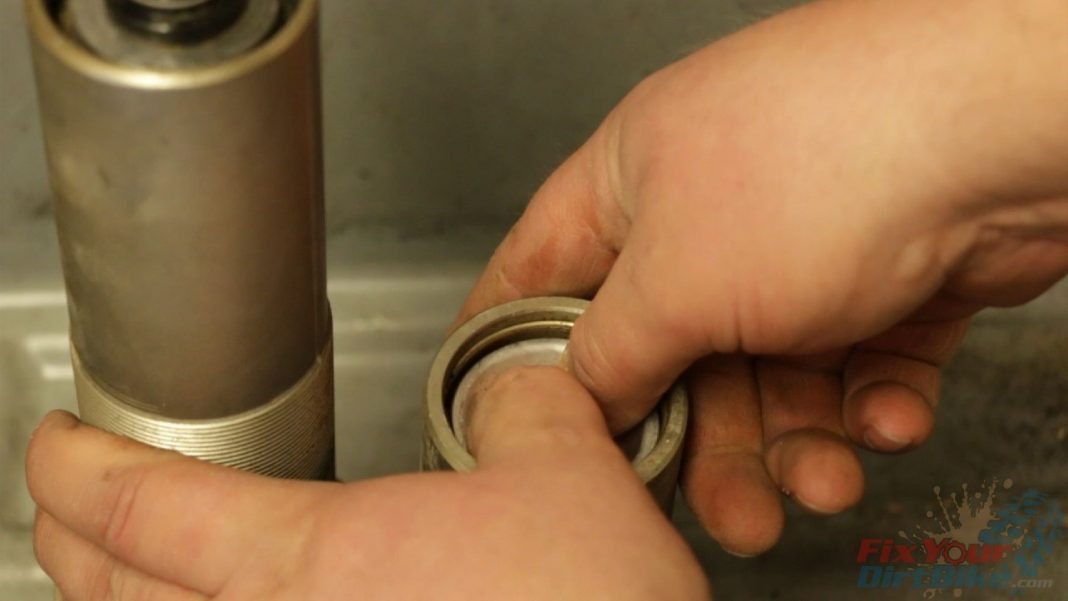
- Step 3: Remove the shock body cap using a punch and hammer. Go back and Forth between the punch holes so the cap does not bind.
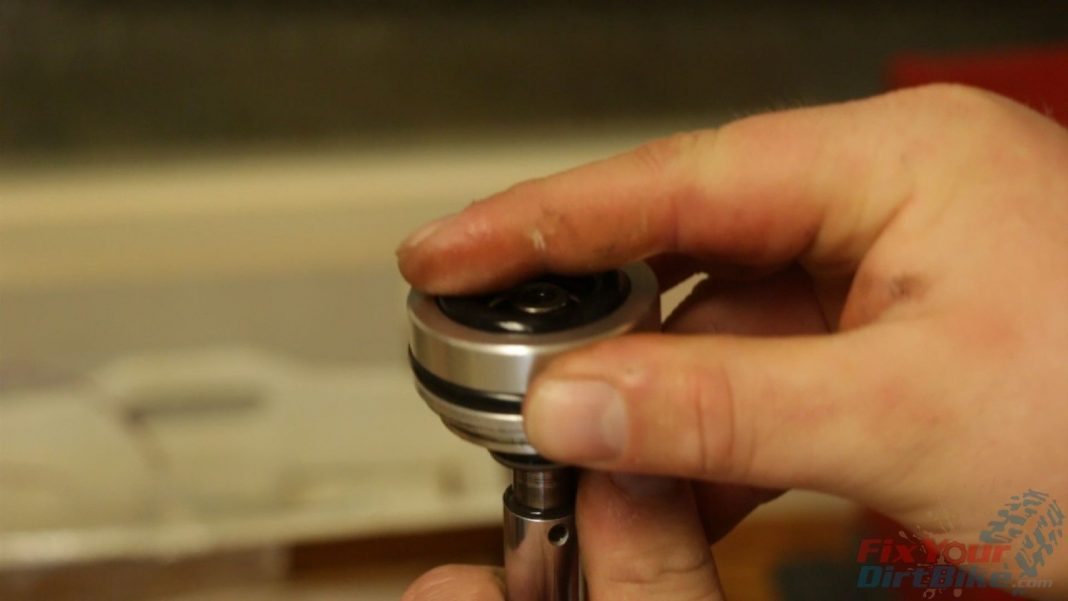
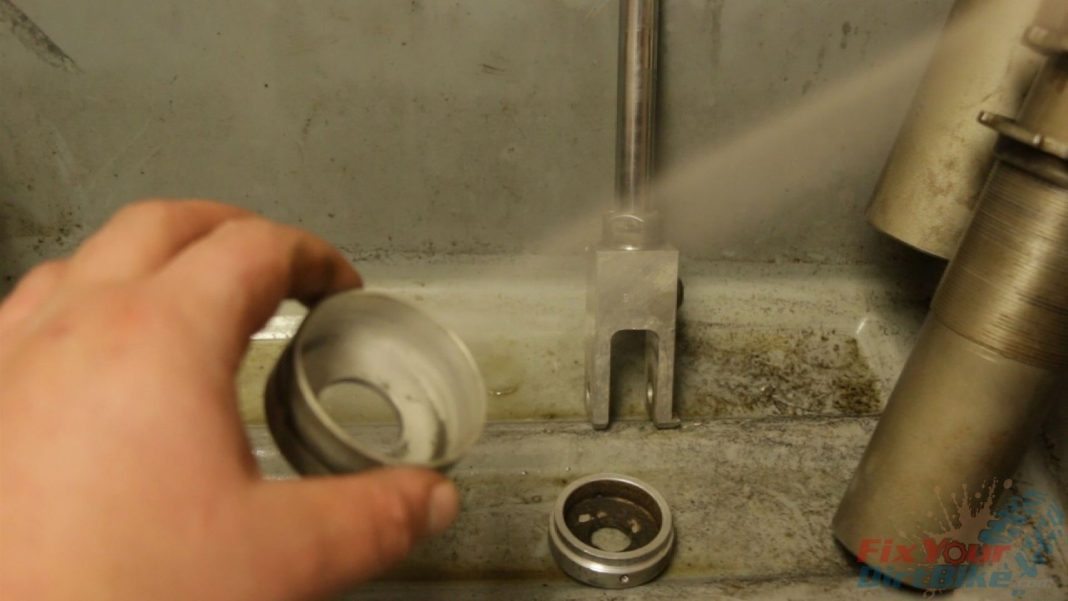
- Clean and inspect the seal head. Before removing the shaft, we must remove the reservoir to release pressure in the shock body.
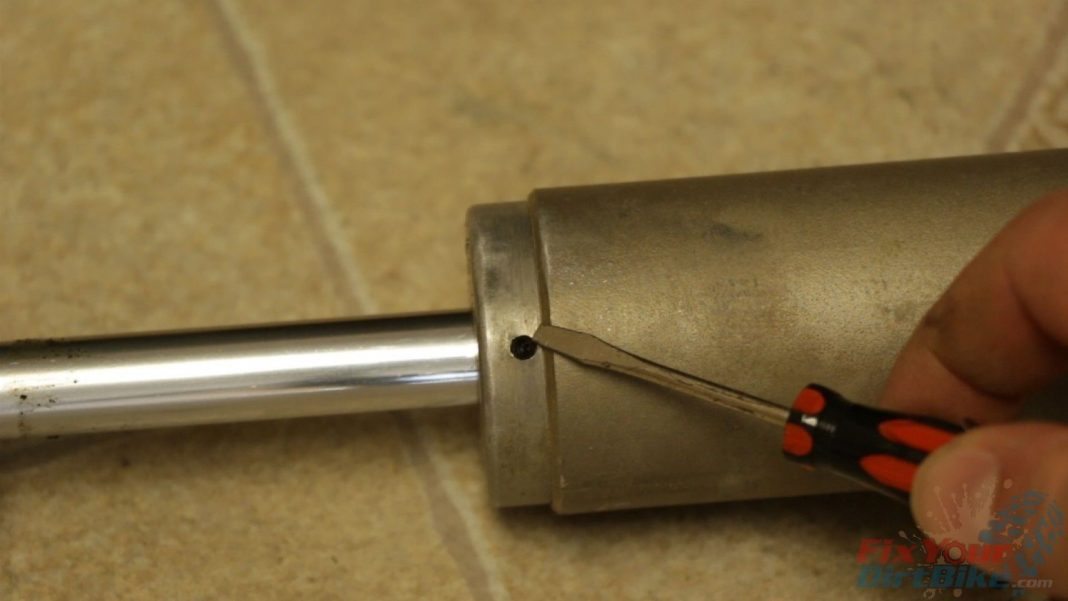
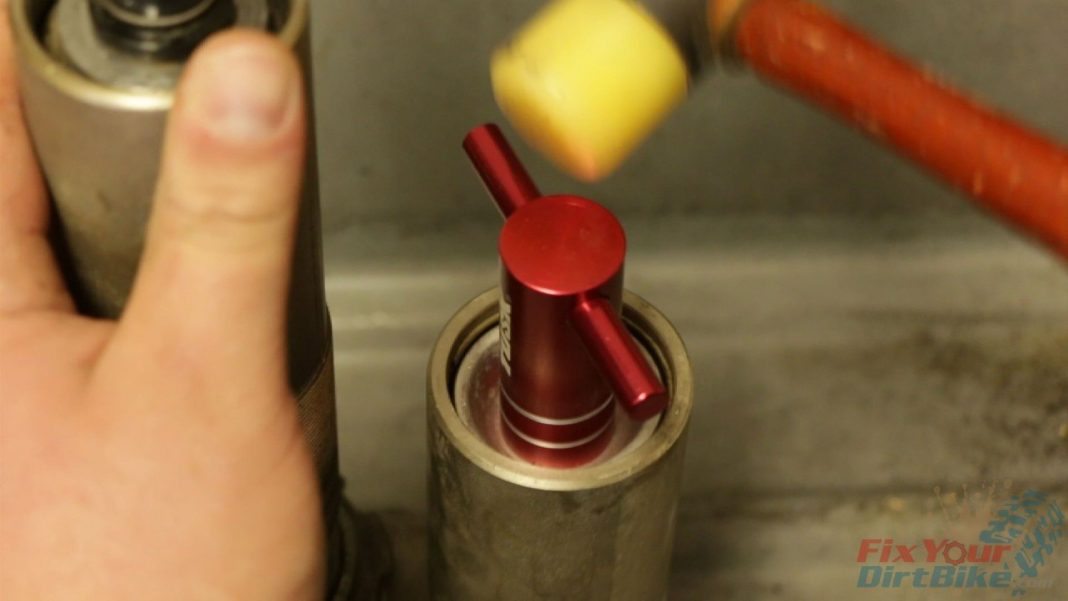
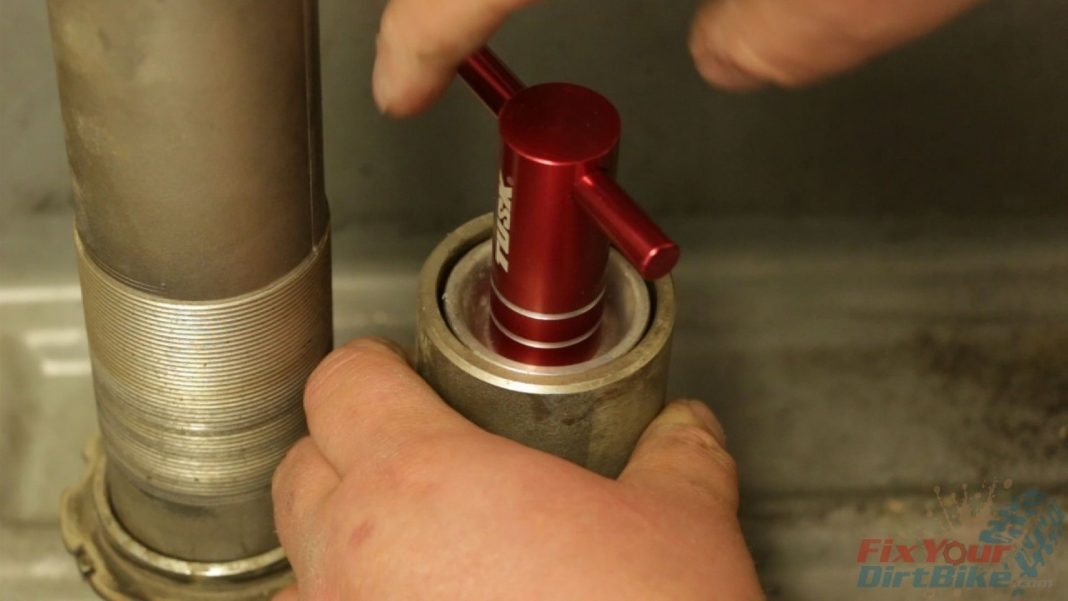
- Step 4: Install the reservoir cap puller and beat the cap into the reservoir to expose the circlip.
- Remove the circlip, install the cap puller again, and pull the reservoir cap and bladder.
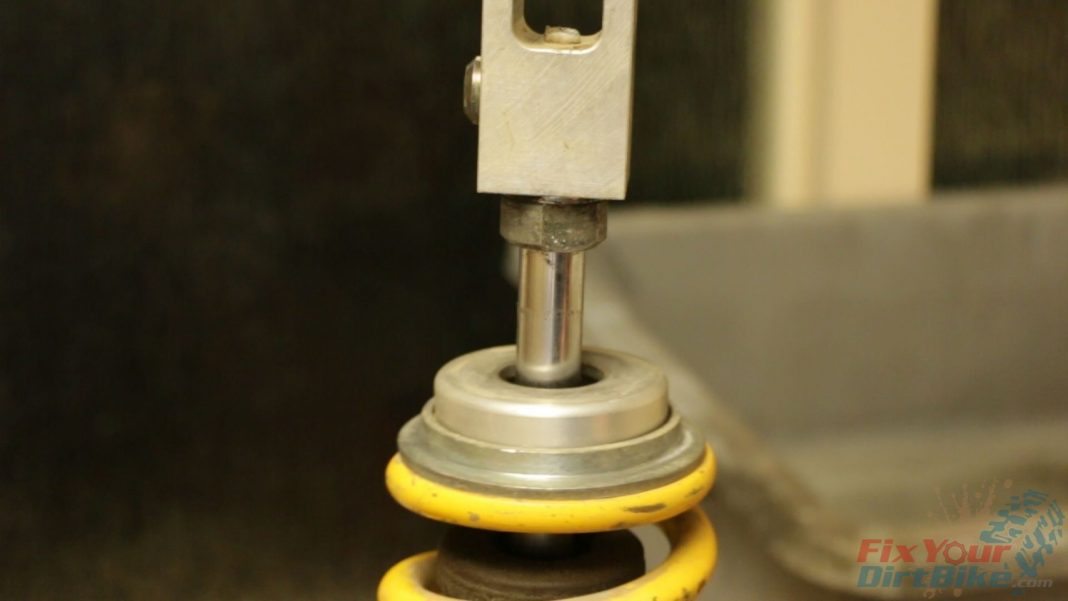
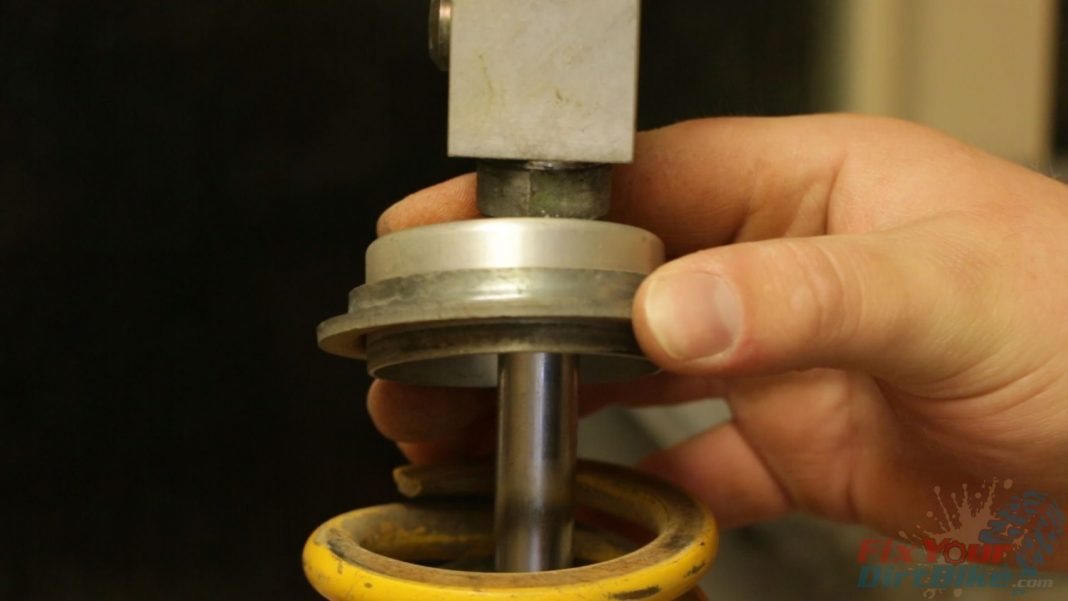
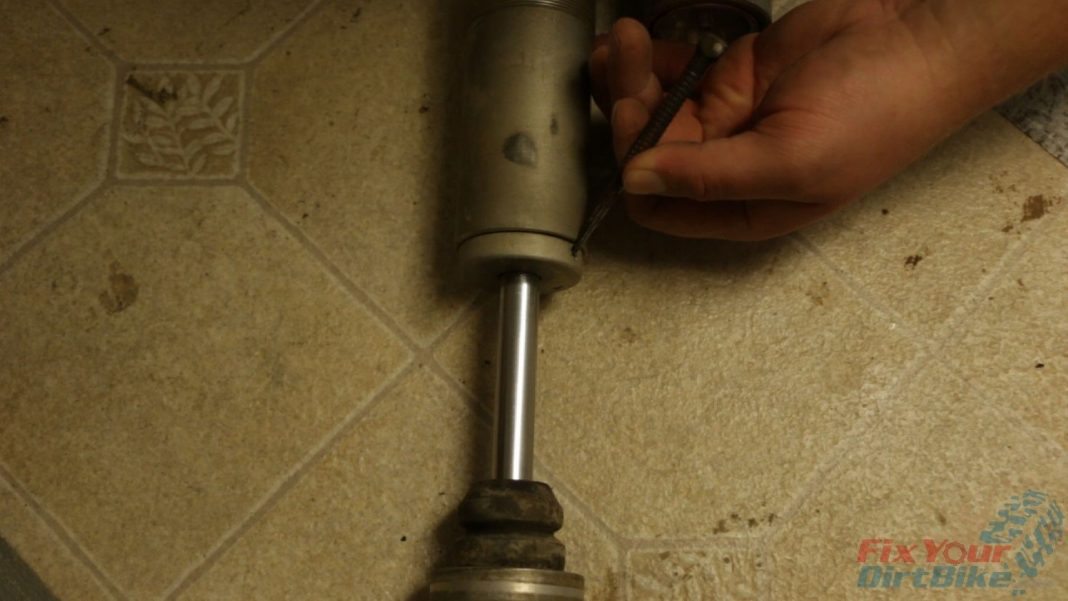
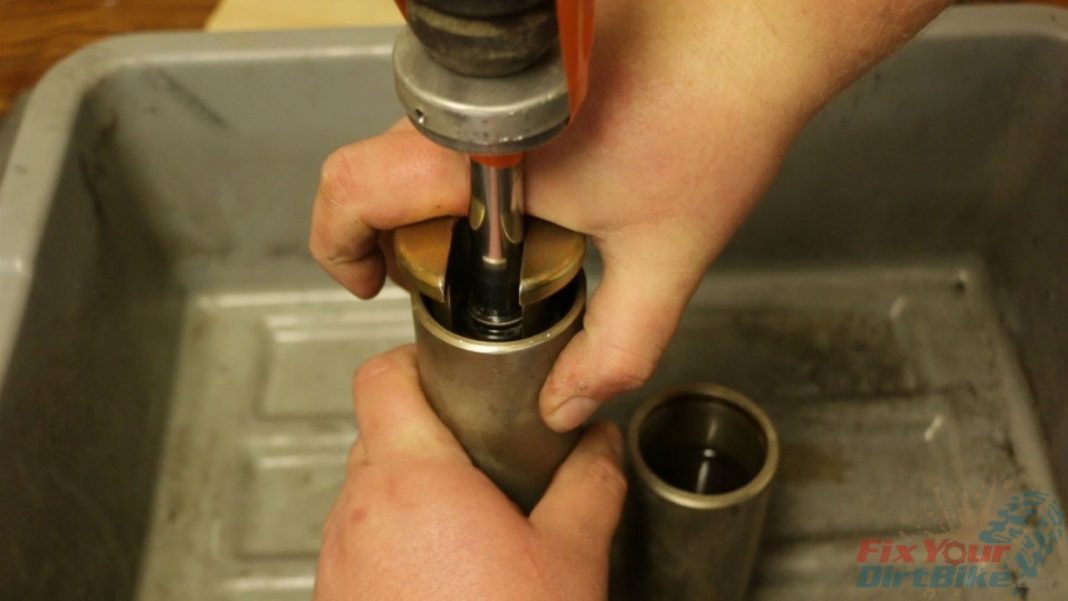
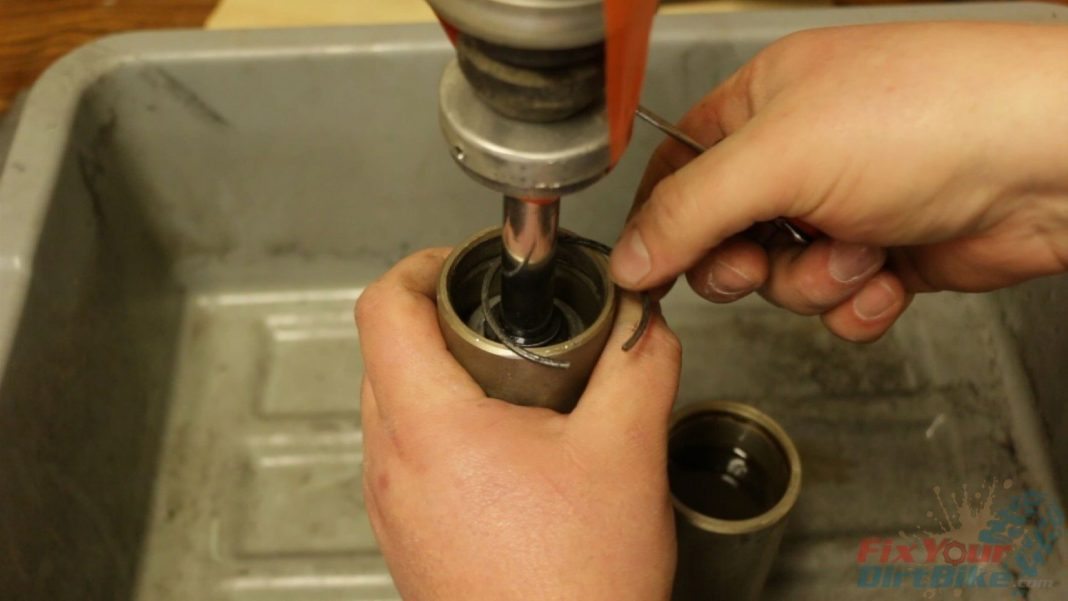
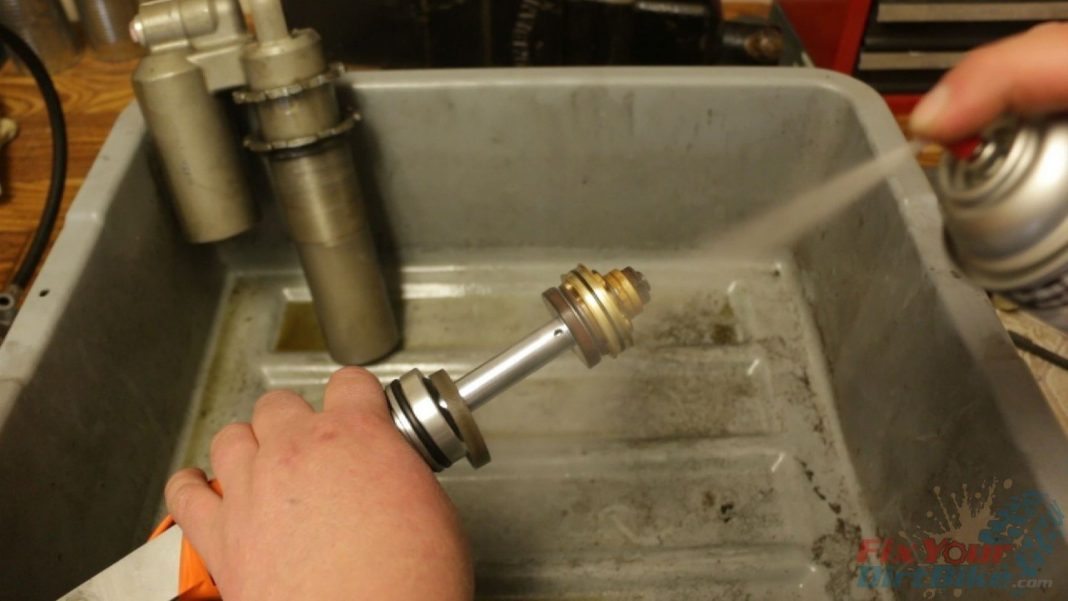
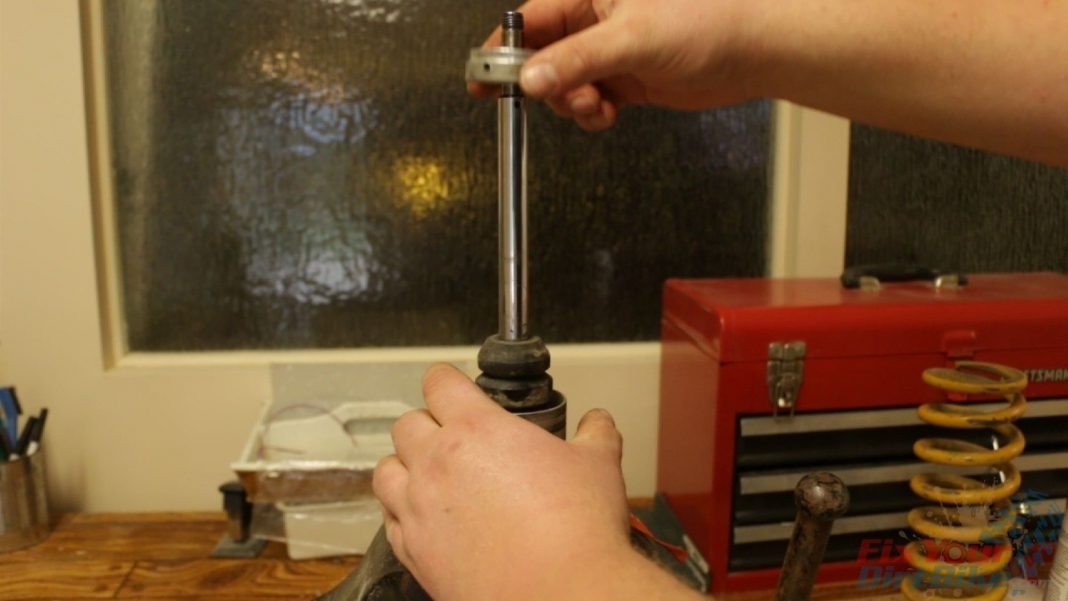
- Step 5: Shaft Removal.
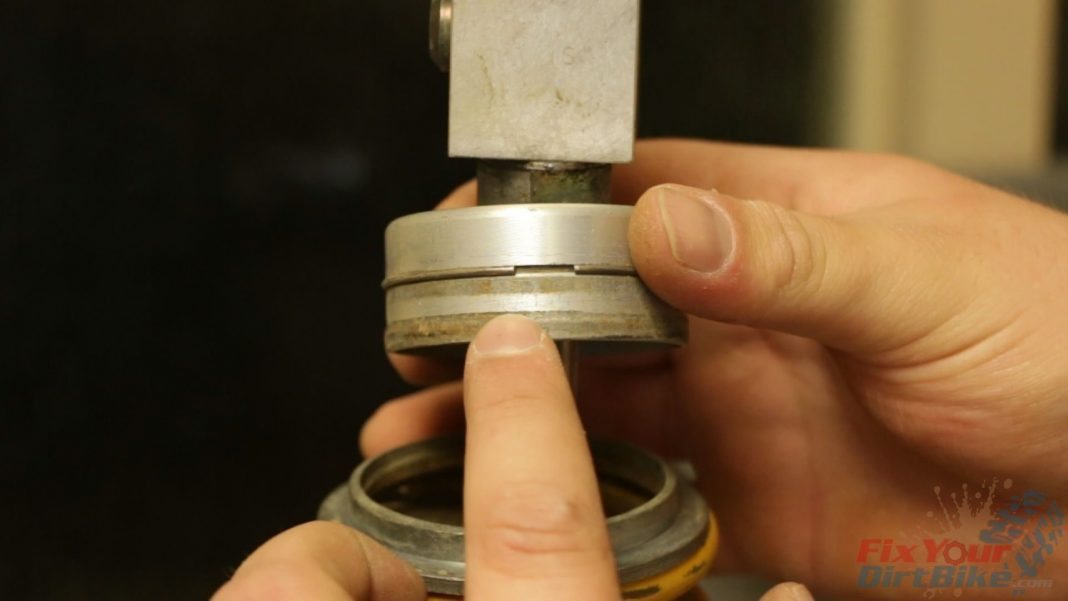
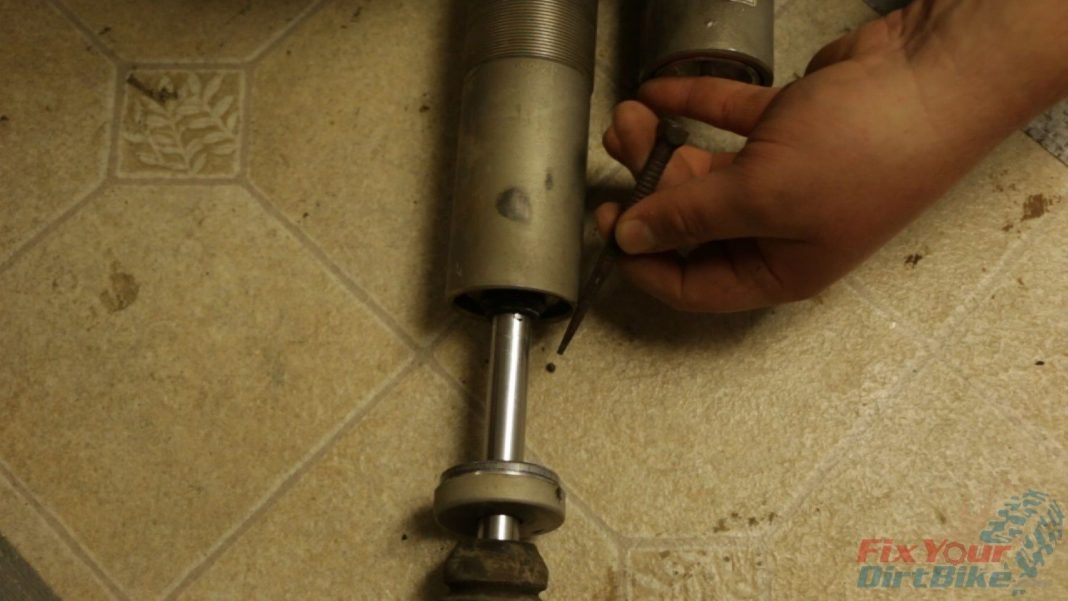
- To remove the shock shaft, push the seal head down to expose the circlip.
- Remove the circlip and carefully work the shaft out of the body. Set the shock body aside and let it drain in a warm place for about 10 minutes.
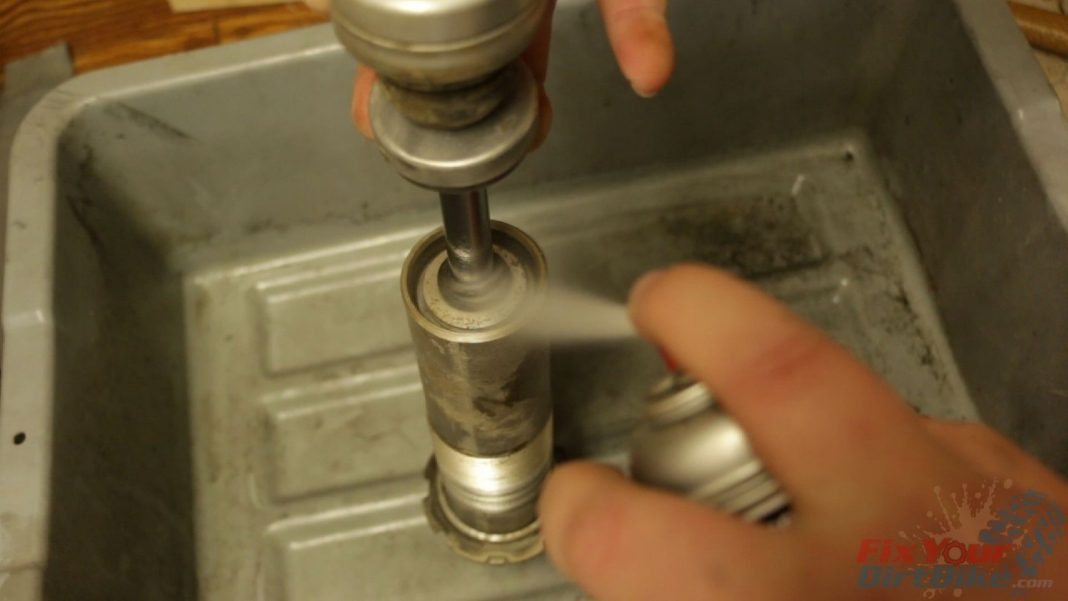
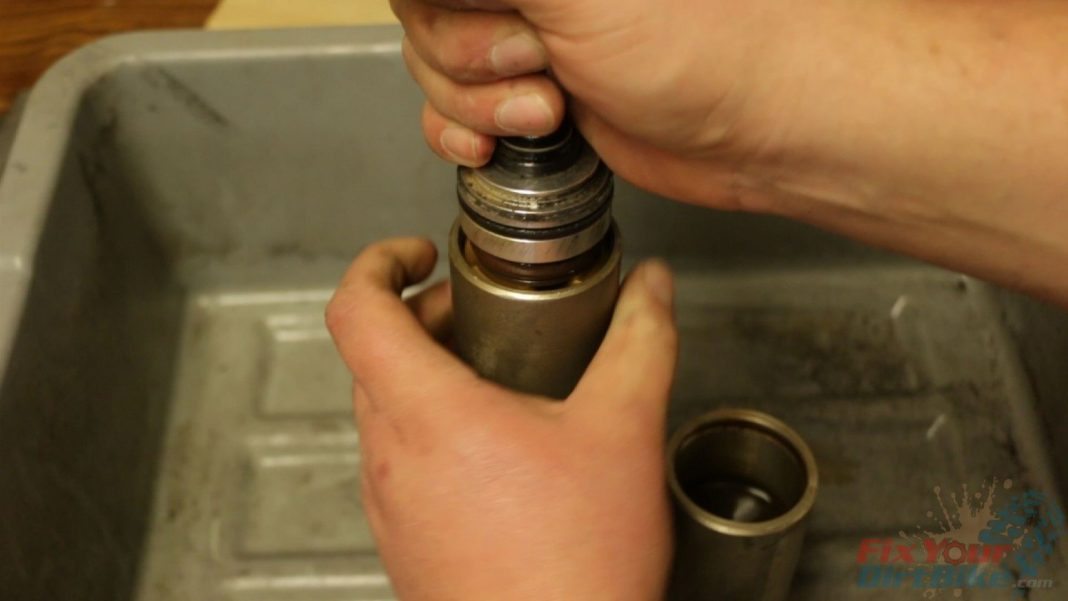
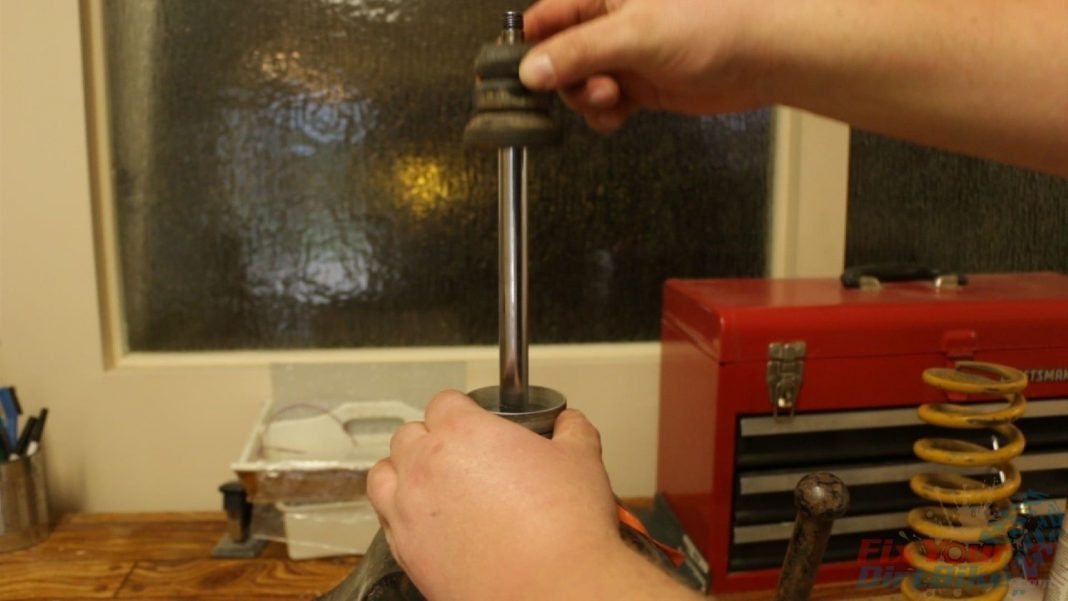
- Clean and inspect the rear shock body, shaft, and valve stack.
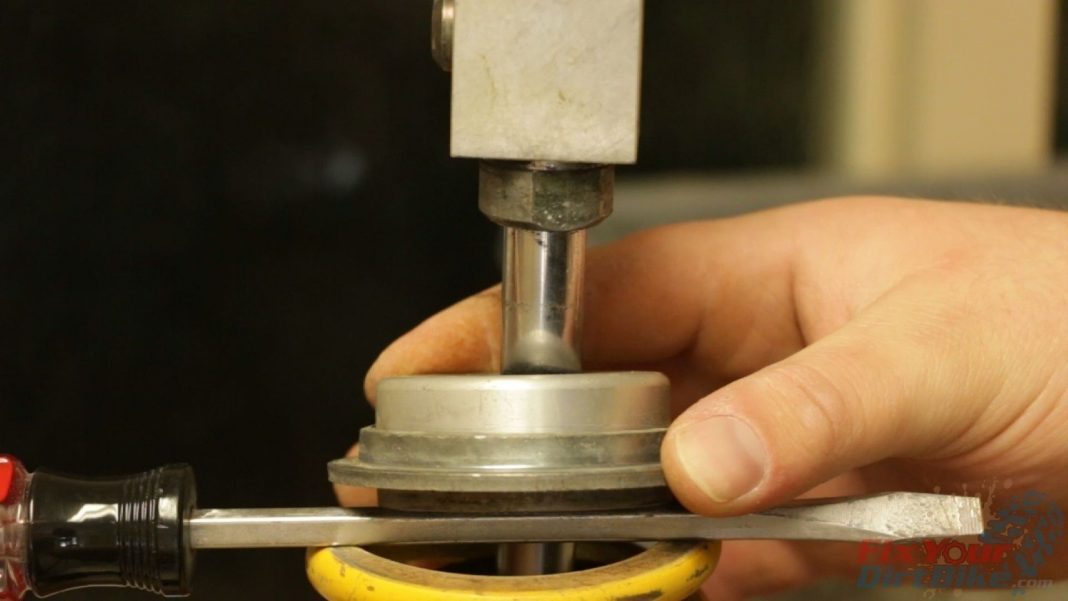
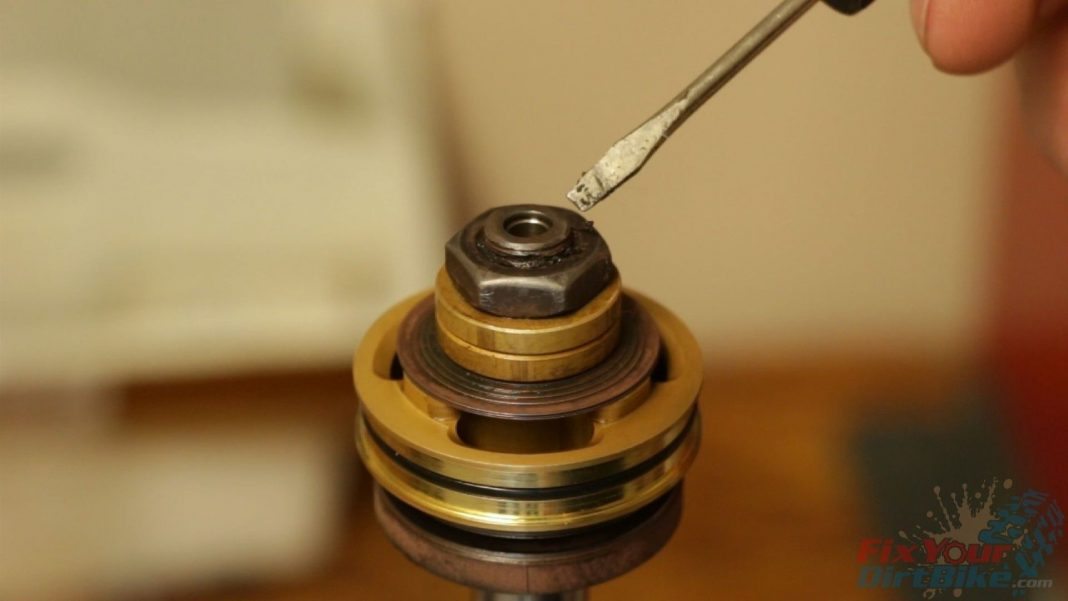
- Step 6: Remove the shaft nut.
- *The shaft nut will be mushroomed from the factory. If it is, you must grind down the nut until you see a distinct separation between the nut and the shaft. But, if your shock was previously rebuilt, like this one, you shouldn’t have to. Clean and inspect the threads.
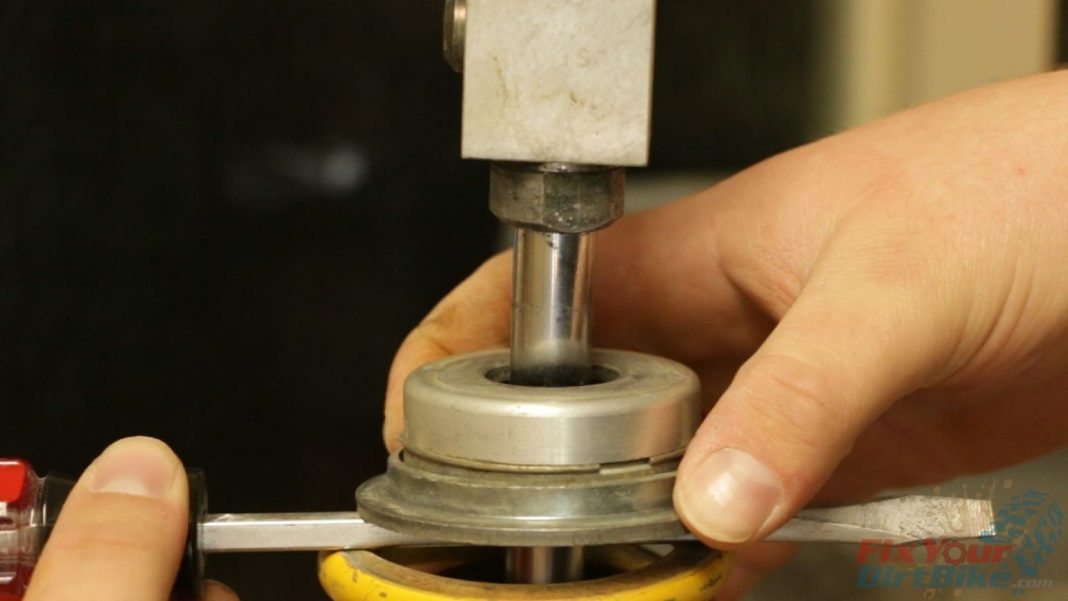
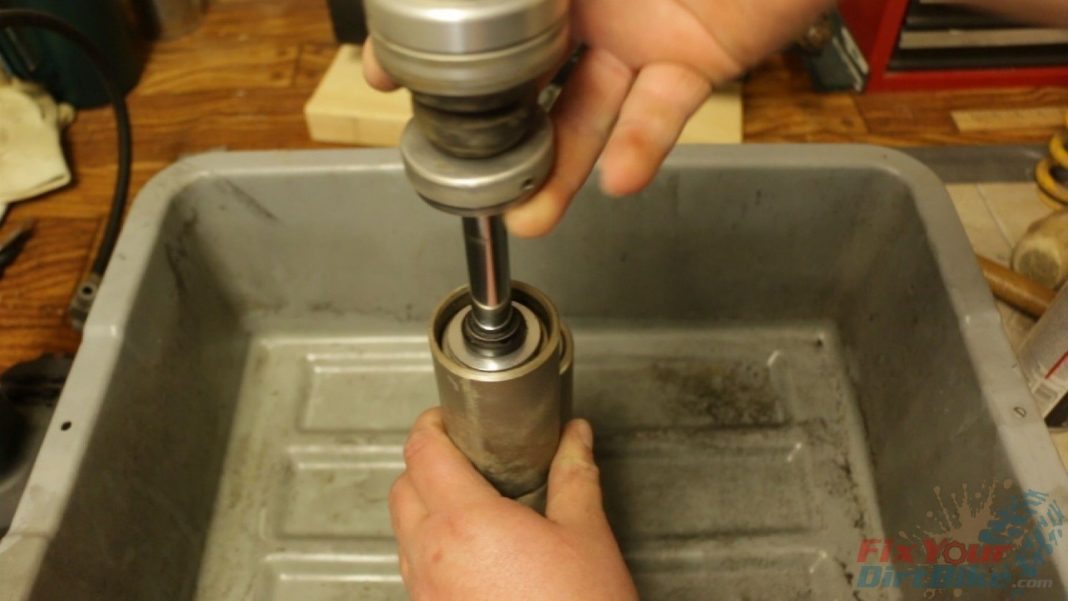
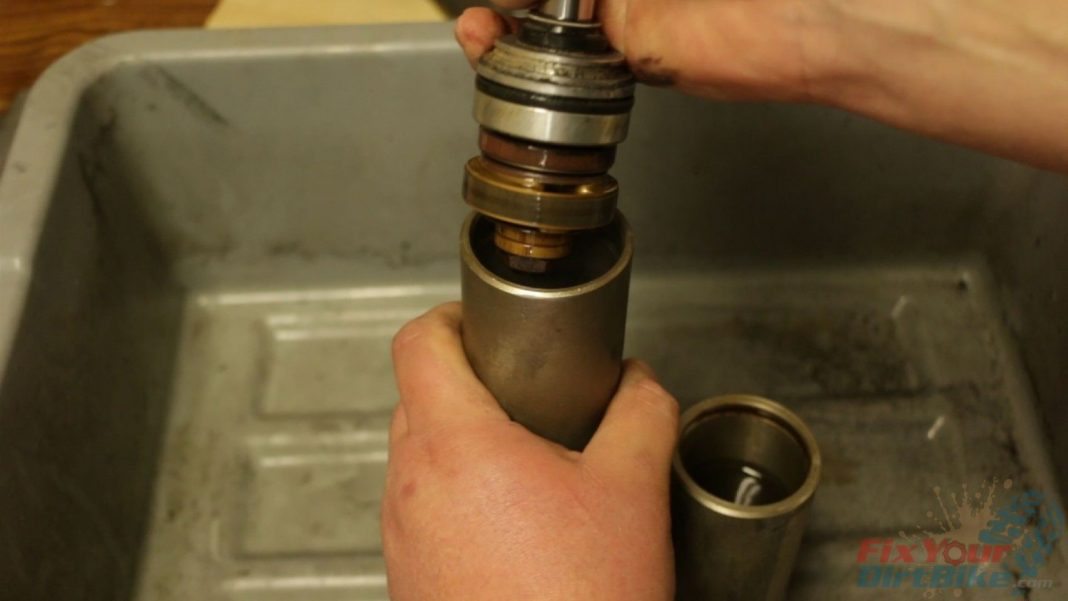
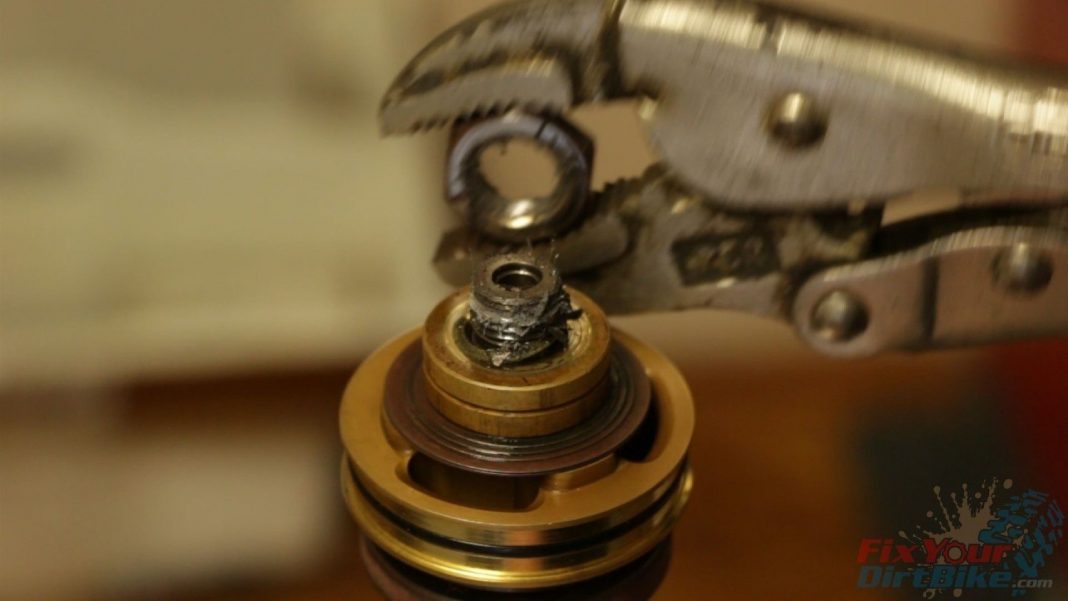
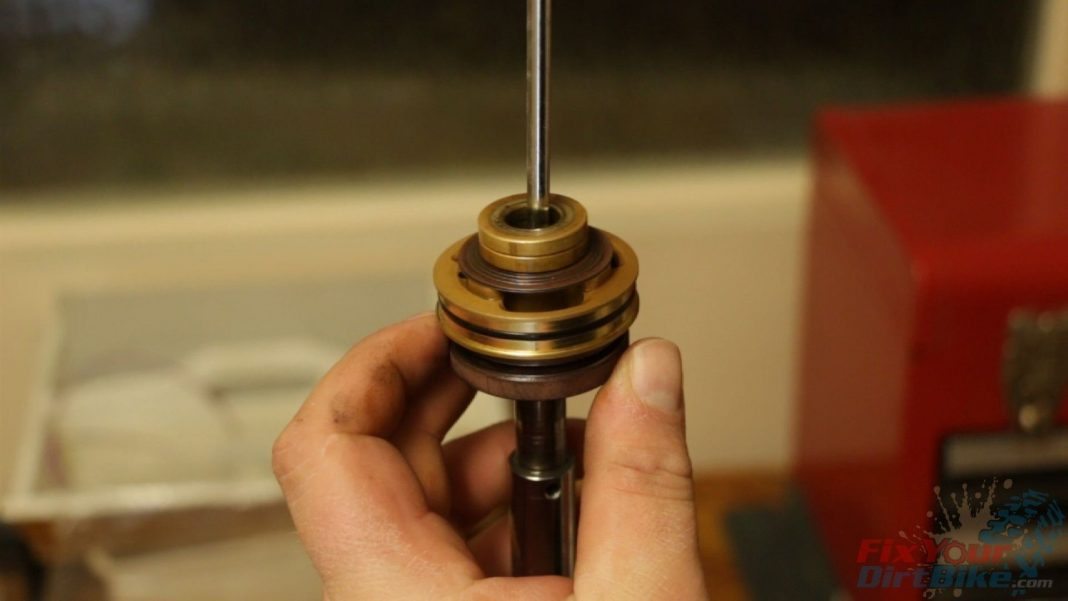
- Step 7: Transfer the valve stack to a screwdriver to
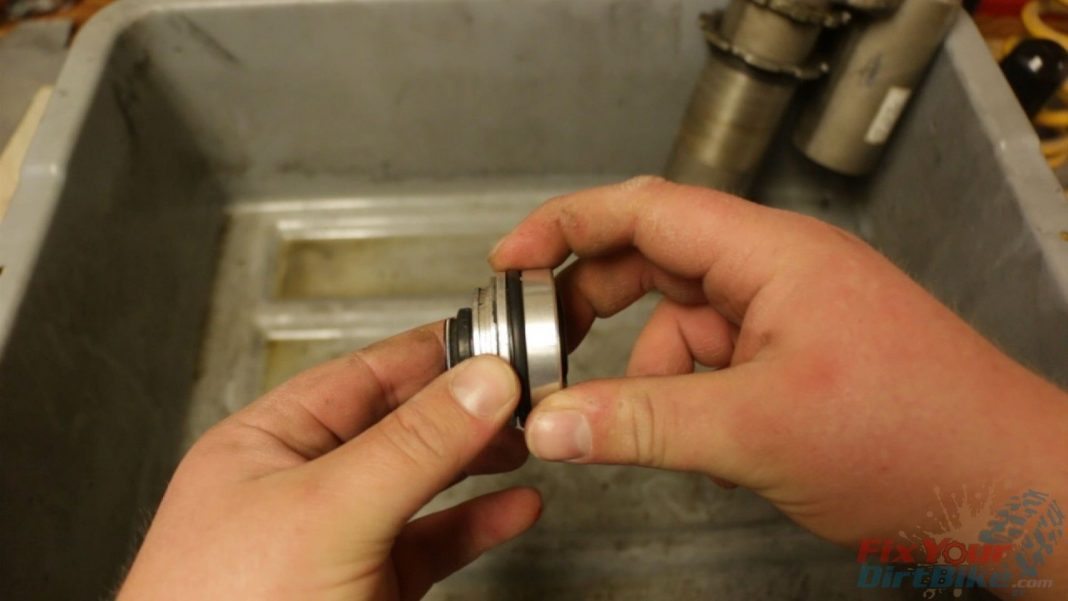
keep everything organized.- Remove the seal head, shock body cover, bumper,
and collar. Clean and inspect.
- Remove the seal head, shock body cover, bumper,
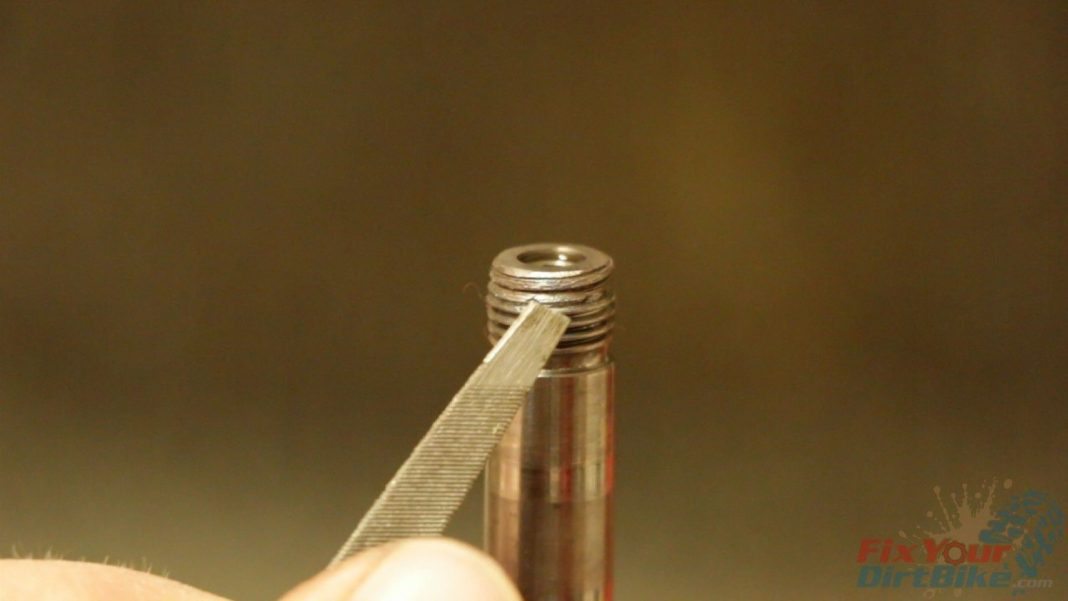
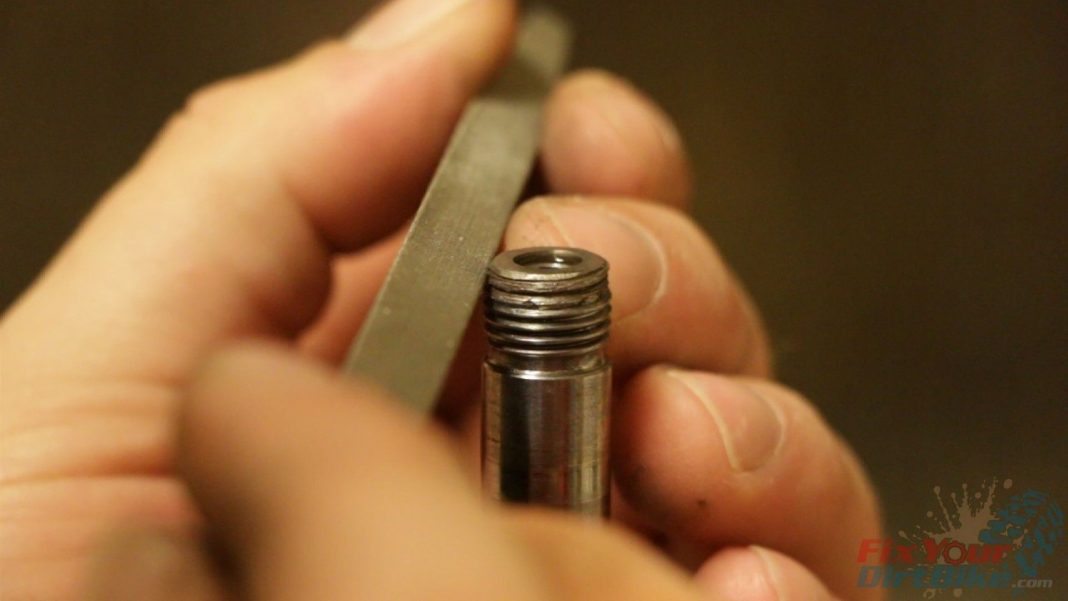
- Step 8: Check the shaft threads; you may need to
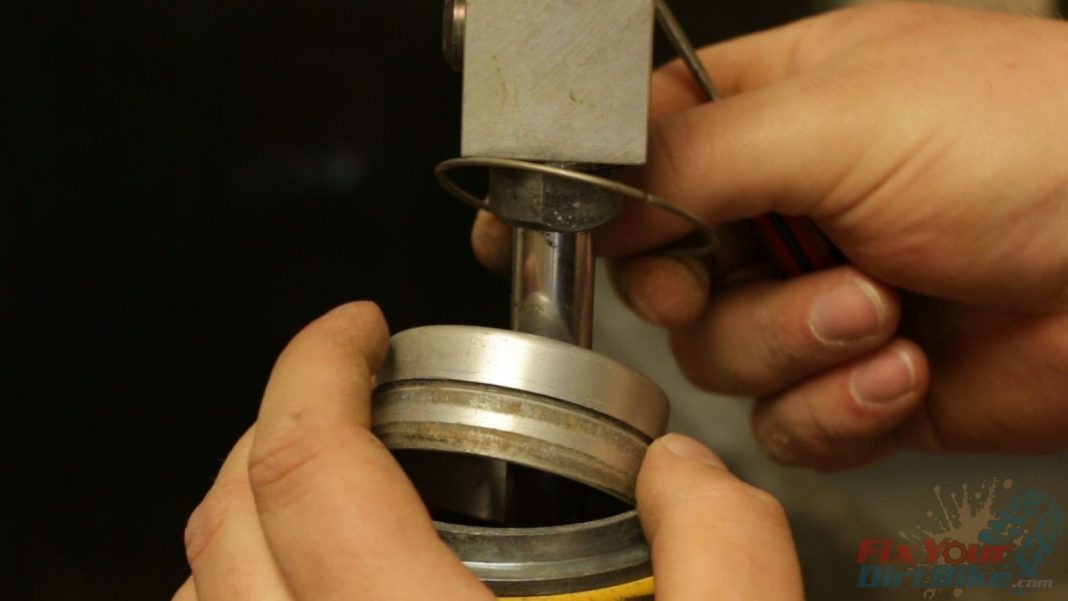
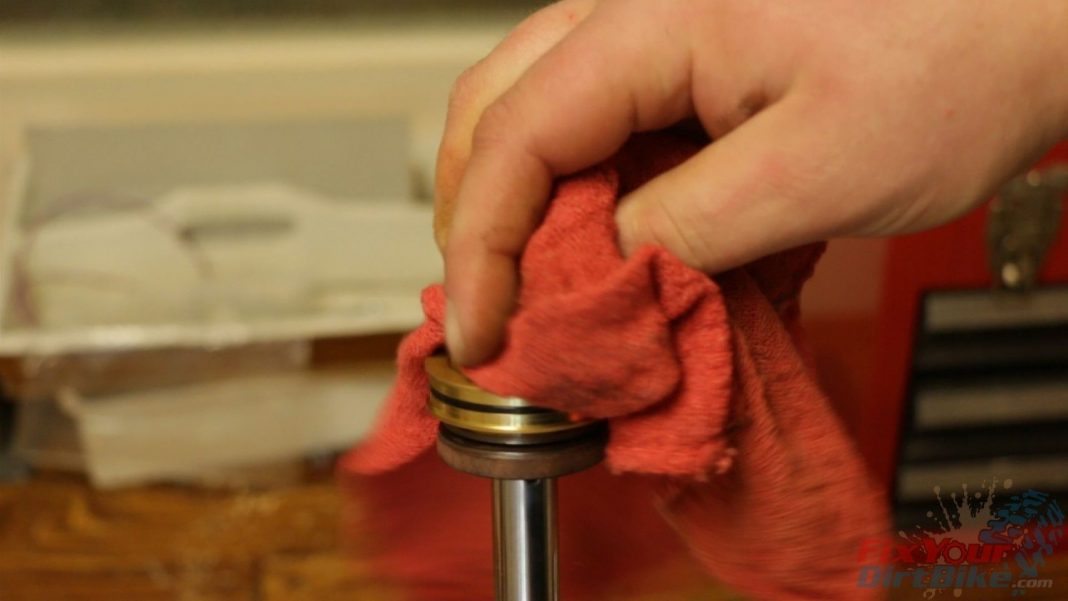
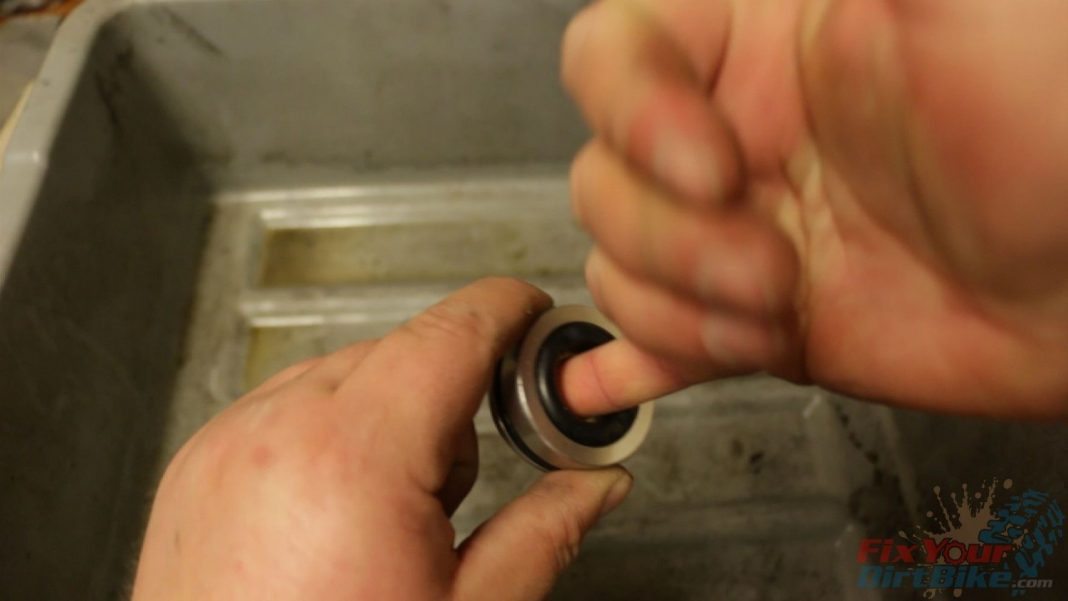
re-pitch the threads using a small file. - Step 9: Check the seal head body and seals, these
The rear shock seals are still good so that I will reuse them.


If you have any questions or comments, please leave them in the comments or on our Facebook page!
97-01 Honda Cr250 Shock Rebuild Part 2: Shaft Assembly →
Keep Your ’97-’01 CR250 Running Right!
- Service Specification
- Clutch Replacement
- Carburetor Service
- Engine Top End
- Engine Bottom End
- Brakes
- Exhaust
- Front Suspension
- Rear Suspension
- Wheels & Tires
- Kickstarter Inspection
- External Shift Linkage


