
How To Service The Shock Linkage On Your 97-01 Honda CR250
 The Tools You Will Need Are
- 17mm Socket
- 17mm Wrench
- 19mm Socket
- 19mm Wrench
- 12mm Socket
- 14mm Wrench
- Pick
- Parts Cleaner
- Soft Bristle Brush
- Shop Towels
- Clamp
- Propane Torch
- Hammer
- Socket To Match Bearing
- Socket Extension
- Clamp
- Mallet
- Safety Glasses
- Rubber Gloves
- Safety Glasses → https://bulltru.com
The Parts You Will Need Are
- New 1997 Honda CR250 Shock Link Bearings Set → https://amzn.to/3DRI0o9
- New ’98-’99 Honda CR250 Shock Link Bearings Set → https://amzn.to/3WlJgX8
- New ’00-’01 Honda CR250 Shock Link Bearings Set → https://amzn.to/3DVA5q1
- Moly Grease → https://amzn.to/40eacJw
Pre-Service Notes
- Start with your bike on a stand with the subframe and shock absorber removed. I removed the rear wheel for video purposes, but you do not need to.
- I recommend opening the Service & Torque Specs in a new tab for easy reference.
- If you need parts and tools, make sure to buy them here!
- Pictures with captions are after the steps below.
- If you need any help, don’t hesitate to ask!
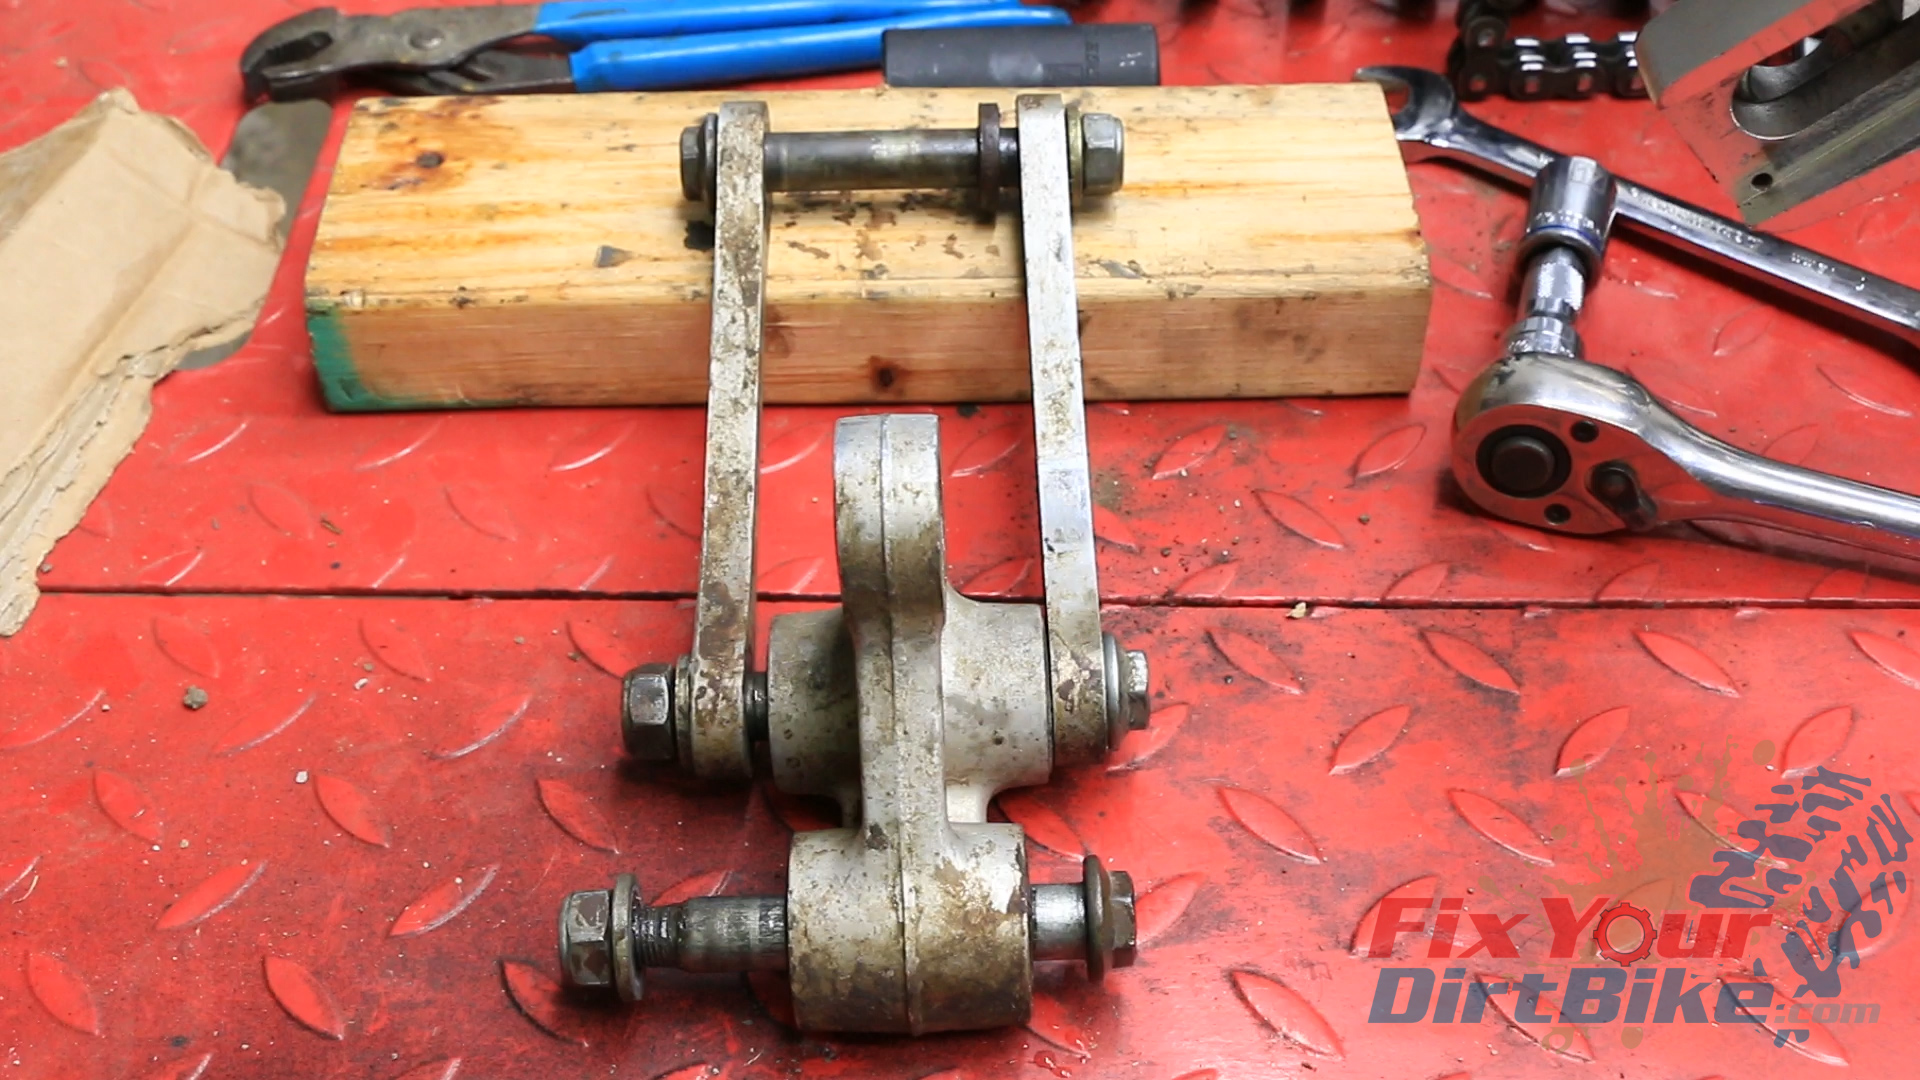
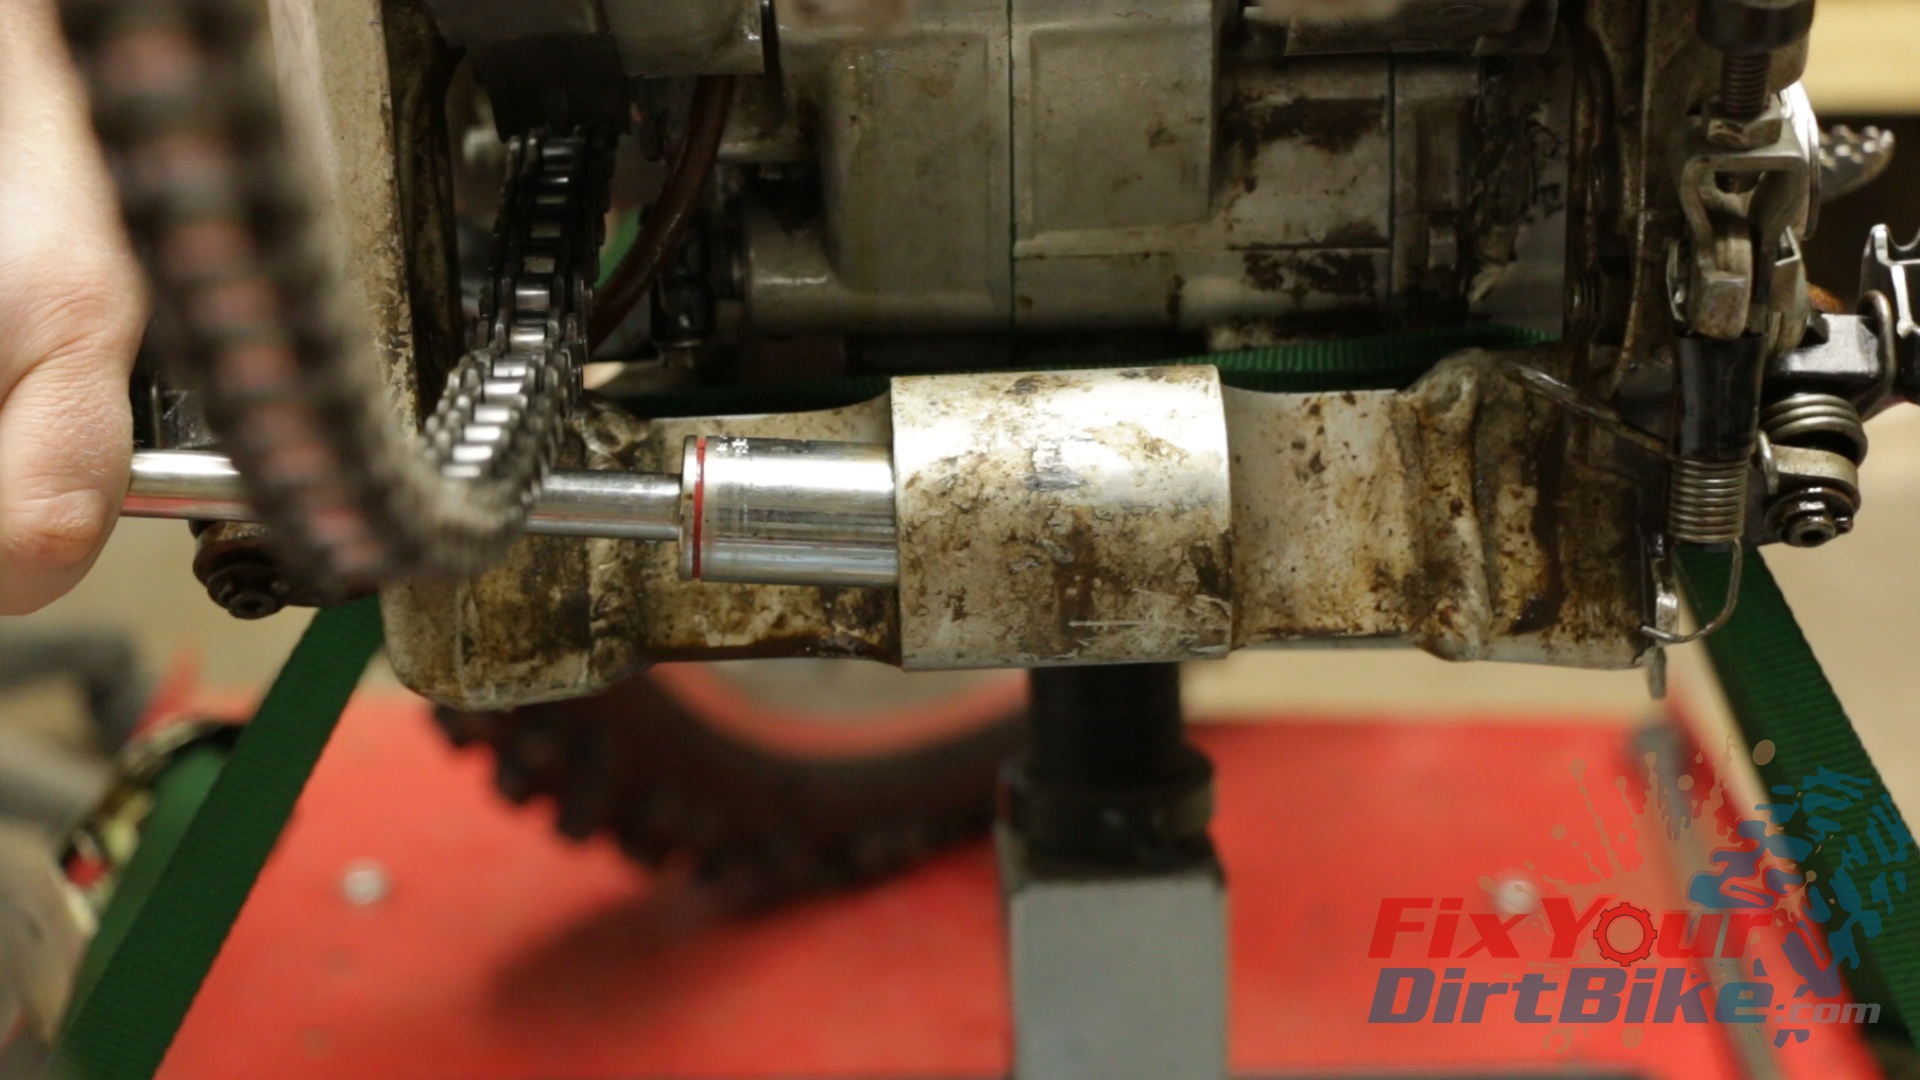
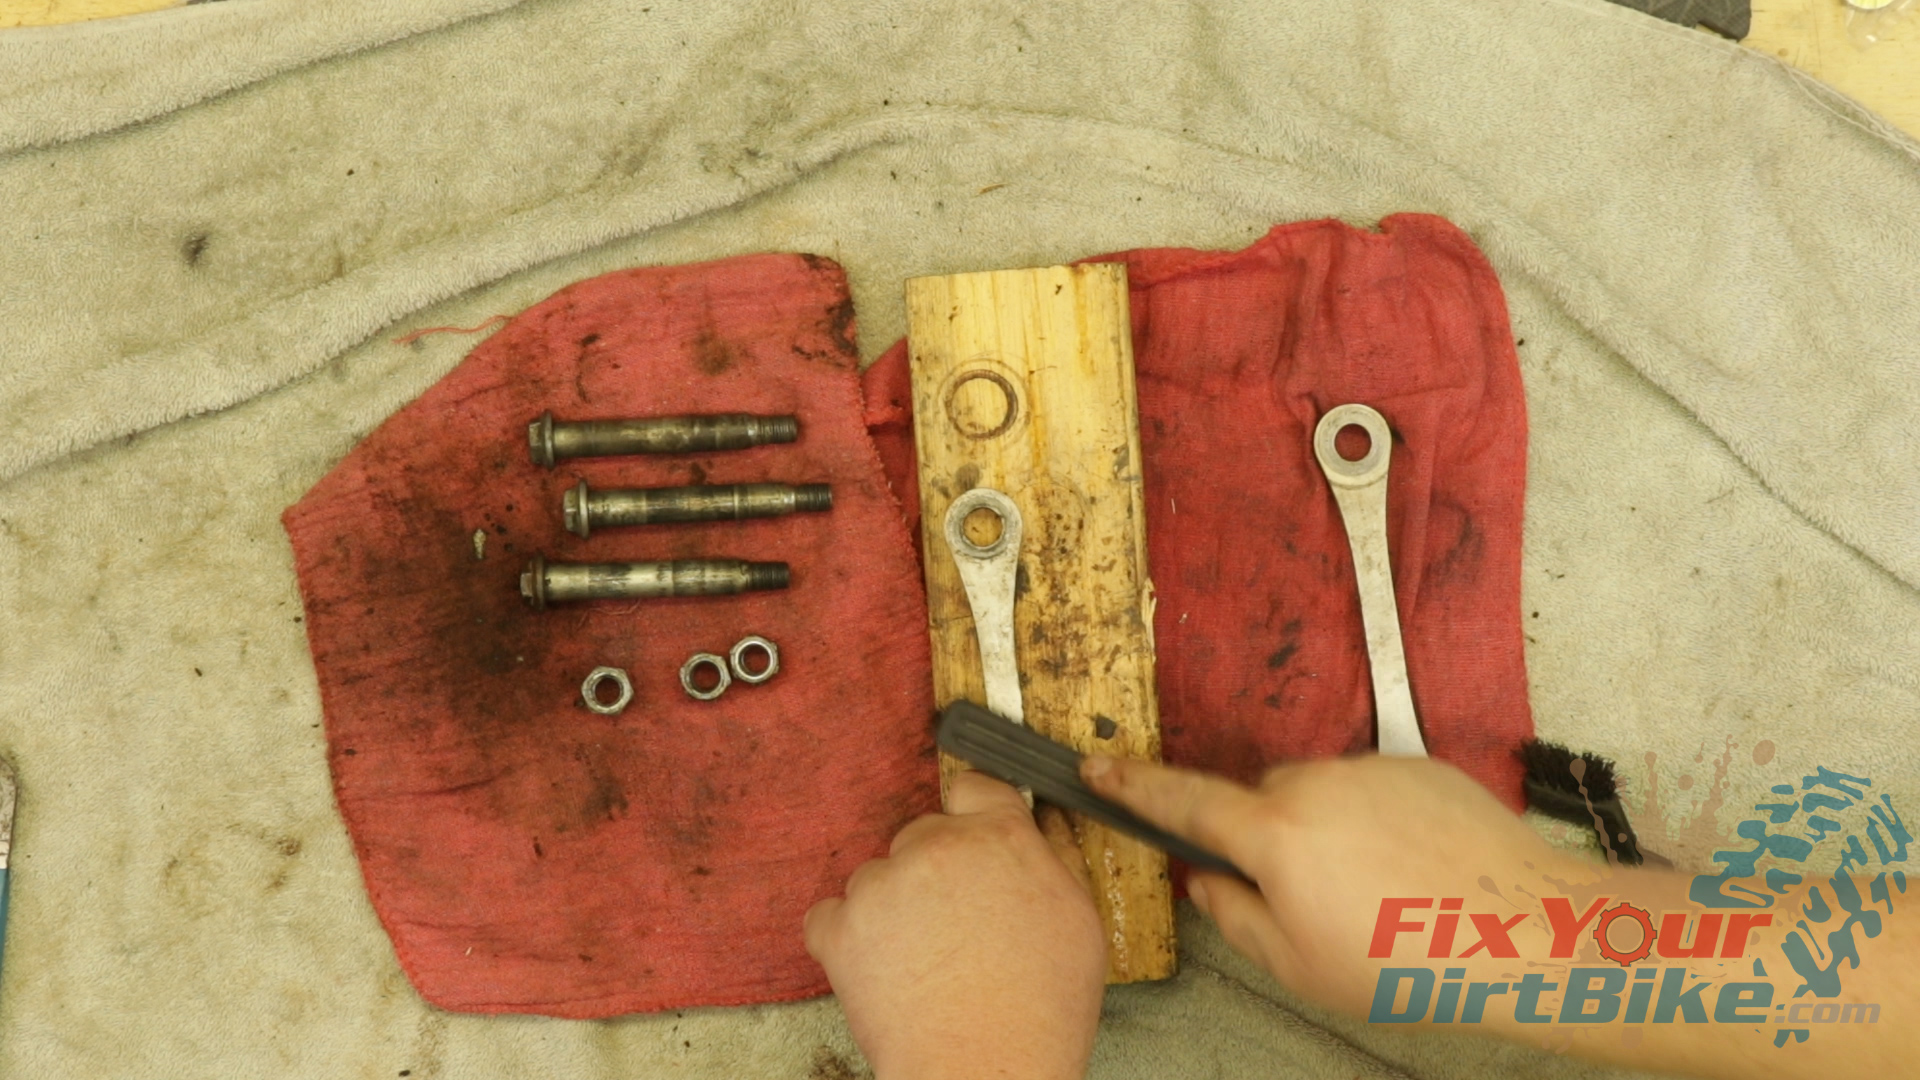
Shock Linkage Removal
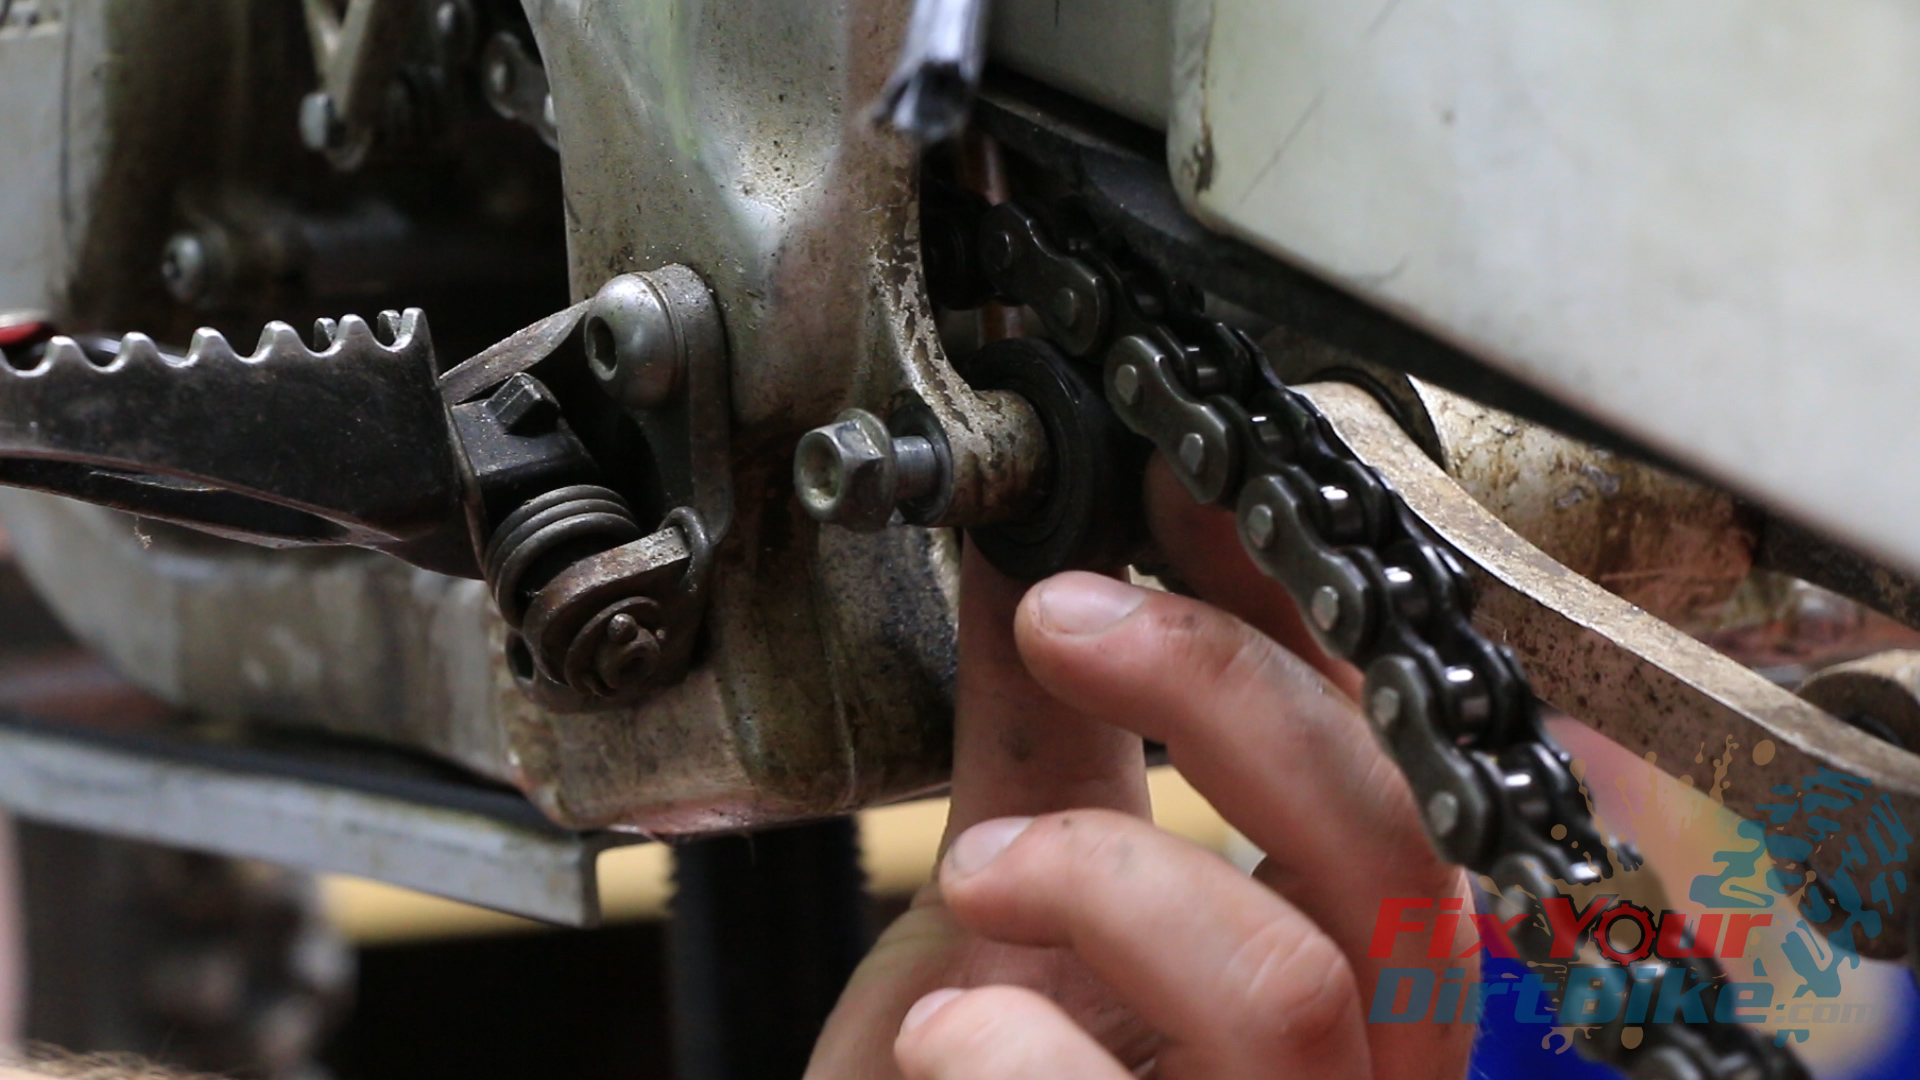
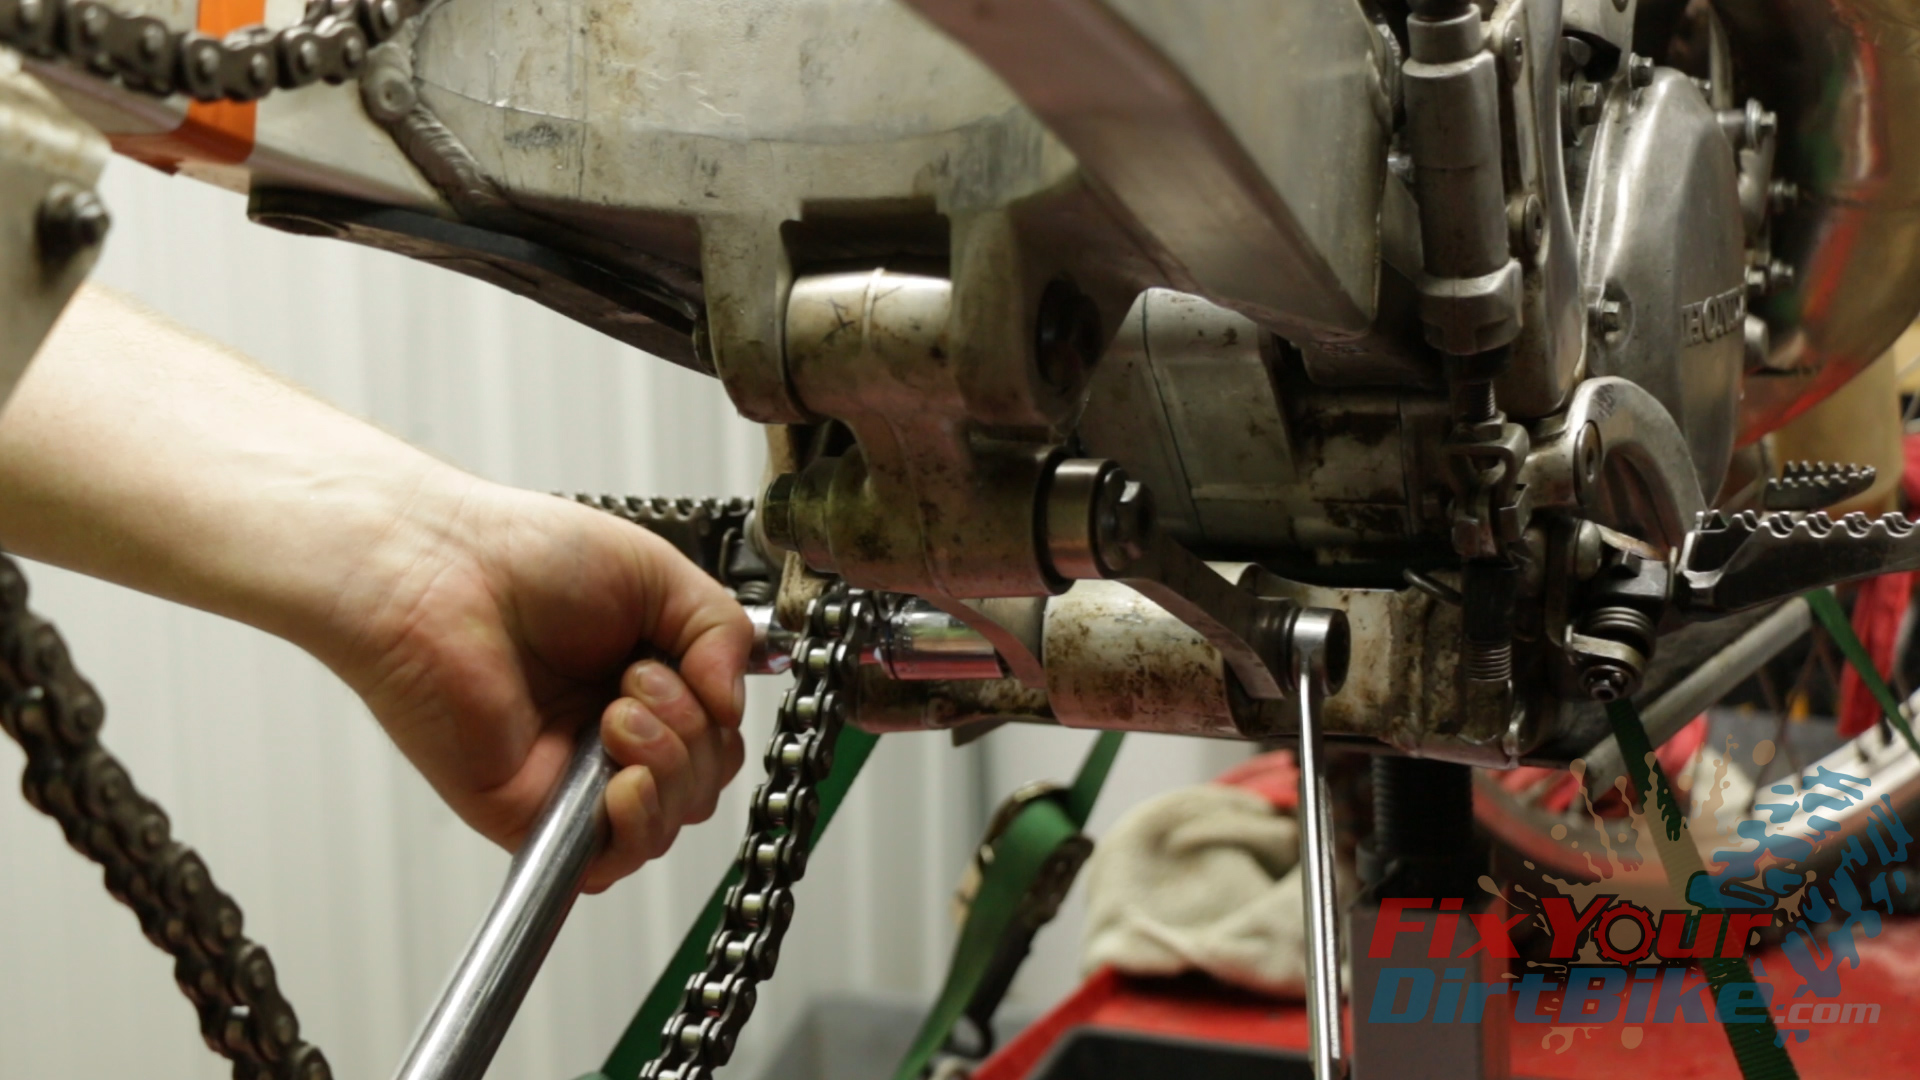
- Remove the lower chain roller to make room for the frame side connecting bolt.
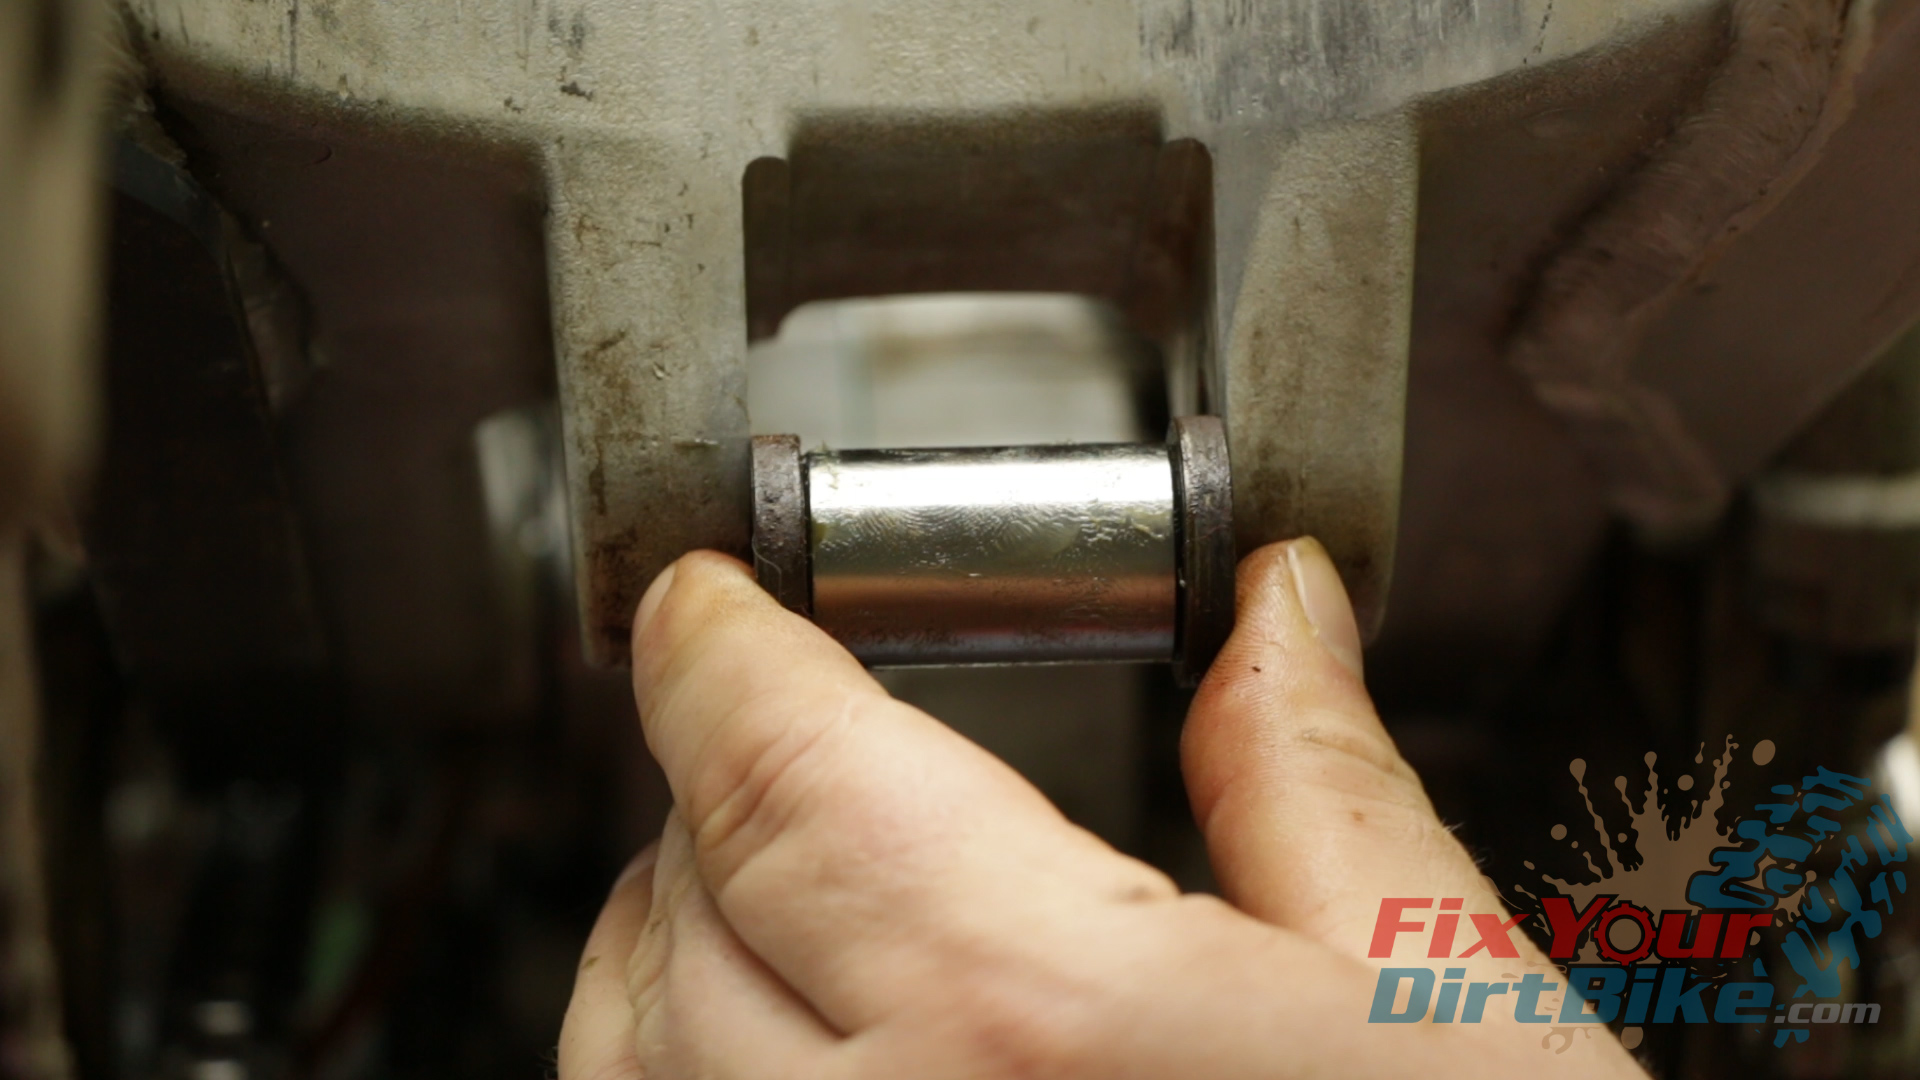
- Remove the bolts and washers from the frame and swingarm.
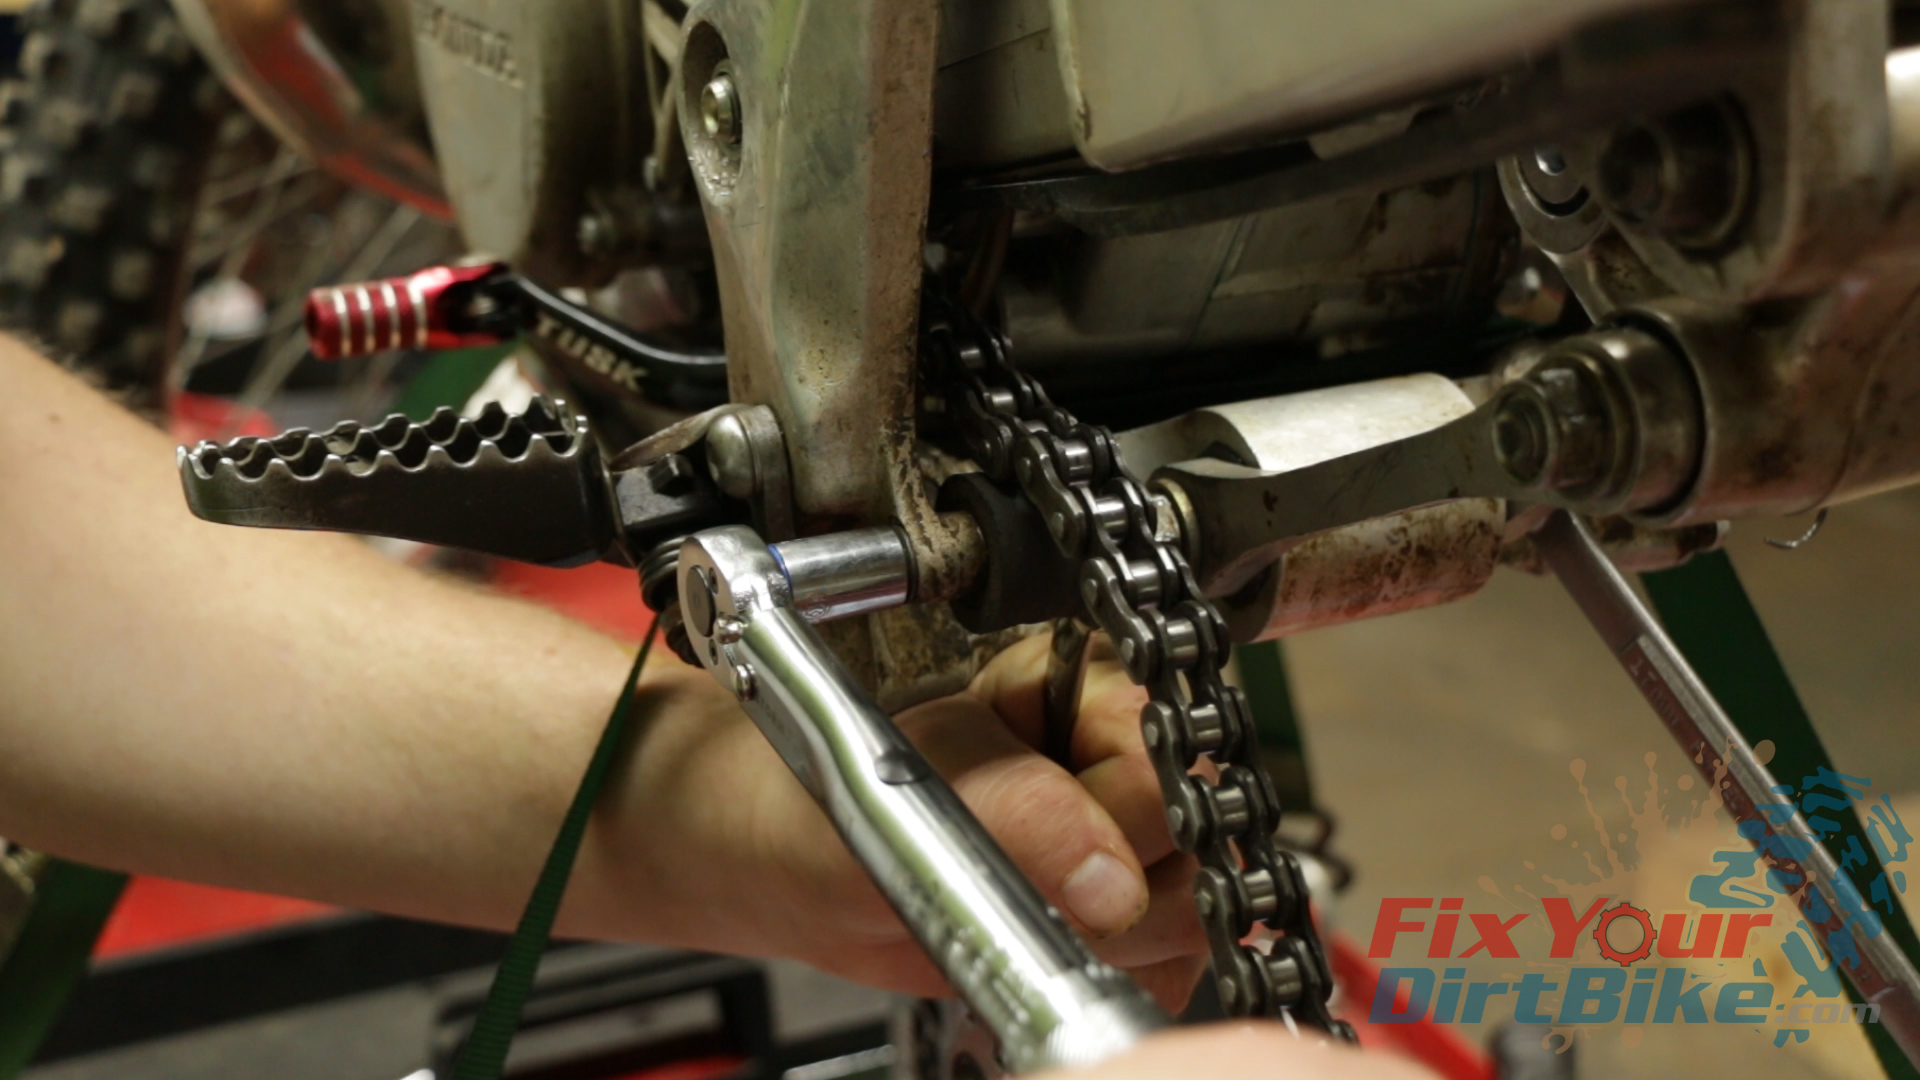
- Reassemble your shock linkage and check that all bolts, washers, and pivot collars are accounted for.
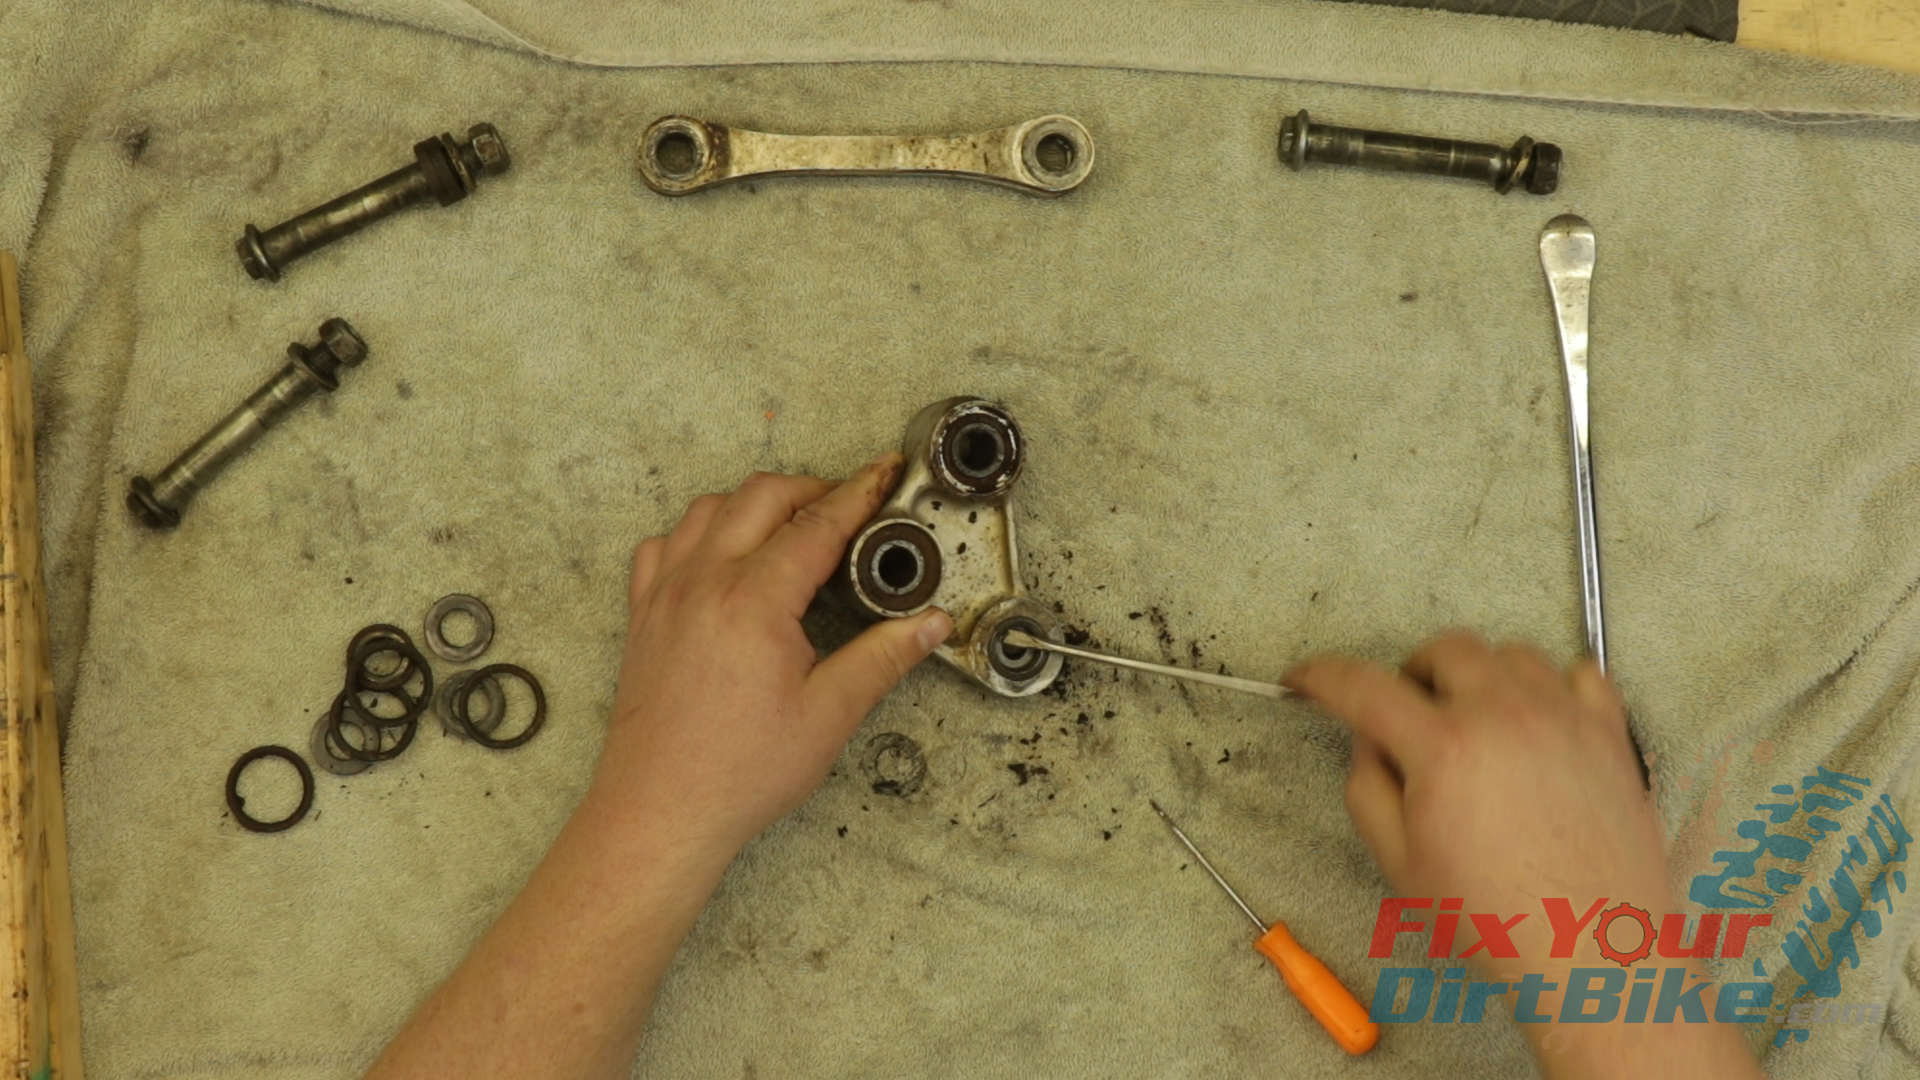
Linkage Disassembly
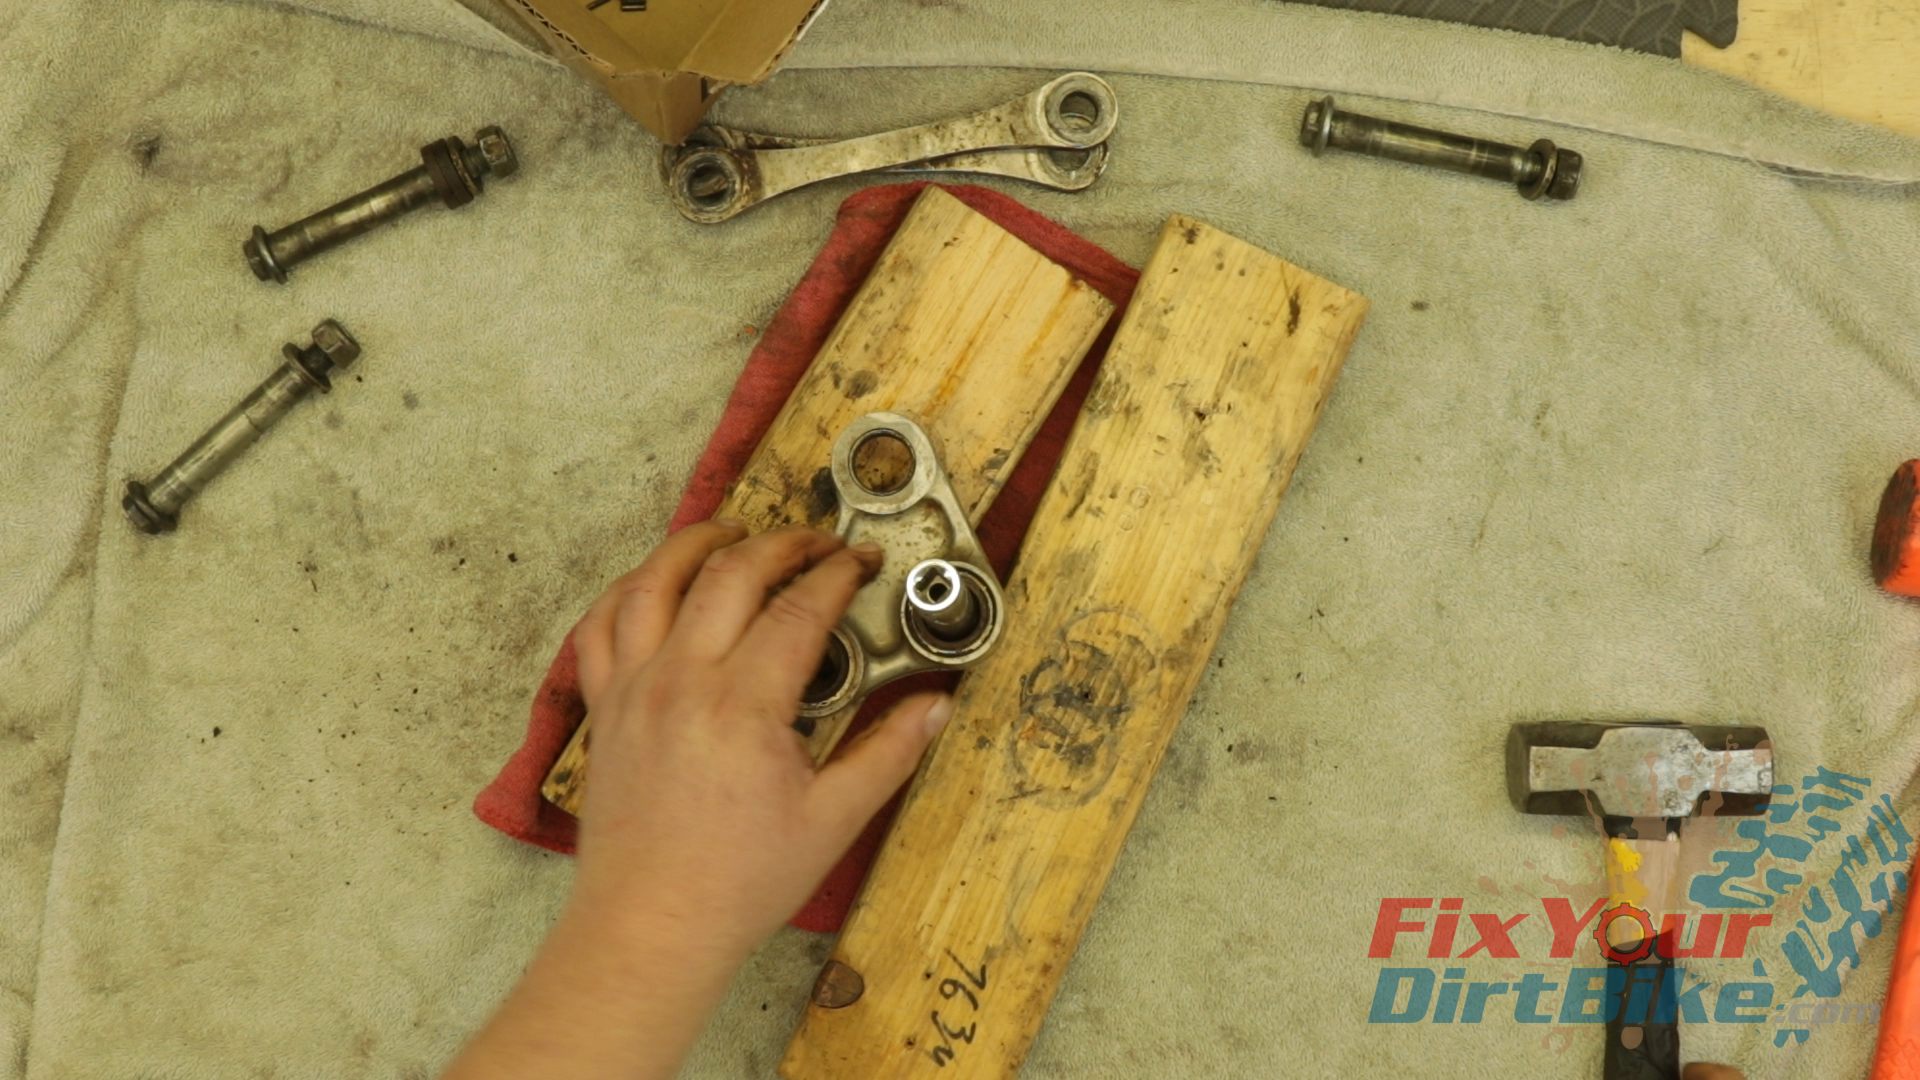
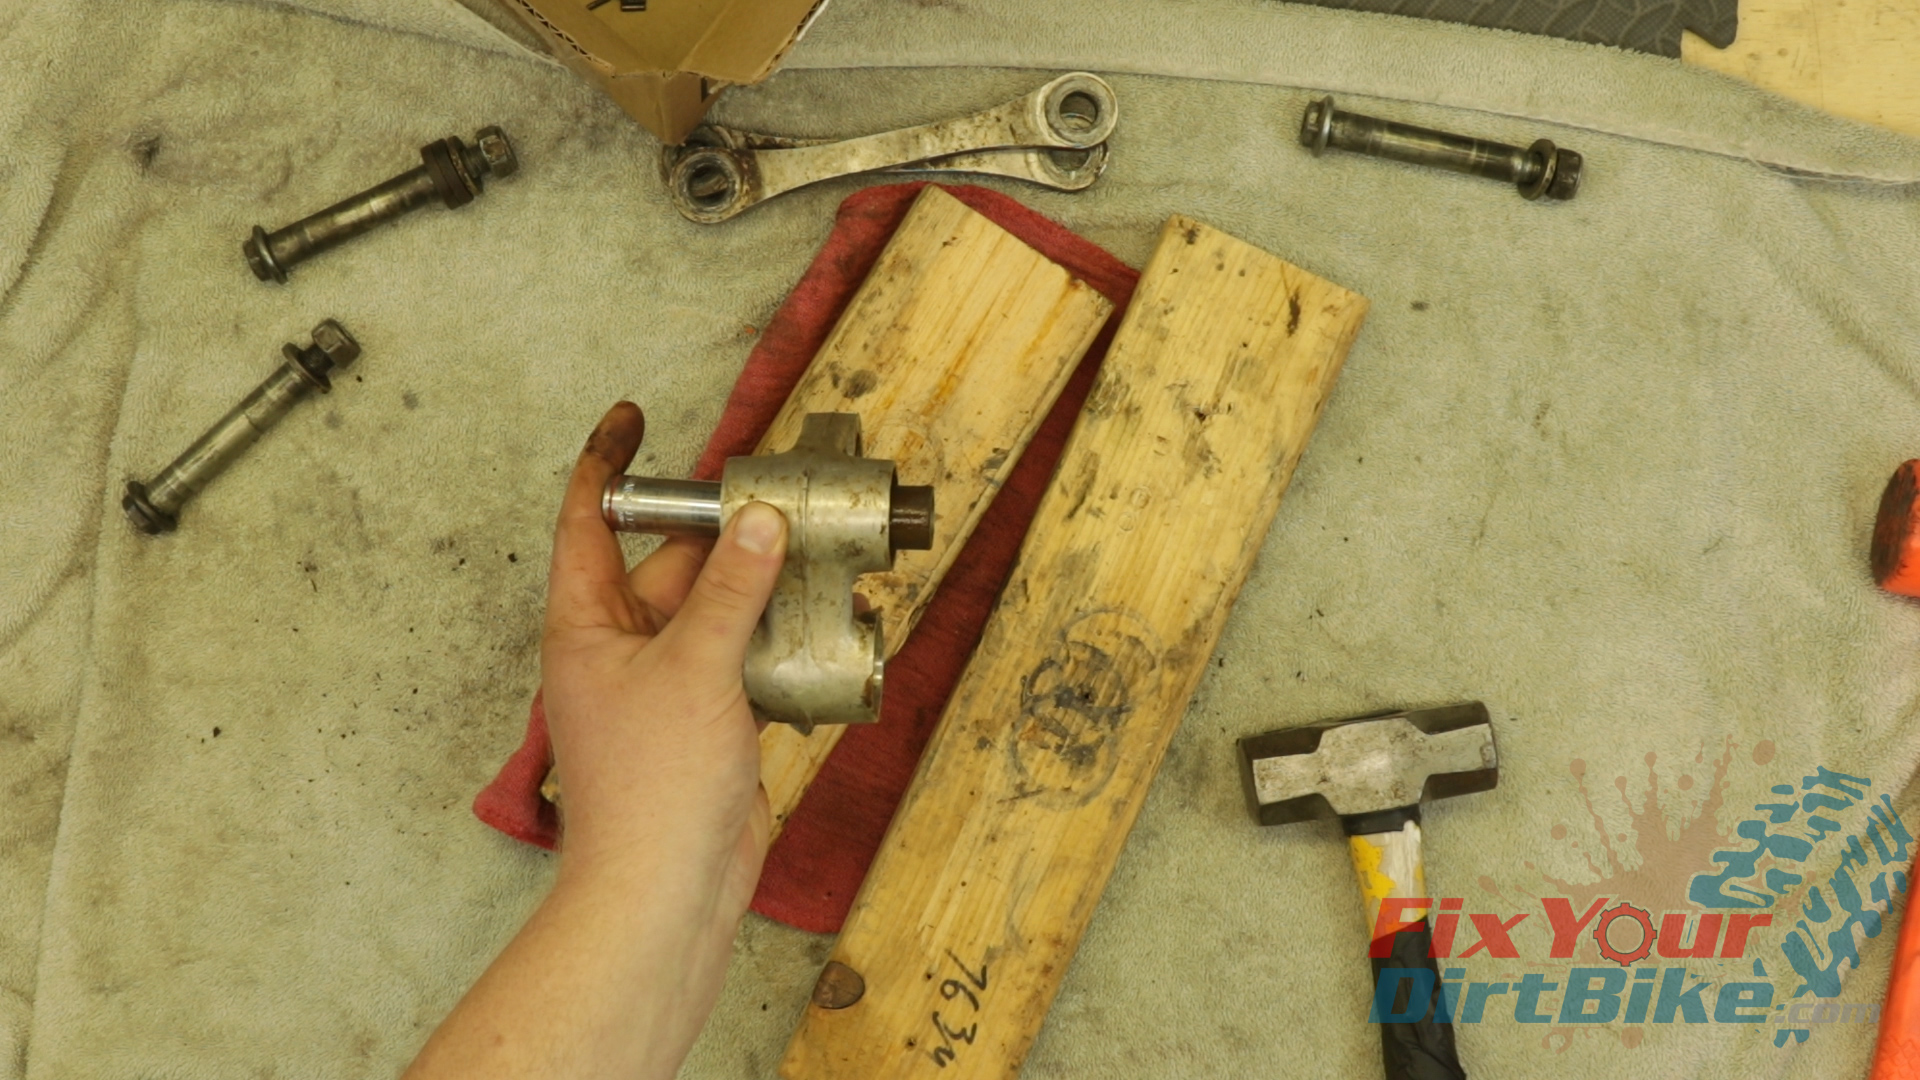
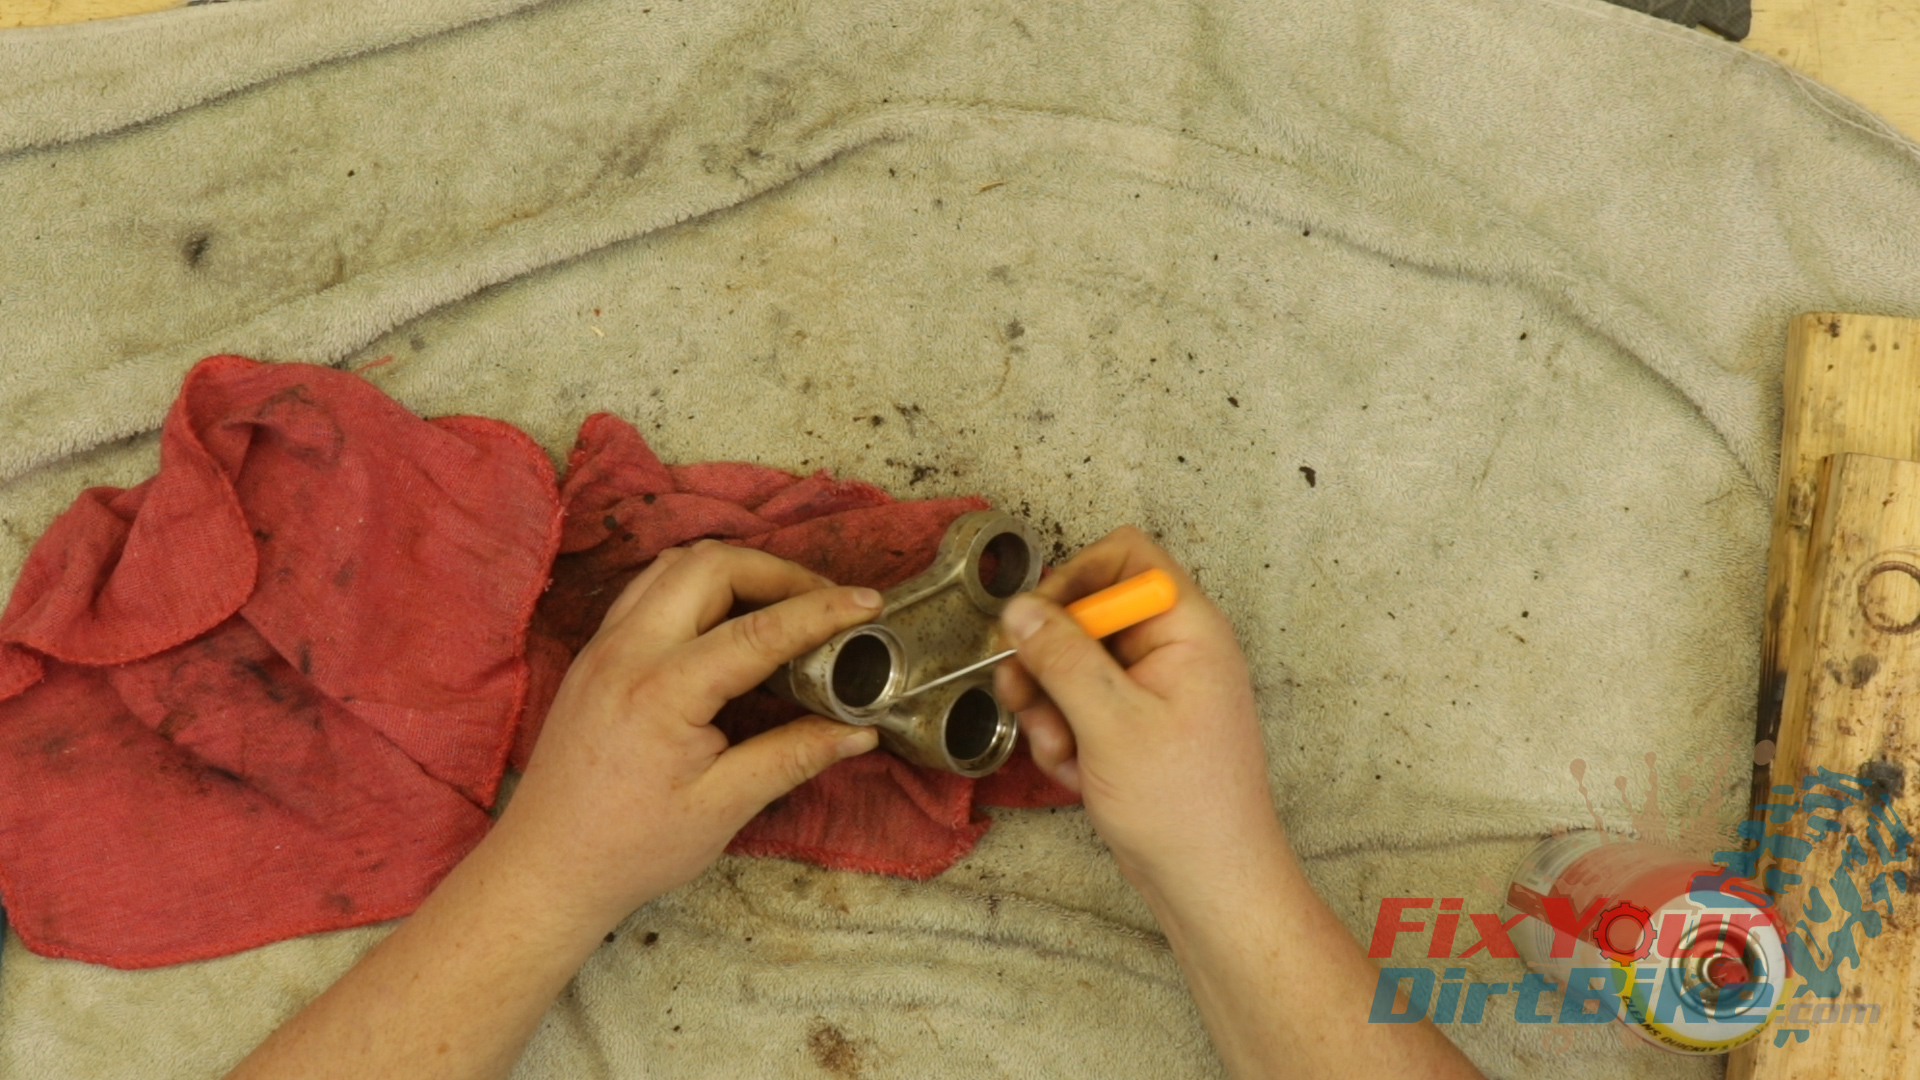
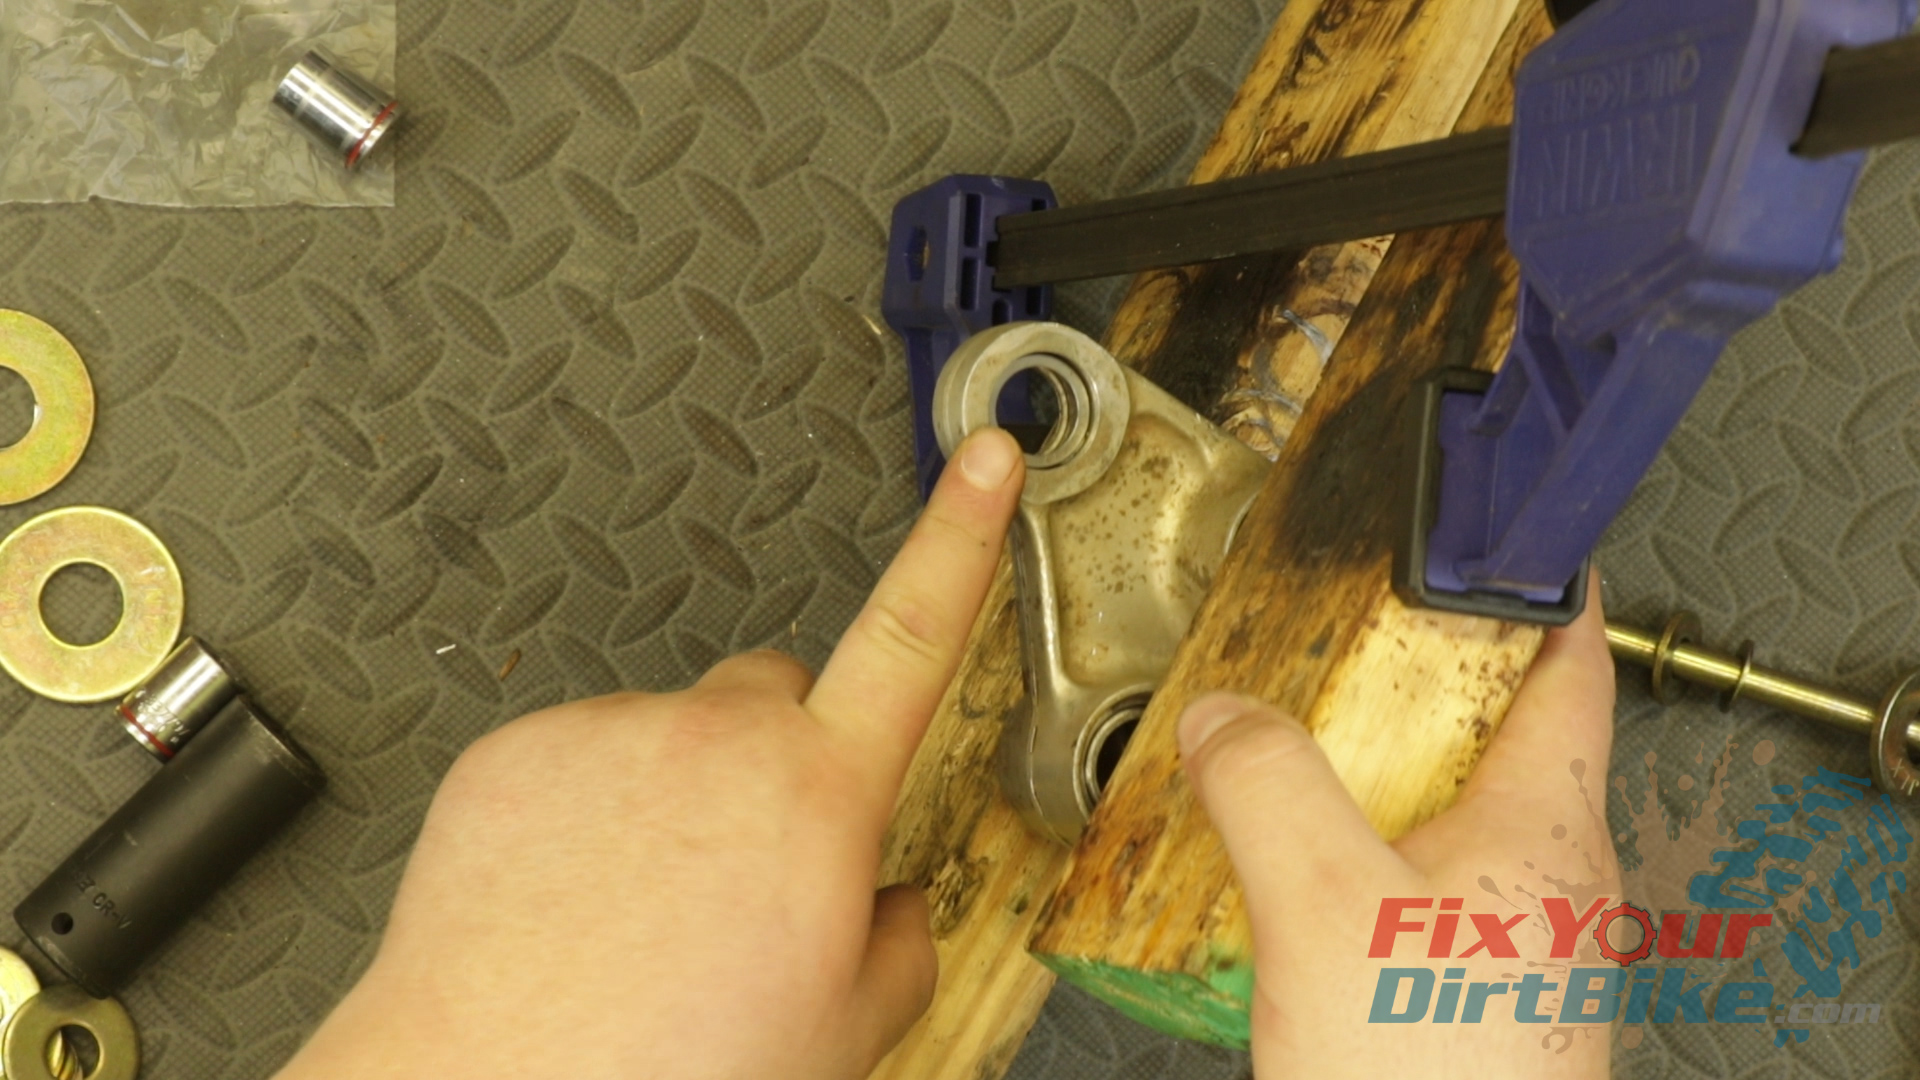
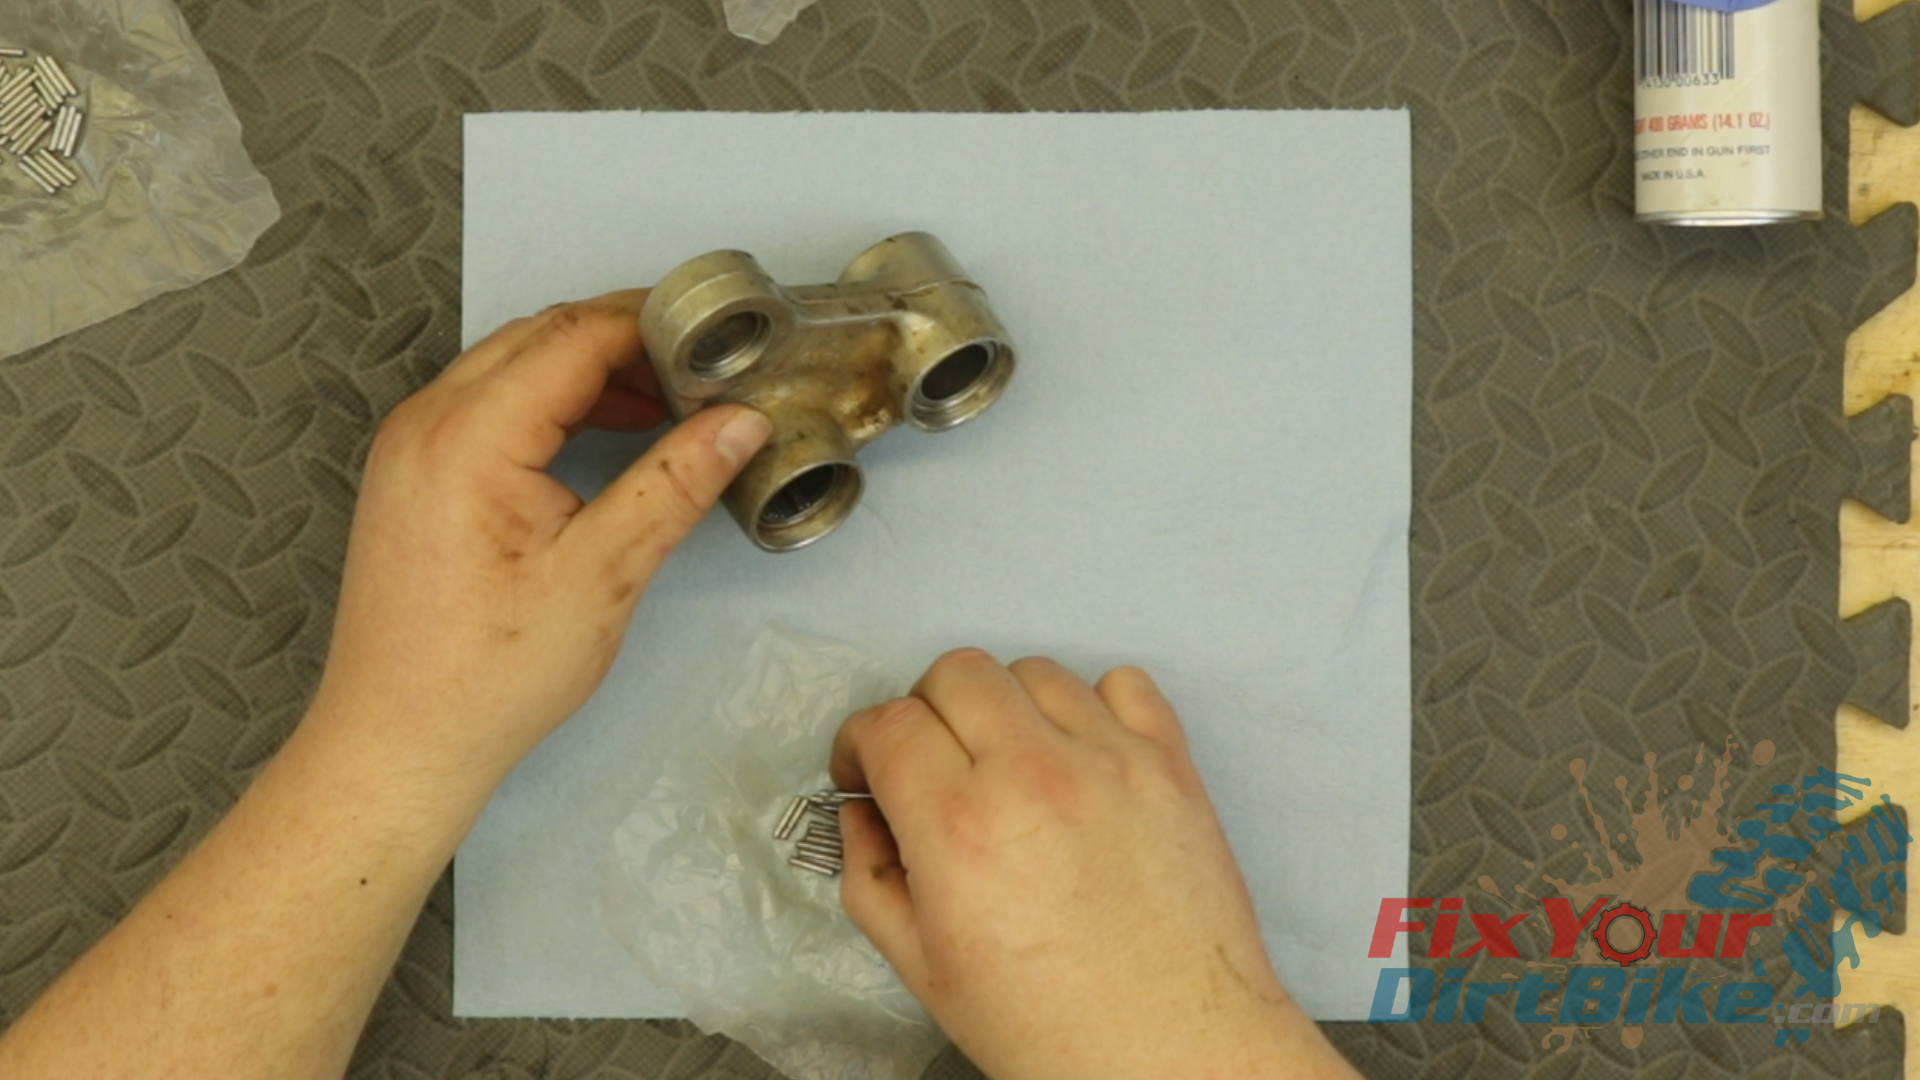
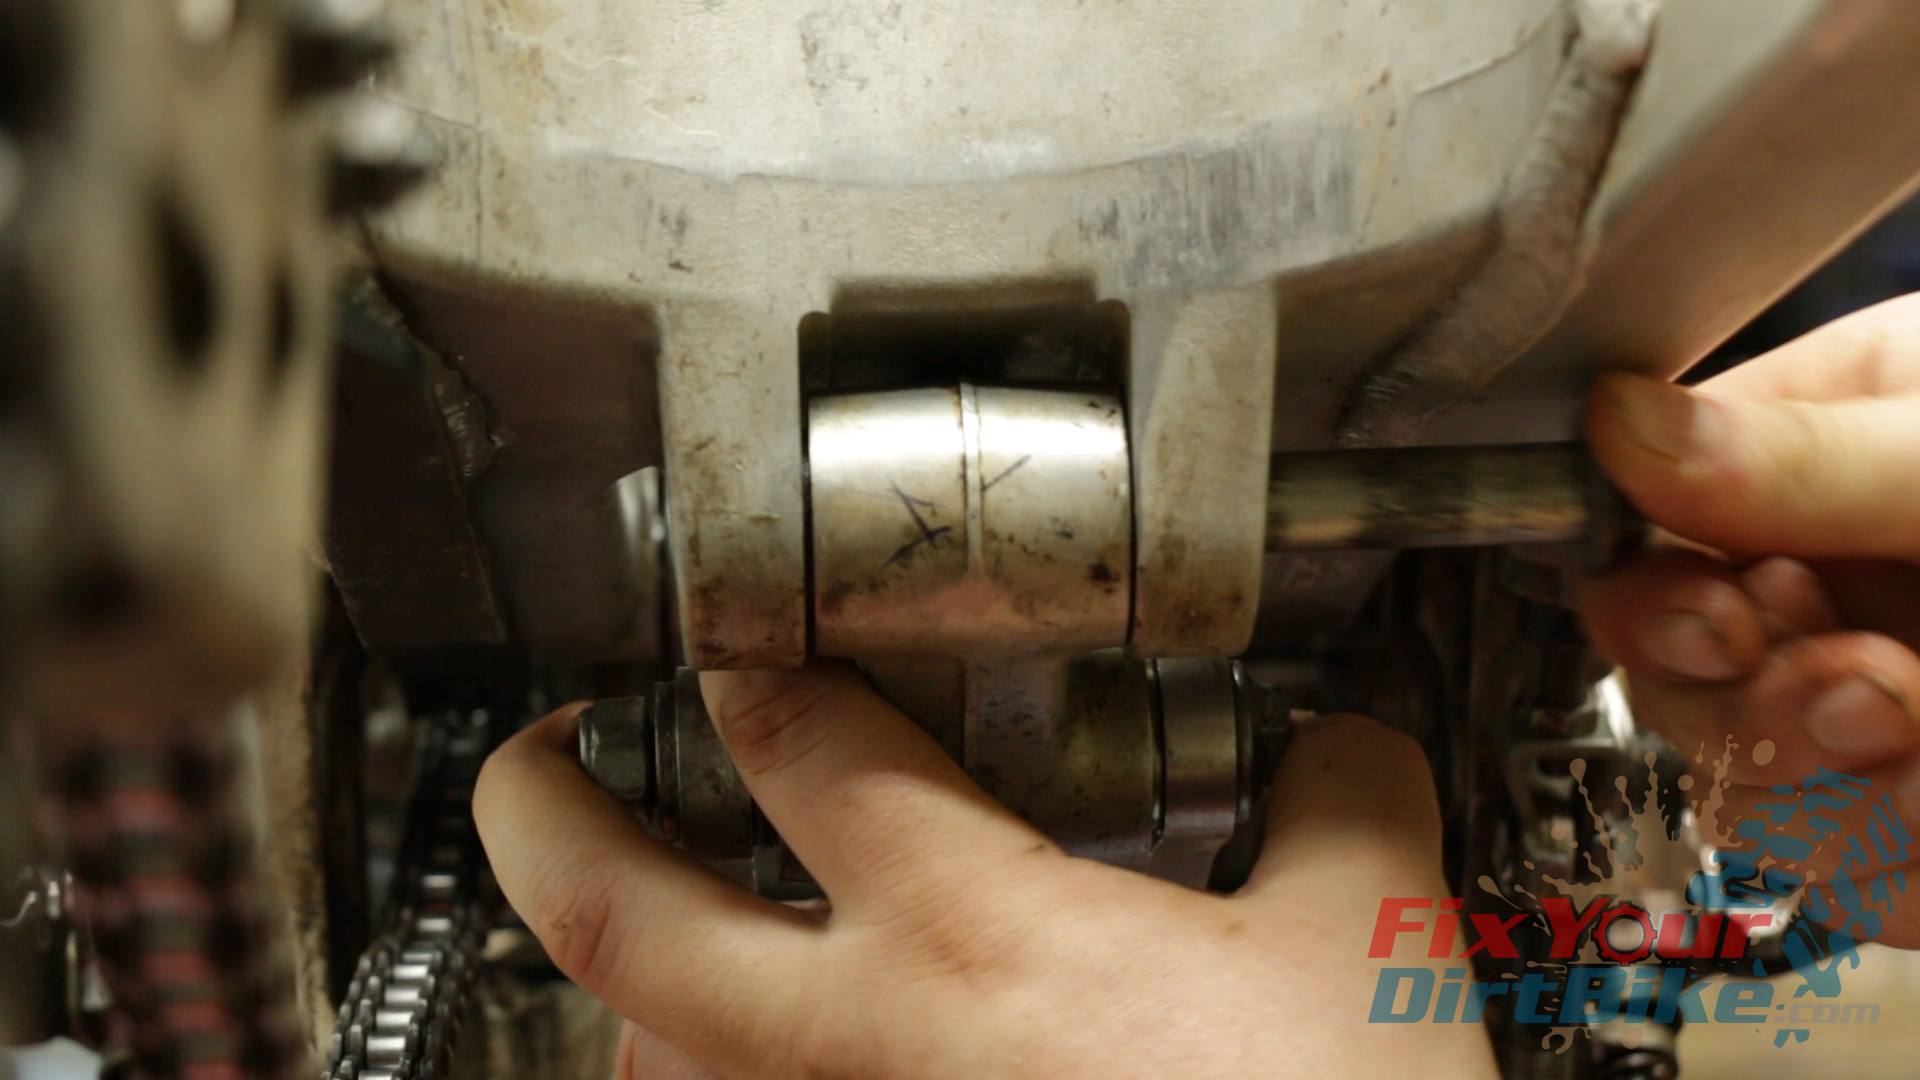
- Remove the side collars and seals, followed by the inner bearing races. The inner races should slide out, but they won’t so find a socket that fits over the inner race only and drive it out.
- Remove the old needles.
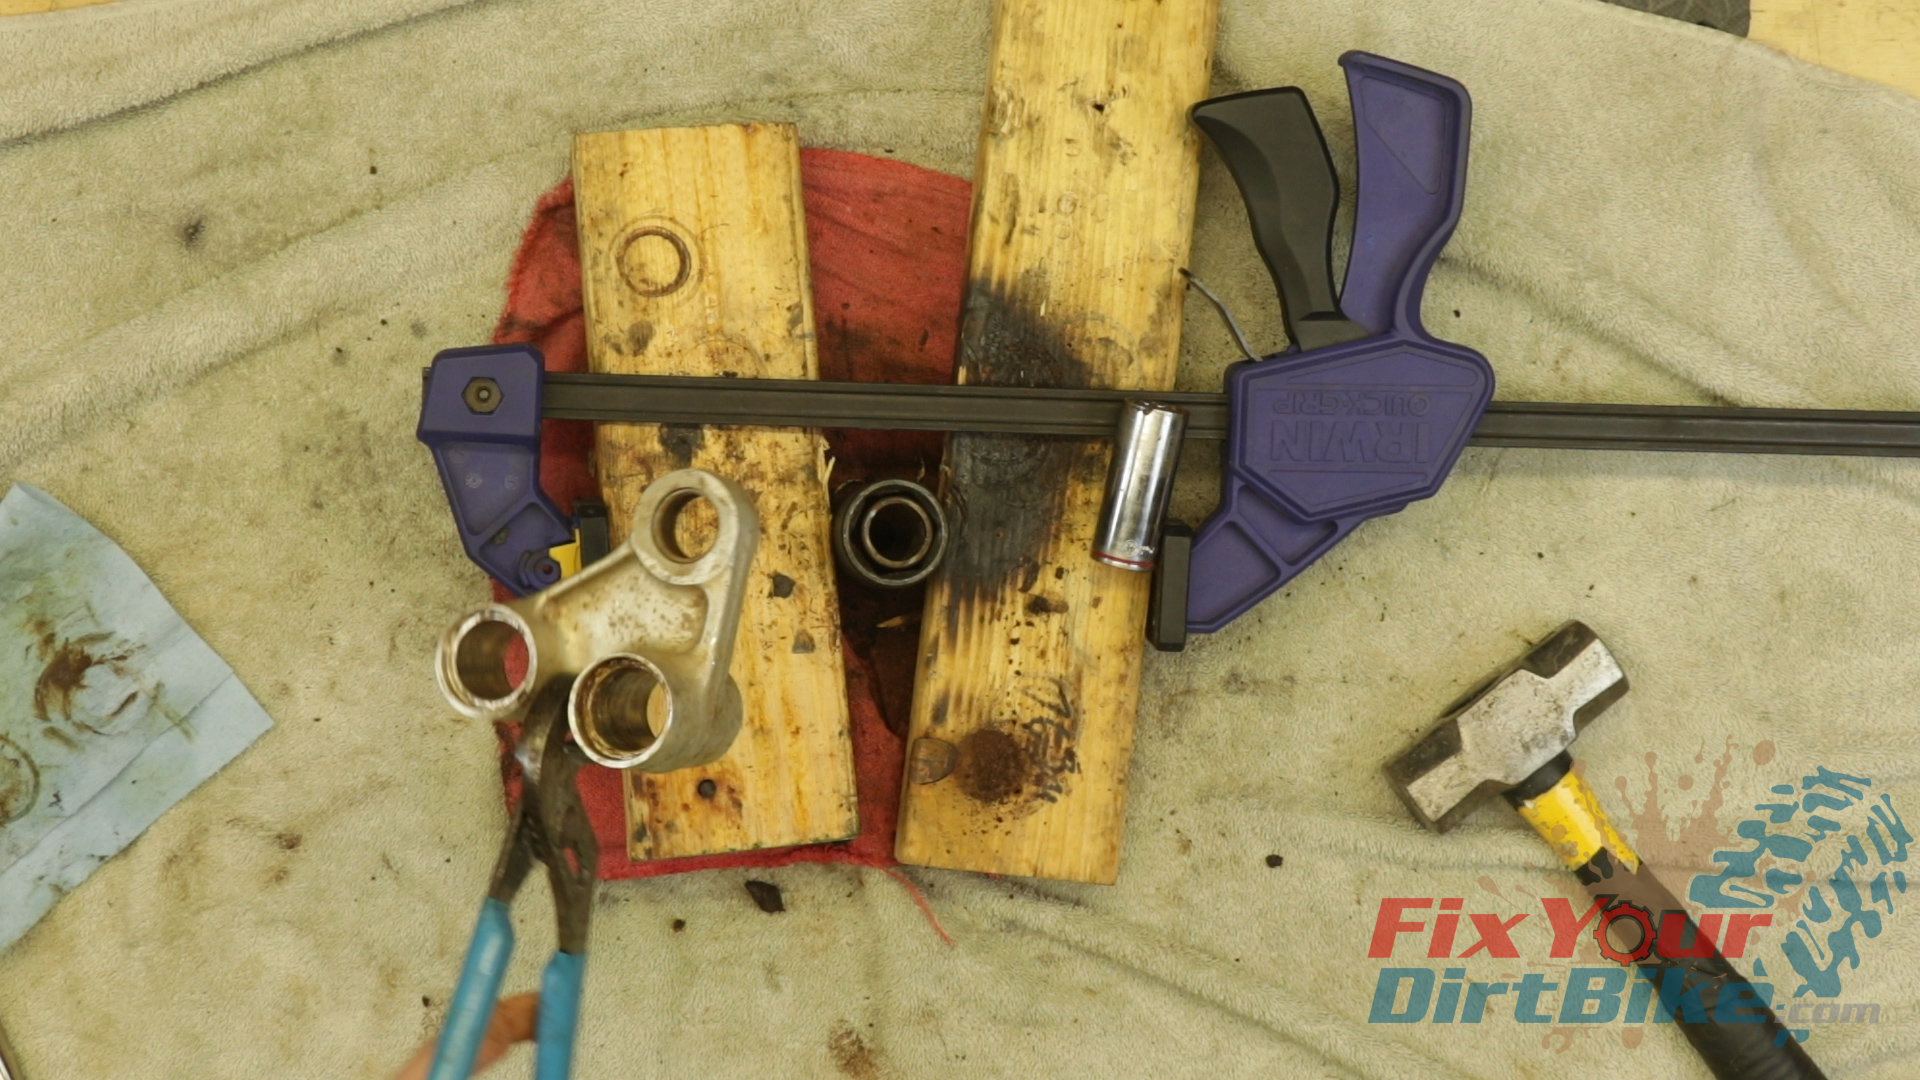
- Removing the outer bearing race from the shock linkage requires a blind bearing puller. If you don’t have one, don’t bother buying one; if the bearings are contaminated, they won’t budge anyway.
- I went straight to the heat and beat method to remove them.
- The outer bearing race consists of two separate races mounted on each side of the bore, with a gap in the middle. To drive both bearings out in the same direction, you need to heat and drive one side in slightly to break it free, then drive the other side into the bore.
- You may need to get creative with your sockets and clamps.
- The link bearings are mounted in the frame on the 1997 model year, but they are mounted in the link on the 1998-2001 models, which makes more sense.
Related: 97-01 Honda CR250 Steering Stem Bearing Service
Clean & Inspect
- Clean your linkage parts as thoroughly as you can and inspect for damage.
- If the link is damaged, it will need to be replaced. If the bearing bores are damaged, do what you can to smooth the surface. Due to the bearings used in the linkage, you should be fine unless the bores are cracked or broken.
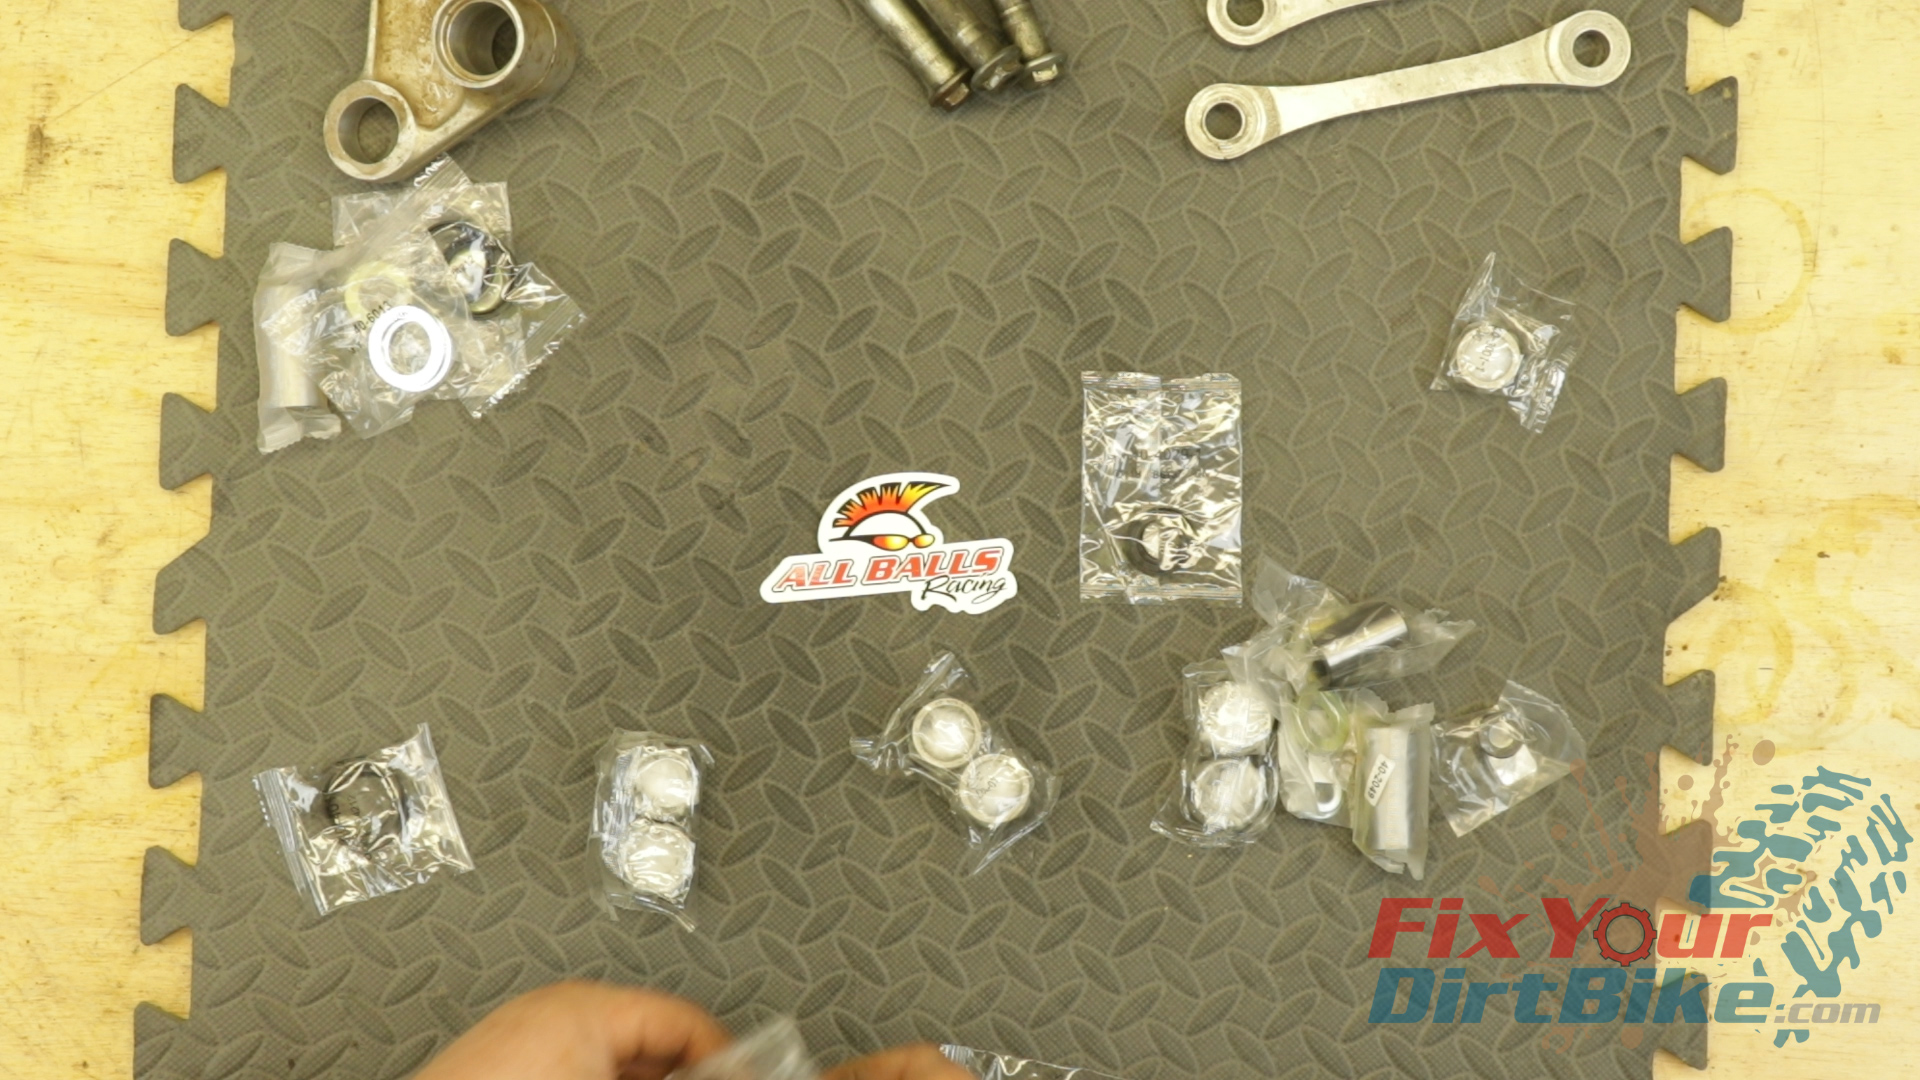
 New Shock Linkage Parts
- For this service, I am using an All Balls complete bearing kit.
- This kit includes all bearings, pivot collars, seals, and washers you need for a full service.
- However, when installing the linkage’s swing arm end, I encountered a fitment problem.
- The new pivot and side collars were just a little too long to fit between the mounts on the swingarm, so I cleaned and re-used the old side collars.
Related: 1997-2001 Honda CR250 Bottom End Service
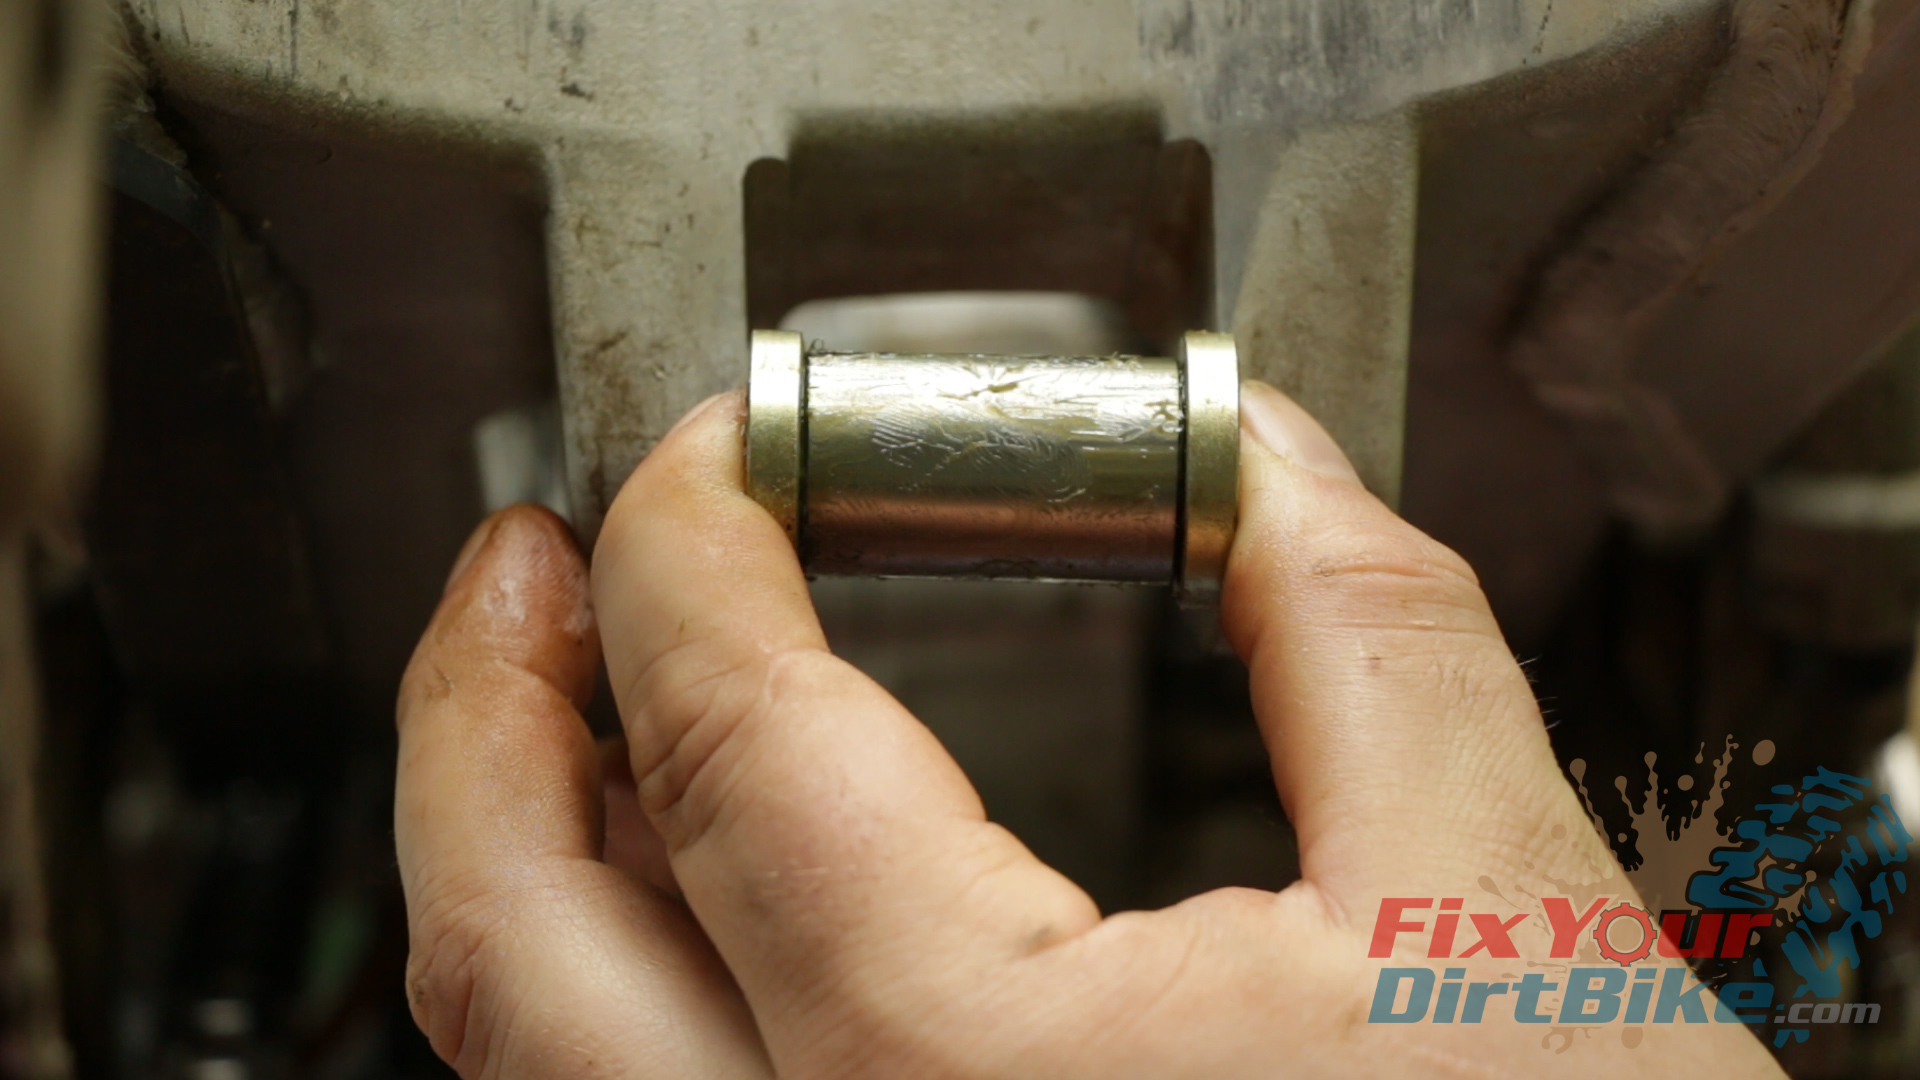
Linkage Assembly
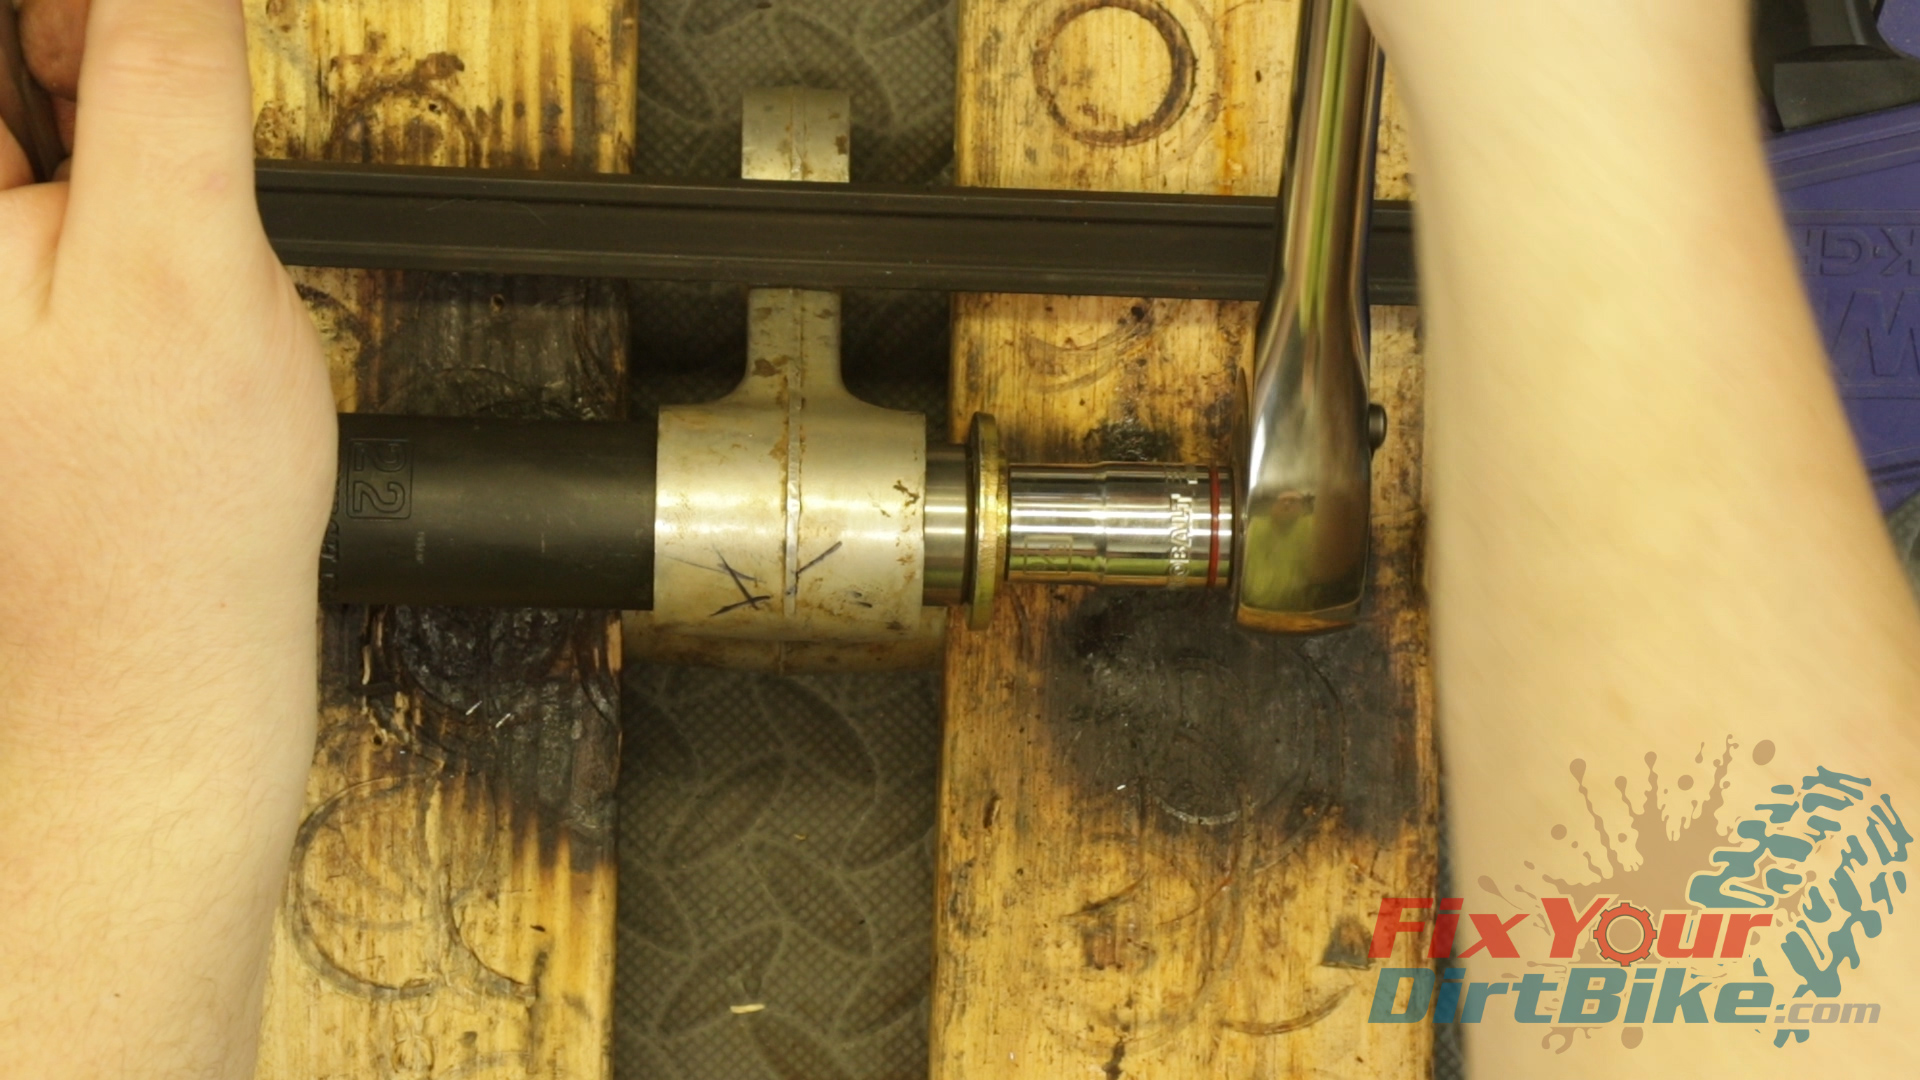
- These bearings are designed with a very thin outer race, so the chance of damage is very high if you try to drive them with a hammer and socket.
- These bearings need to be pressed in using a hydraulic press or a bolt-and-nut press. A proper bearing press kit costs $150, or you can make one for $20 out of grade 8 bolts and washers.
- Again, you will need to get creative with your sockets and washers.
- Before you install the outer bearing race, remove the bearing needles and set them aside.
- I like to insert a small socket inside the bearing race to help with alignment, but some aggressive adjustment is usually necessary. The thin outer race is very forgiving, so hammer adjustments won’t hurt it; just don’t go crazy.
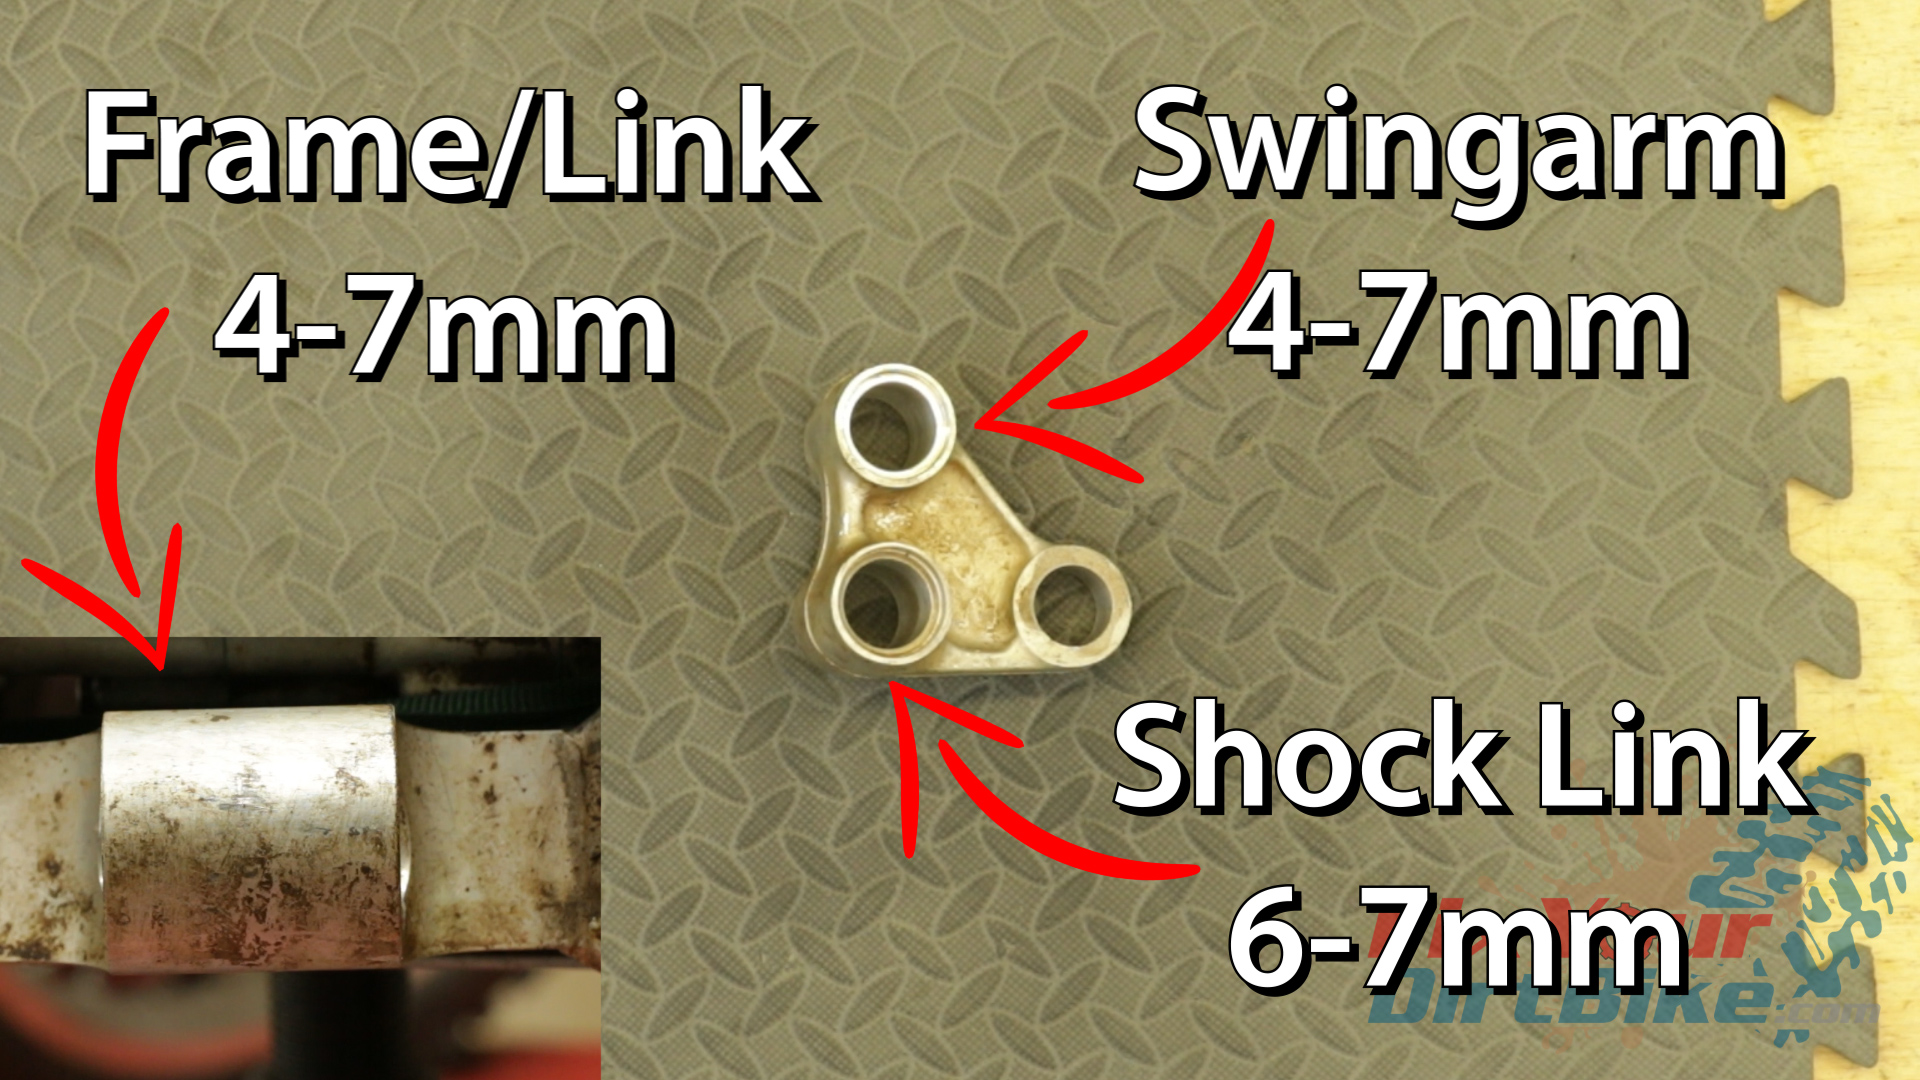
- The bearings in the swingarm bore, in the frame on 97s, and the shock link on 98 to 02s must be driven into the bore 4 to 7 mm.
- Press the shock link bearing into the bore 6 to 7 mm.
- The shock absorber mount is the one small bearing that must be centered in the bore.
- Press the outer race into the shock linkage like the others, then carefully drive or press the race to the center, measuring as you go.
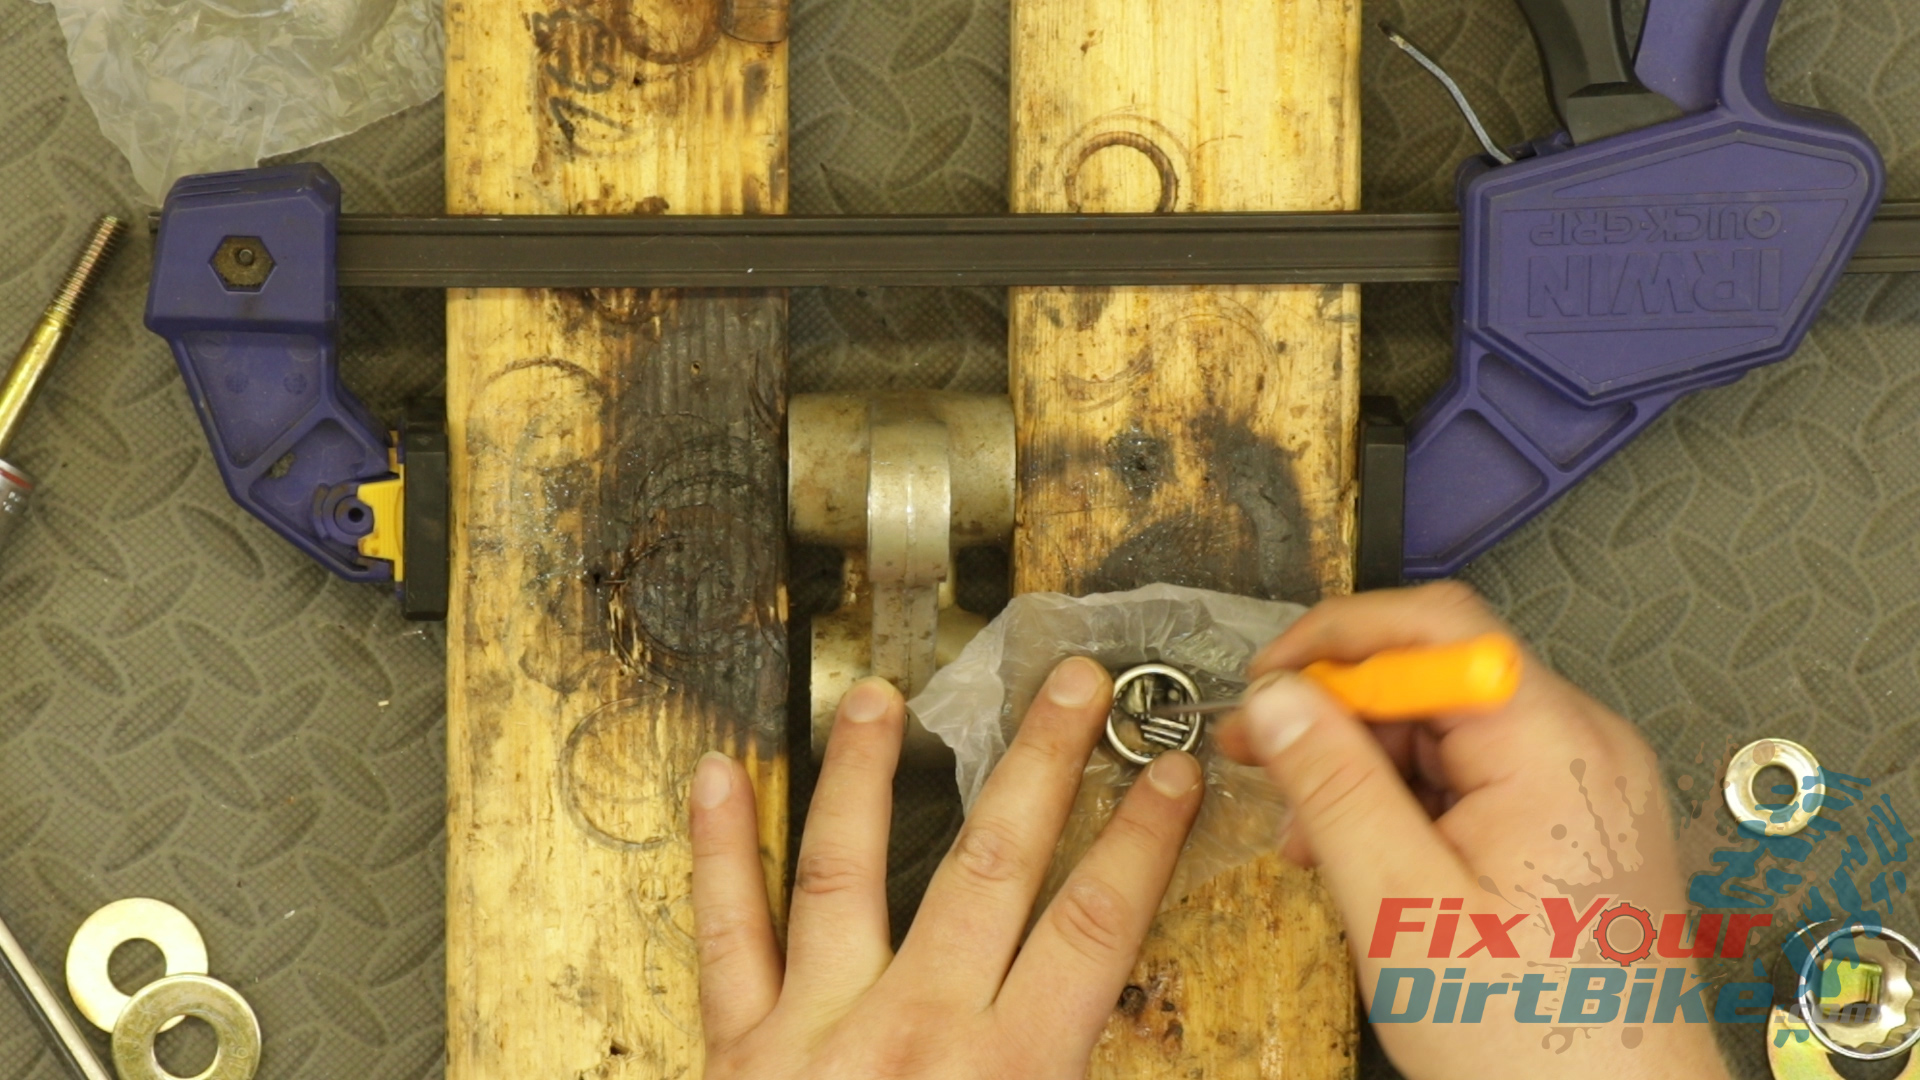
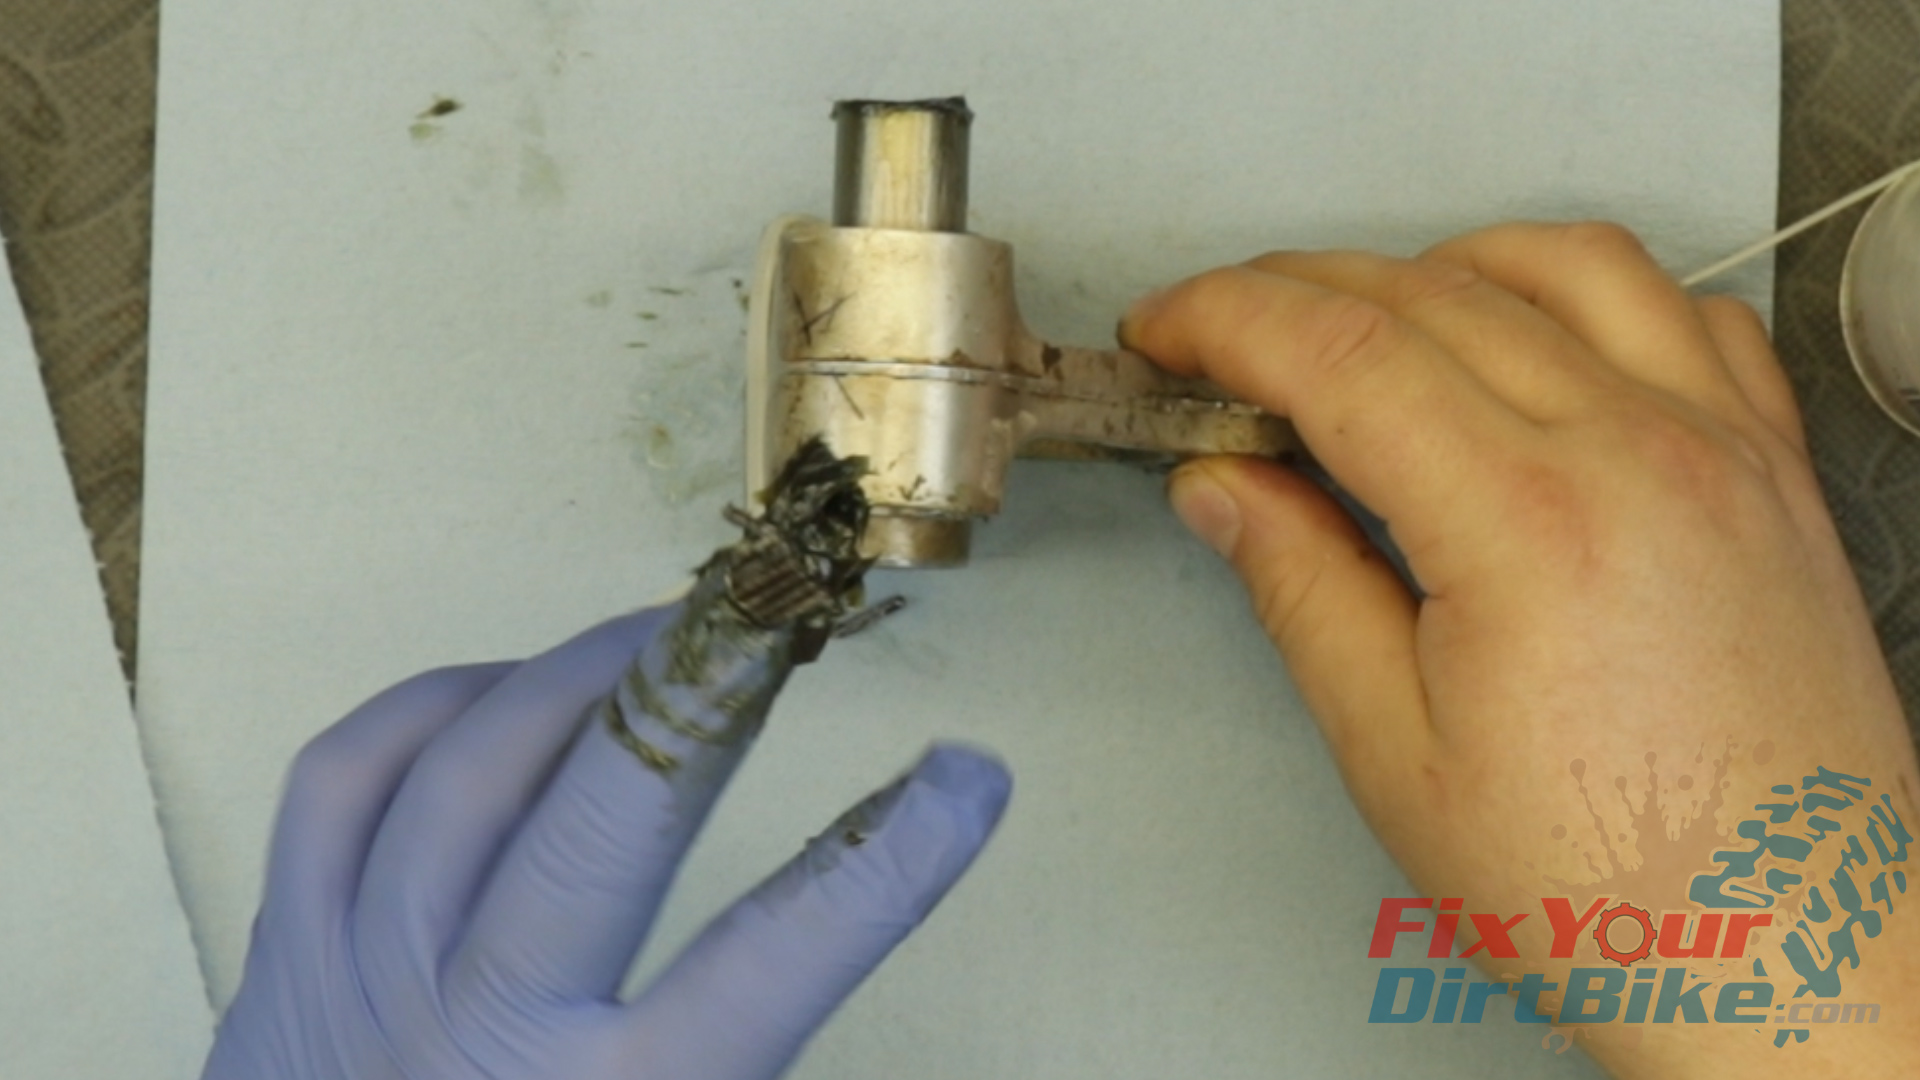
Bearing Needles
- Carefully install the needles in the bearing race. They should be coated in a light layer of grease from the factory to stick together in the bore. Some white lithium grease will do the trick if your needles aren’t sticky enough.
- Your needles should sit evenly with no gaps.
- After you’ve completed one side, install the inner pivot collar to keep them in place as you do the opposite side.
- With both sides assembled and the pivot collar in place, secure the assembly with a zip tie.
Grease
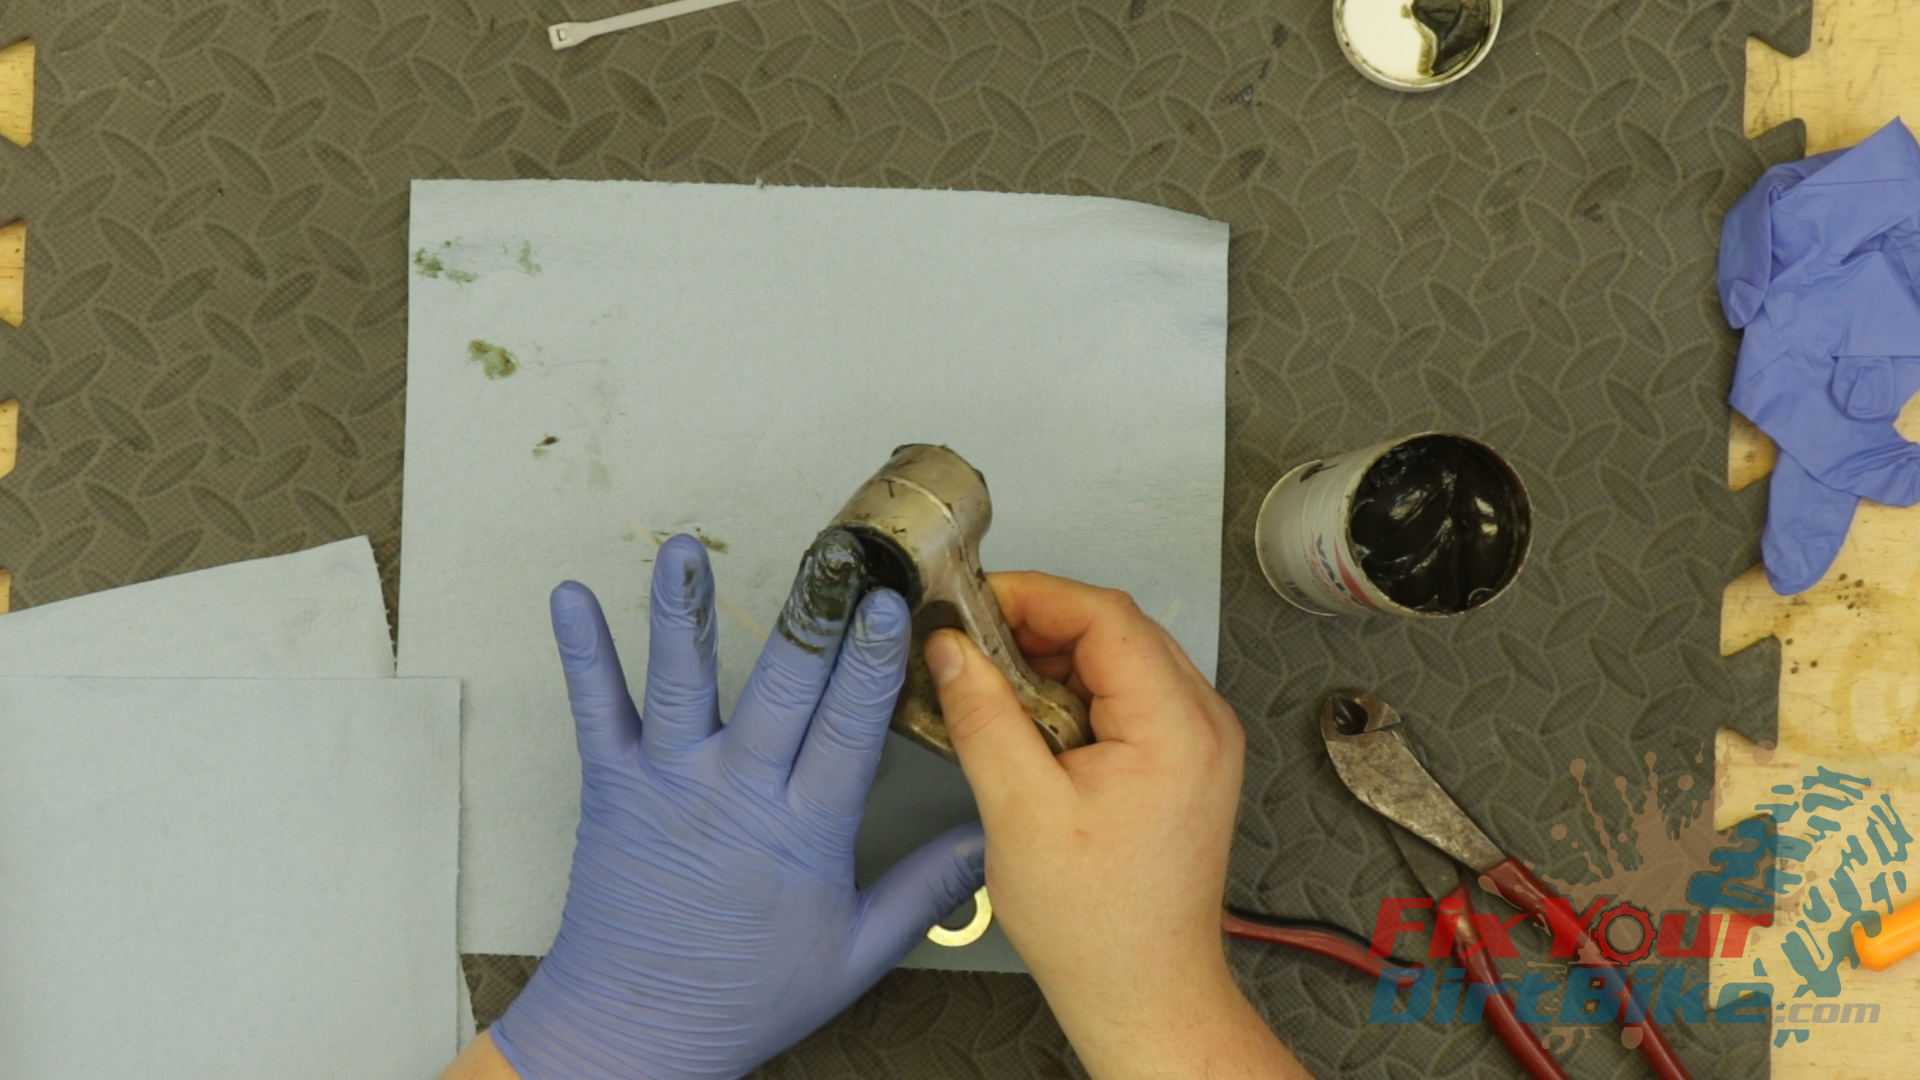
- Apply a thick layer of moly-based grease to the bearings.
- Remember, the shock absorber mount is the only one-piece bearing. The bearings inside the swingarm and frame bores of the shock link body have a gap, so get as much grease as you can between them.
- Work the grease around the bearing into the needles, but be careful. If you pull away from the bearing like this, the needles will stick to the grease and come out. So work your finger around the needles, then slowly slide your finger out of the bore while keeping the pressure on the needles.
- Grease each side, then install the seals with another coating of grease, followed by the pivot collar.
- Install the two large washers on the widest bore, followed by the seal and pivot collar.
- Secure the bearings with a zip tie again when you finish each set.

Related: 97-01 Honda CR250 Swingarm Service
Linkage Installation
- When installing the linkage assembly, ensure the shock arm is oriented correctly, with the small end facing forward.
- With the link attached to the frame and the arm attached to the link, swing them around to ensure smooth rotation.
- If everything feels smooth, attach the shock arm to the swing arm.
- Torque all three bolts to 59 ft-lbs.
- Install the lower chain roller and torque to 106 in-lbs.
If you have any questions about this shock link service, please let me know in the comments or on social!
 Keep Your ’97-’01 CR250 Running Right!


